
Loading ...
Loading ...
Loading ...
30
Lesson 1 Introduction to Editing in the Cut Page
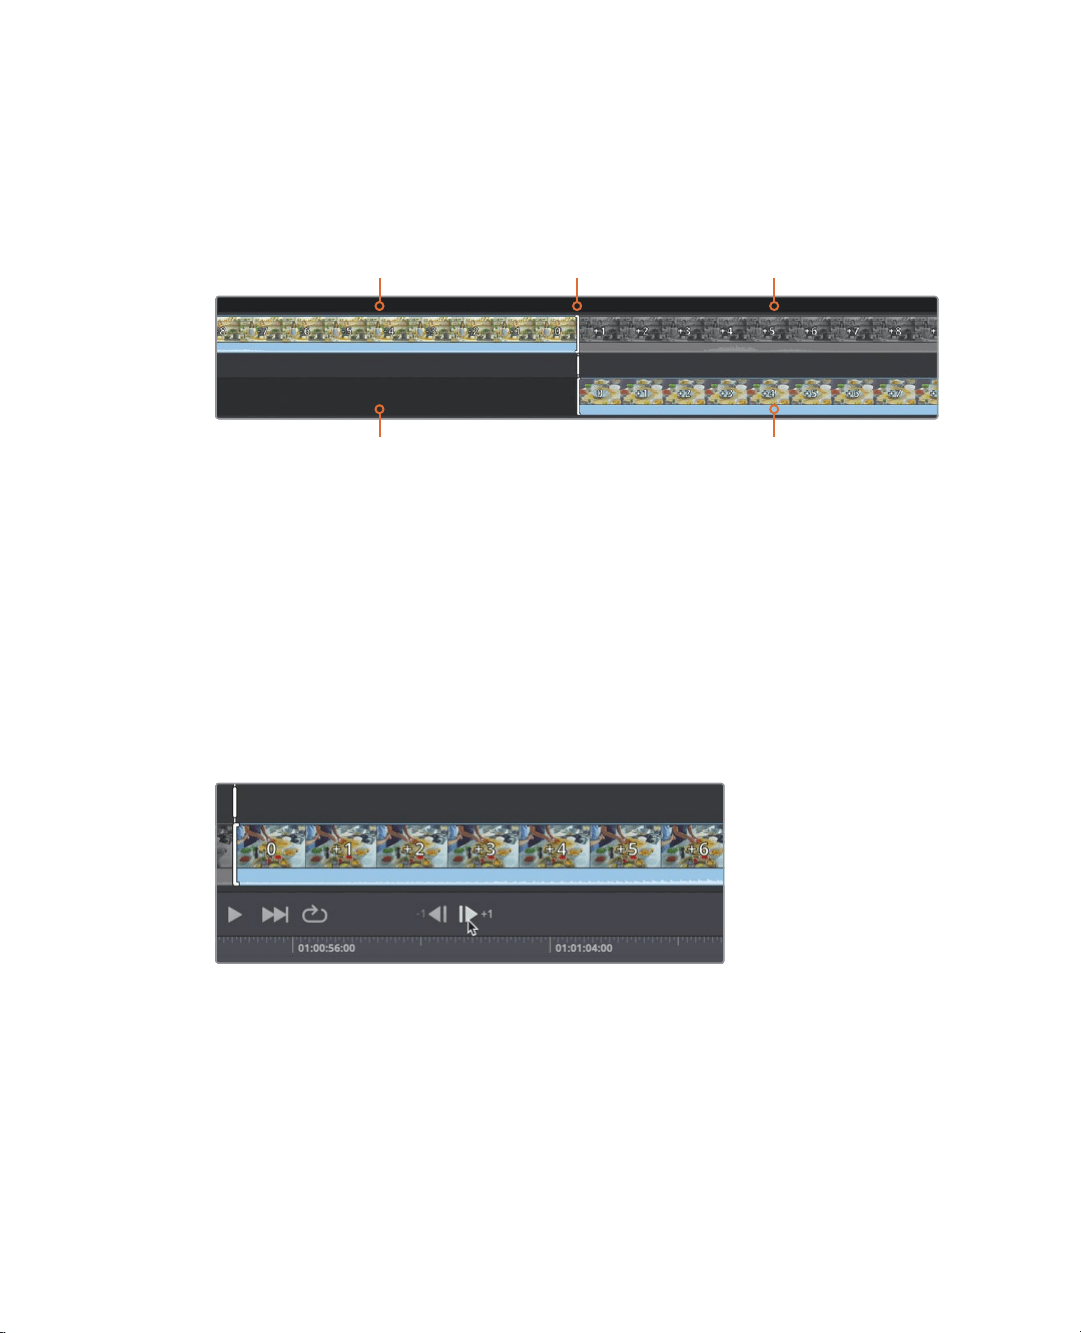
The viewer’s trim editor show a close up view of the previous outgoing clip and the
next incoming clip. The transition point is identified by a white vertical line in the center
of the film strips. This is often called an A/B trimmer since the outgoing clip also called
the A side, appears as a filmstrip on the left, and the incoming clip called the B side
appears on the right.
B Side: Incoming clip
Trim controls
B Side: Handle
A Side: Outgoing clip A Side: Handle
The shaded parts of the filmstrip show the unused sections of the clips that can be
used to extend either clip. Since we’ve already established that the B side incoming
clip has no additional handle, there is no shaded part for this clip.
You can ripple trim either of the cuts by dragging the trim control on its filmstrip. You
can also trim both sides of the transition simultaneously by dragging the trim control in
the gray area between the two clips.
But for very small trims you can use the single frame buttons for the outgoing side or
the incoming side.
4 In the viewer, click 5 to 8 times on the +1 frame button under the incoming clip to
remove the word yeah.
5 Reposition the timeline play head and play over the start of the clip to hear the new
inpoint.
Trimming a few frames removed the word yeah from the start of the clip. You can see how
much easier it is to use the viewer buttons when trimming small, precise areas.
Loading ...
Loading ...
Loading ...