
Loading ...
Loading ...
Loading ...
177
Creating a Constant Speed Change
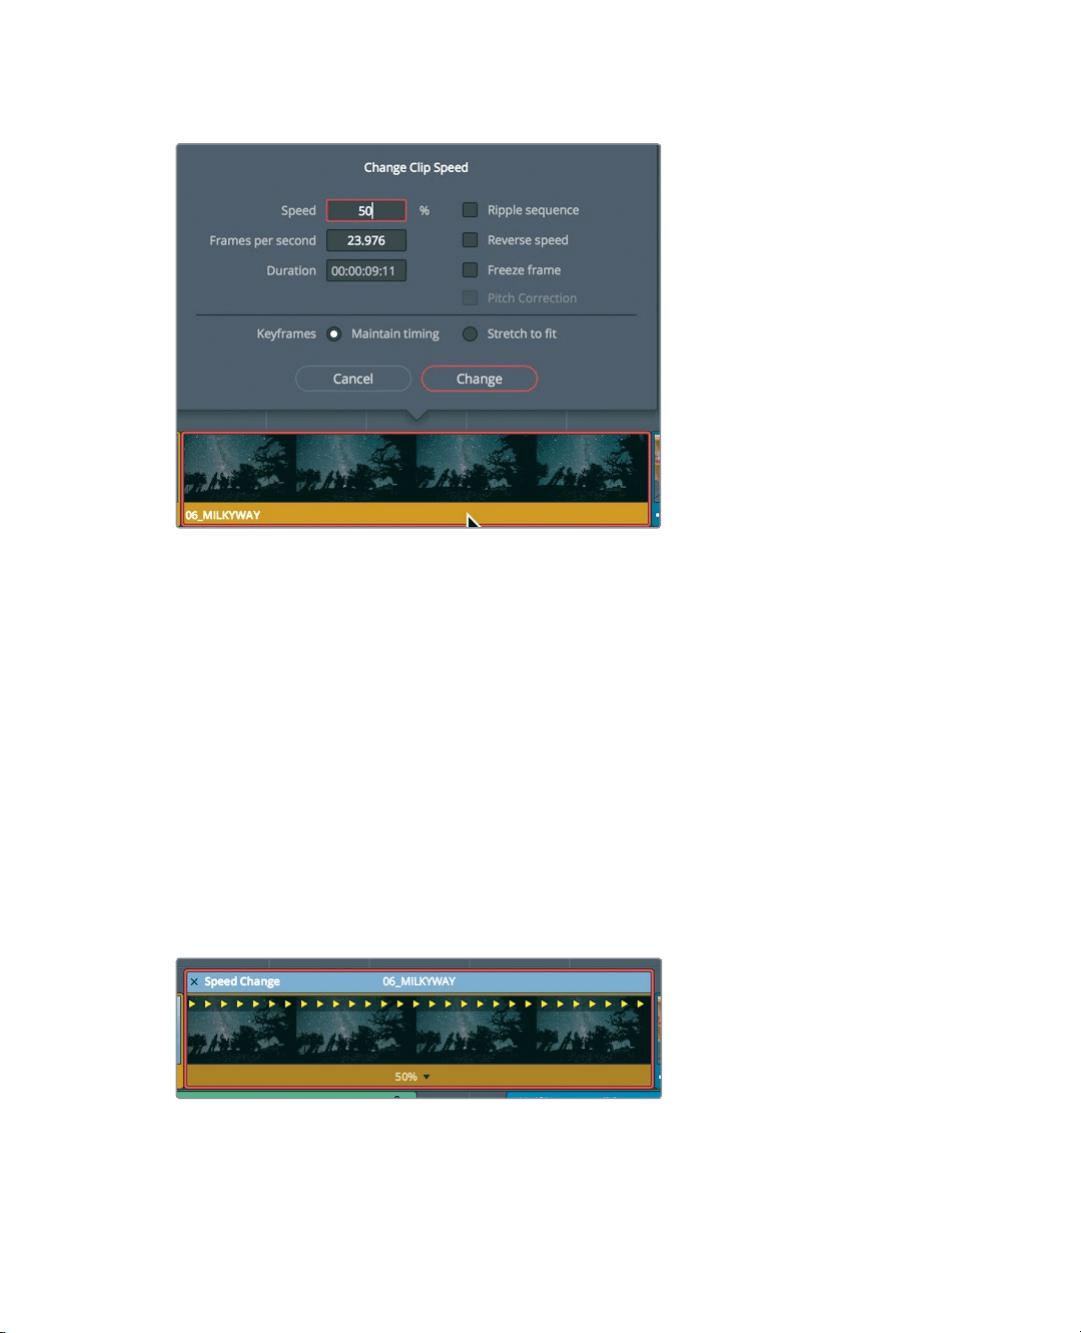
4 In the Speed numeric field, enter 50, and click Change to close the dialog.
Setting this value to 50% means that the clip will play at half the timeline frame rate —
inthis case, 12 frames per second. To indicate that the clip’s playback speed has been
changed, a small speed change icon is displayed next to the clip’s name in the timeline.
5 Play the clip to see the speed change results.
When creating a slow-motion clip, the default settings in the Change Clip Speed dialog
do not change the overall duration of the clip or the timeline. However, DaVinci Resolve
does have tools that allow you to modify the speed of a clip by changing its duration.
Retiming using the Selection and Trim Tools
While the Change Clip Speed dialog creates constant speed changes and retains the clip
duration, the retime controls stretch and shrink a clip’s duration by slowing it down and
speeding it up.
1 Right-click the 06_MILKY WAY clip, and in the pop-up menu, choose Retime Controls,
or press Cmd-R (macOS) or Ctrl-R (Windows).
The Speed Change bar appears at the top of the clip in the timeline. The current speed
of the clip is listed along the bottom. The speed of a clip is altered by trimming the
Speed Change bar in the timeline.
Loading ...
Loading ...
Loading ...