
Loading ...
Loading ...
Loading ...
320
Lesson 11 Quick start: colorcorrection
However, you also have the option of creating additional nodes in which each node
contains one or more corrections that affect the image. Using multiple nodes, each
containing separate adjustments, you can exercise more precise control over the order of
those adjustments and more easily track and modify them.
Let’s add a second node to the node editor to separate the adjustment that you will apply
to the teal dish.
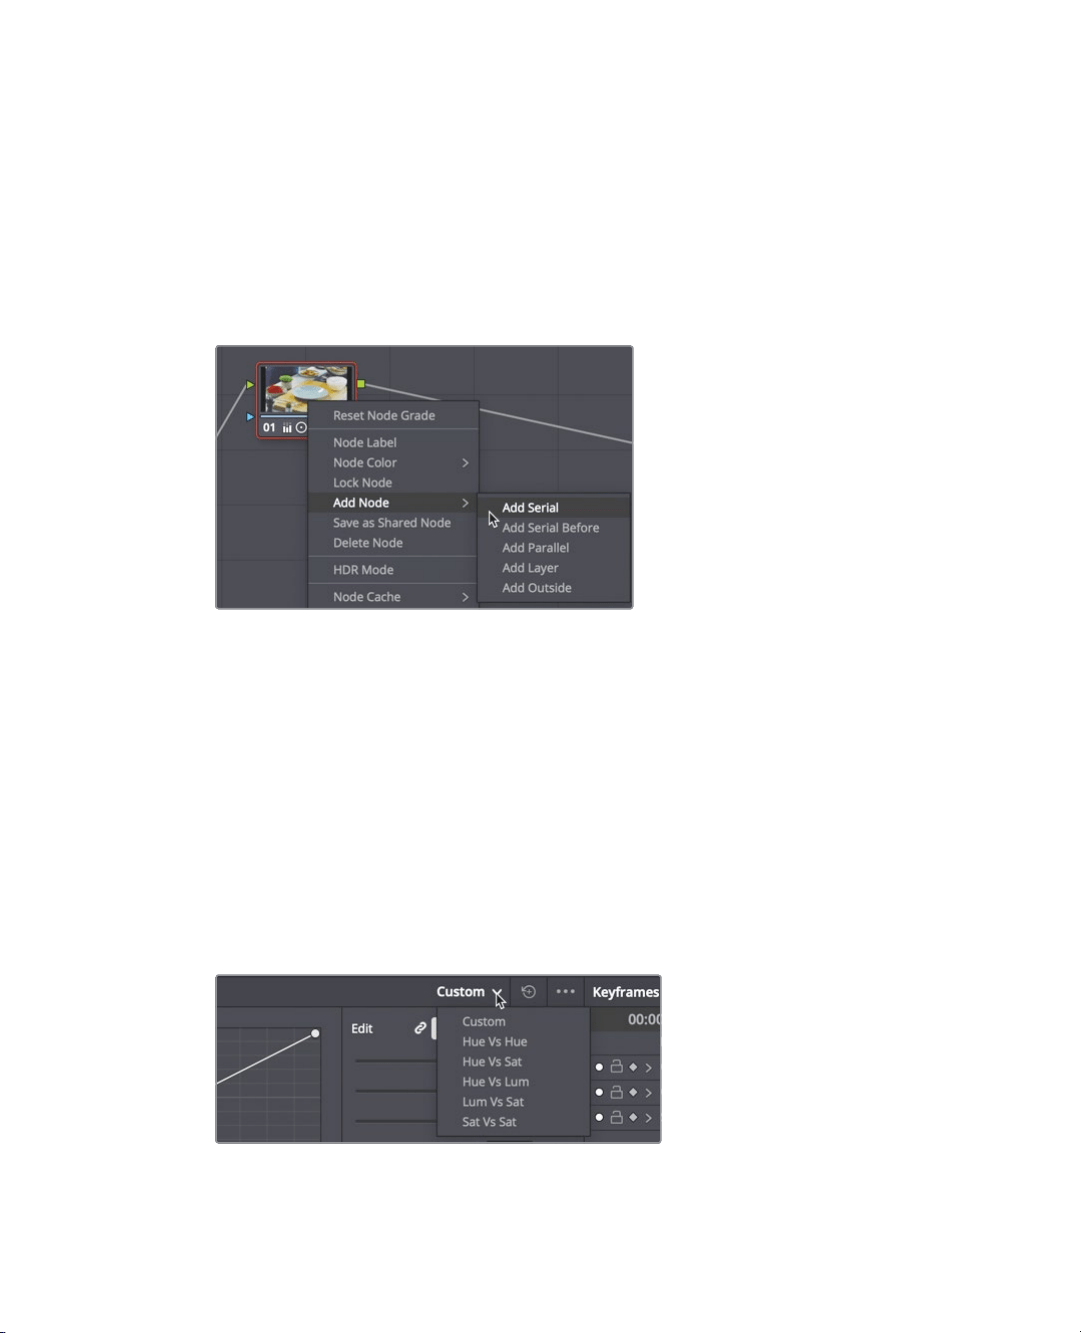
1 Right click over the node in the node editor and choose Add Node > Add Serial, or
press Option-S (macOS) or Alt-S (Windows).
The node is added after the initial node in the node editor. The new node is given the
number 02 and has a red outline to indicate that it is the currently selected node. You
can rename the node to be more descriptive.
2 Right-click the node, and from the contextual menu, choose Node Label.
3 Type DISH, and press enter to rename the node.
With a new node in place, you can now use the curve controls to modify the color of
the blue pole. The default curve controls are custom curves that you may be familiar
using in Photoshop or other image-editing applications. However, DaVinci Resolve
includes several curve controls for isolating various hues, as well as luminance and
saturation levels. To adjust the hue of the dish and shift it to a different hue, you’ll use
ahue vs. hue curve.
4 In the curves drop down menu, choose Hue Vs Hue to display the hue vs. hue curve.
The hue vs. hue color spectrum is displayed under the timeline. These controls let you
isolate a specific hue in the image just by clicking the image.
Loading ...
Loading ...
Loading ...