
Loading ...
Loading ...
Loading ...
22
Lesson 1 Introduction to Editing in the Cut Page
The boring detector highlights the end of this clip as being a bit too long. It might be nicer
to break this shot up and switch to a few different angles while cutting the prawns. We can
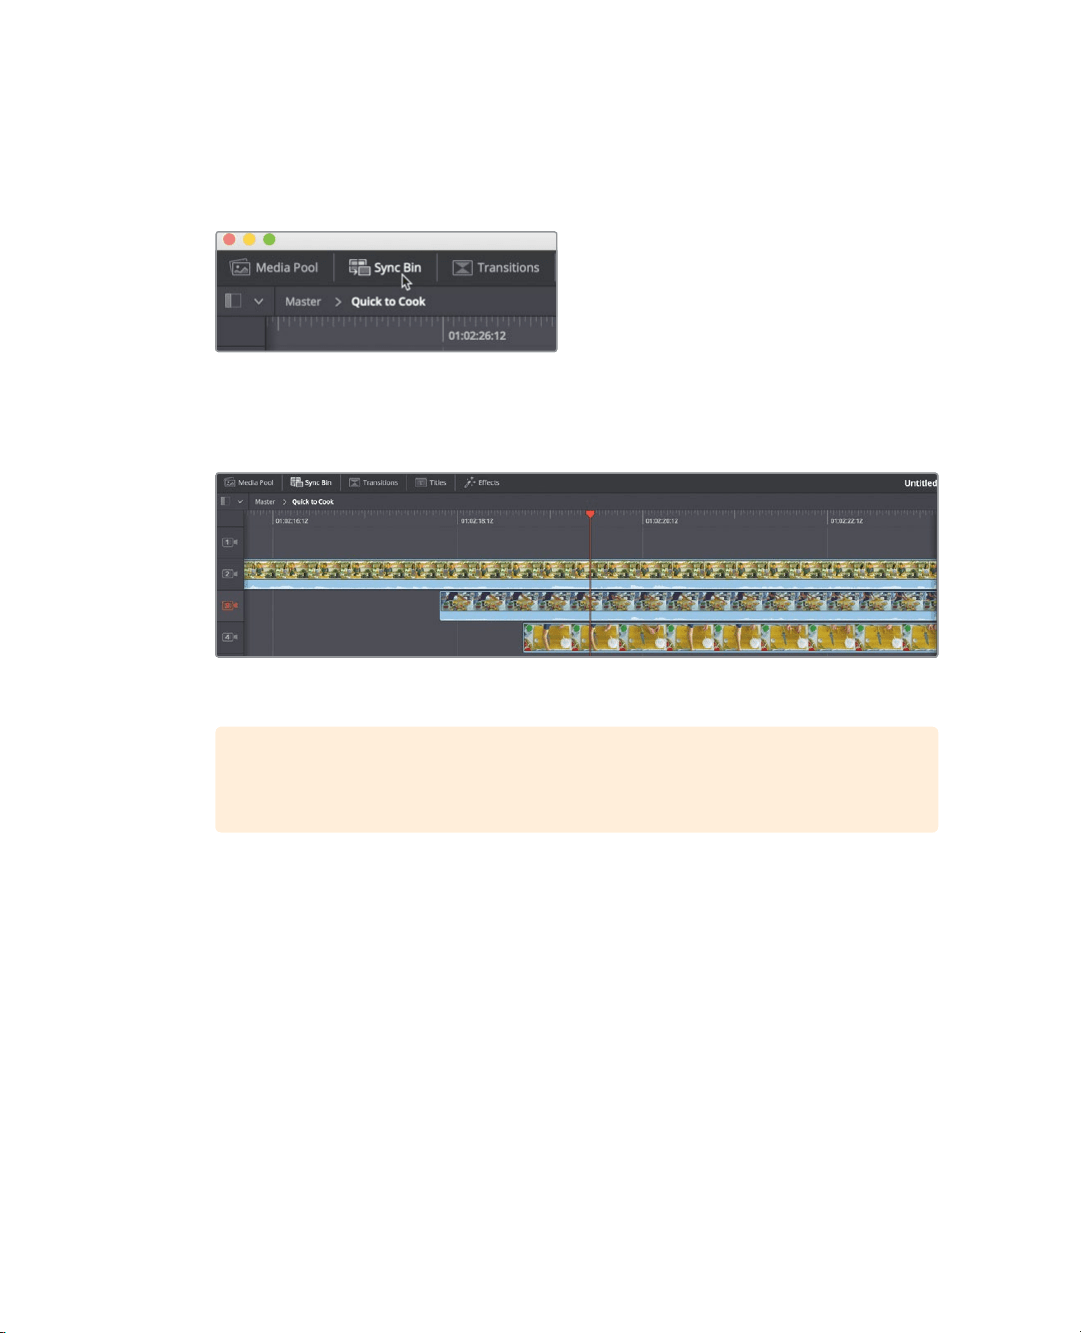
switch to the sync bin to see the other camera angles available at thistime.
2 Click the sync bin button above the media pool.
The sync bin arranges clips based on the camera # and their time code. All the camera
angles in the bin that match the current timeline location are displayed under the sync
bin play head.
You control the sync bin using the timeline play head.
TIP If your clips do not have camera #s, you can add camera # using the
media page metadata inspector.
3 Drag the timeline play head backwards and forwards over your program to see the
different synced camera angles display in the sync bin.
As you drag, various clips in the sync bin start and stop based on if they are in sync
with the current timeline play head. The viewer displays a multi view of all the synced
camera angles, highlighting the one currently used in the timeline.
Loading ...
Loading ...
Loading ...