
Loading ...
Loading ...
Loading ...
353
Using Curves for Primary ColorCorrections
9 Choose View > Bypass All Grades, or press Shift-D, to see the original image, and then
press Shift-D again to compare your corrected clip to the original.
Now you can work on color balance by adjusting the curve for the individual channels.
Using nodes to separate tonal and color balancing
Looking at the parade scope, you can see the shadows in the blue channel trace appear
slightly higher than the red and green channels. While the highlights in the blue channel trace
appear lower. This indicates there is a blue tint in the shadow and a red tint in the highlights.
So these are the first regions we will adjust. Sometimes, as you balance shots you may
decide adjustments are best performed by isolating tonal problems from more complex color
cast problems. You can separate the two parts of the balancing process using nodes.
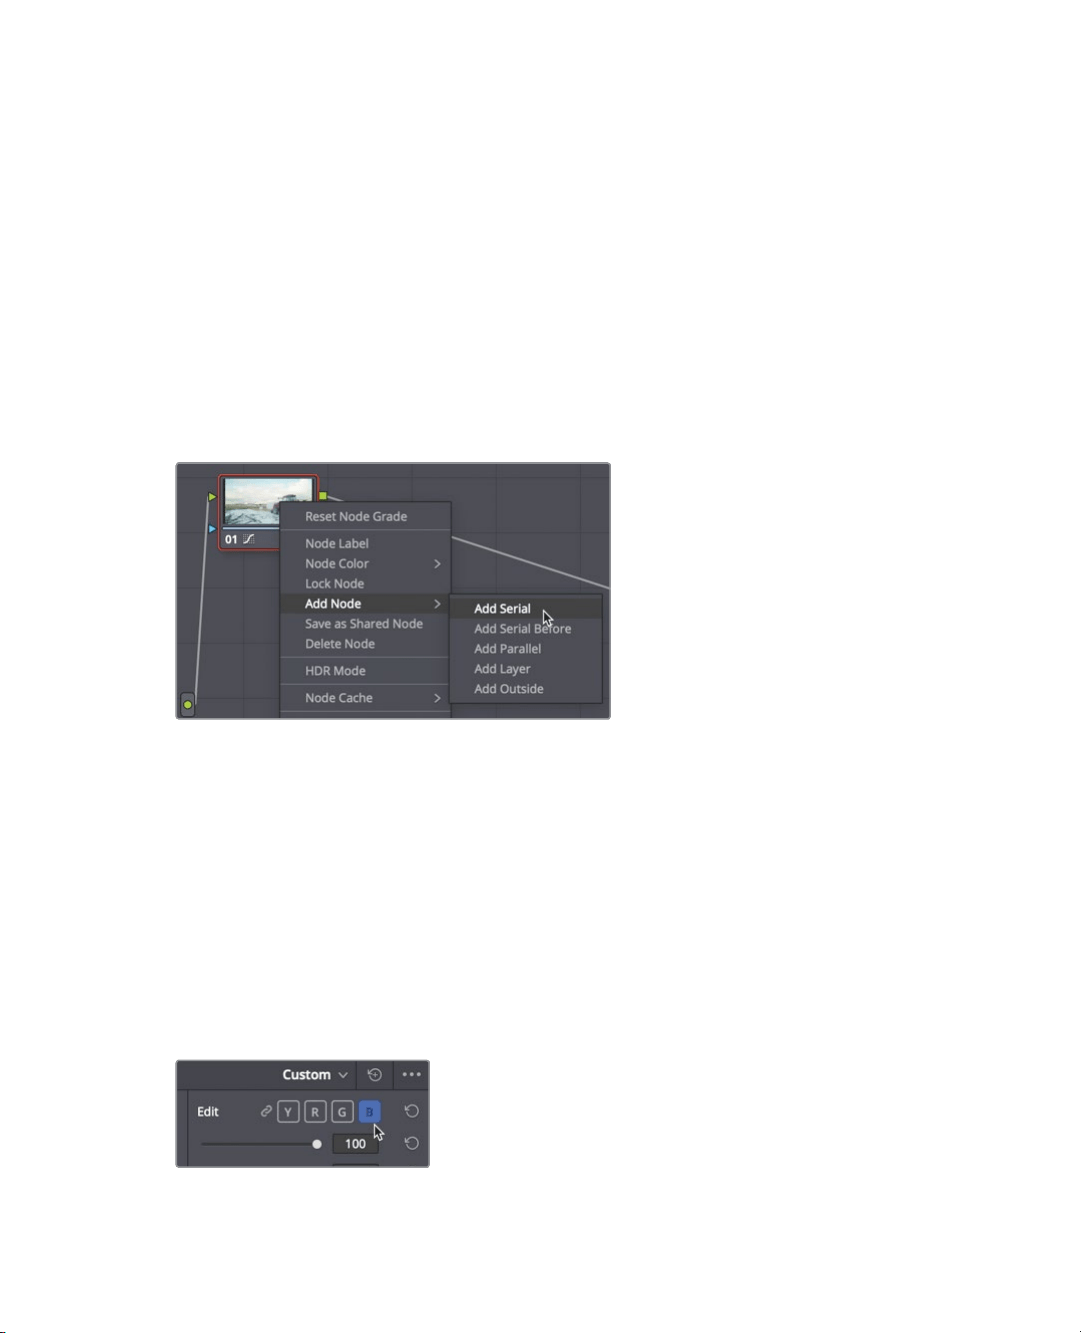
1 In the Node graph, right-click node 01, and in the menu, choose Add Node > Add Serial.
You can think of a node as a transparent layer stacked on top of your clip. When you
make any color adjustment, those adjustments are applied to the node, and not to the
clip. As a result, every adjustment in DaVinci Resolve is non-destructive because you
can enable and disable a node at any time. We’ll use the first node for our tonal
adjustments and the new second node for color cast issues. Let’s start by naming the
nodes appropriately.
2 Right click over node 01 and choose Node label, then type TONAL BALANCE.
3 Right click over node 02 and choose Node label, then type COLOR BALANCE.
Since node 02 is the highlighted node, any adjustments you make will be contained
inthat node.
4 In the curve controls area, click the B button to activate the blue curve.
Loading ...
Loading ...
Loading ...