
Loading ...
Loading ...
Loading ...
294
Lesson 10 Creating Graphics and Effects in Fusion
2 In the upper-left corner of the Resolve window, click the nodes button to hide the
nodeeditor.
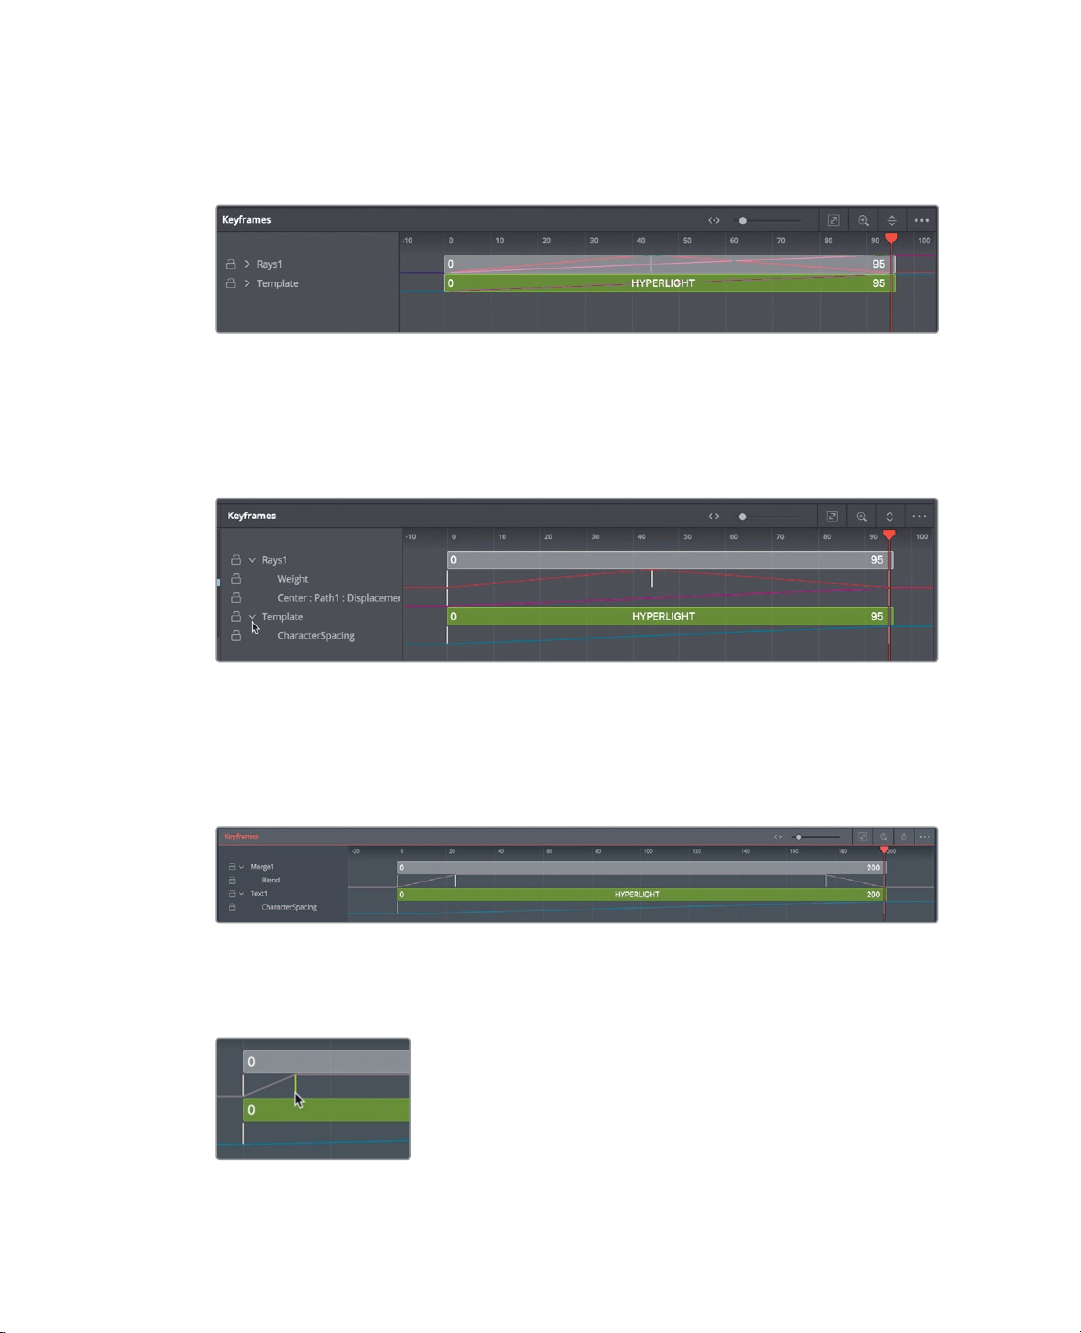
The keyframes editor shows each node stacked in a familiar timeline interface.
Even though the keyframe tracks are stacked like layers, the vertical order of these
tracks has no impact on your composite. The tracks effect only when clips start,
whenthey end, and the keyframes that they contain.
3 In the keyframes editor, click the disclosure arrow next to the Template and Rays1
nodes toshow the start and end keyframes on both tracks.
The white lines below the tracks indicate the keyframes for the Rays and tracking
animations. Let’s move the center keyframe on the weight track so it reaches the full
force of the light rays earlier.
4 Click in an empty space in the keyframes editor, and press Cmd-F (macOS) or Ctrl-F
(Windows) to fit the tracks in the window.
Expanding the tracks to fill the panels allows you to see the keyframes more clearly.
5 In the Rays Weight track, drag the middle keyframe to the left until the tooltip in the
lower-left corner of the DaVinci Resolve window reads “Time: 20.0”.
You have moved the keyframe to frame 20, making the light rays appear earlier.
Loading ...
Loading ...
Loading ...