
Loading ...
Loading ...
Loading ...
148
Lesson 6 Refining a Timeline
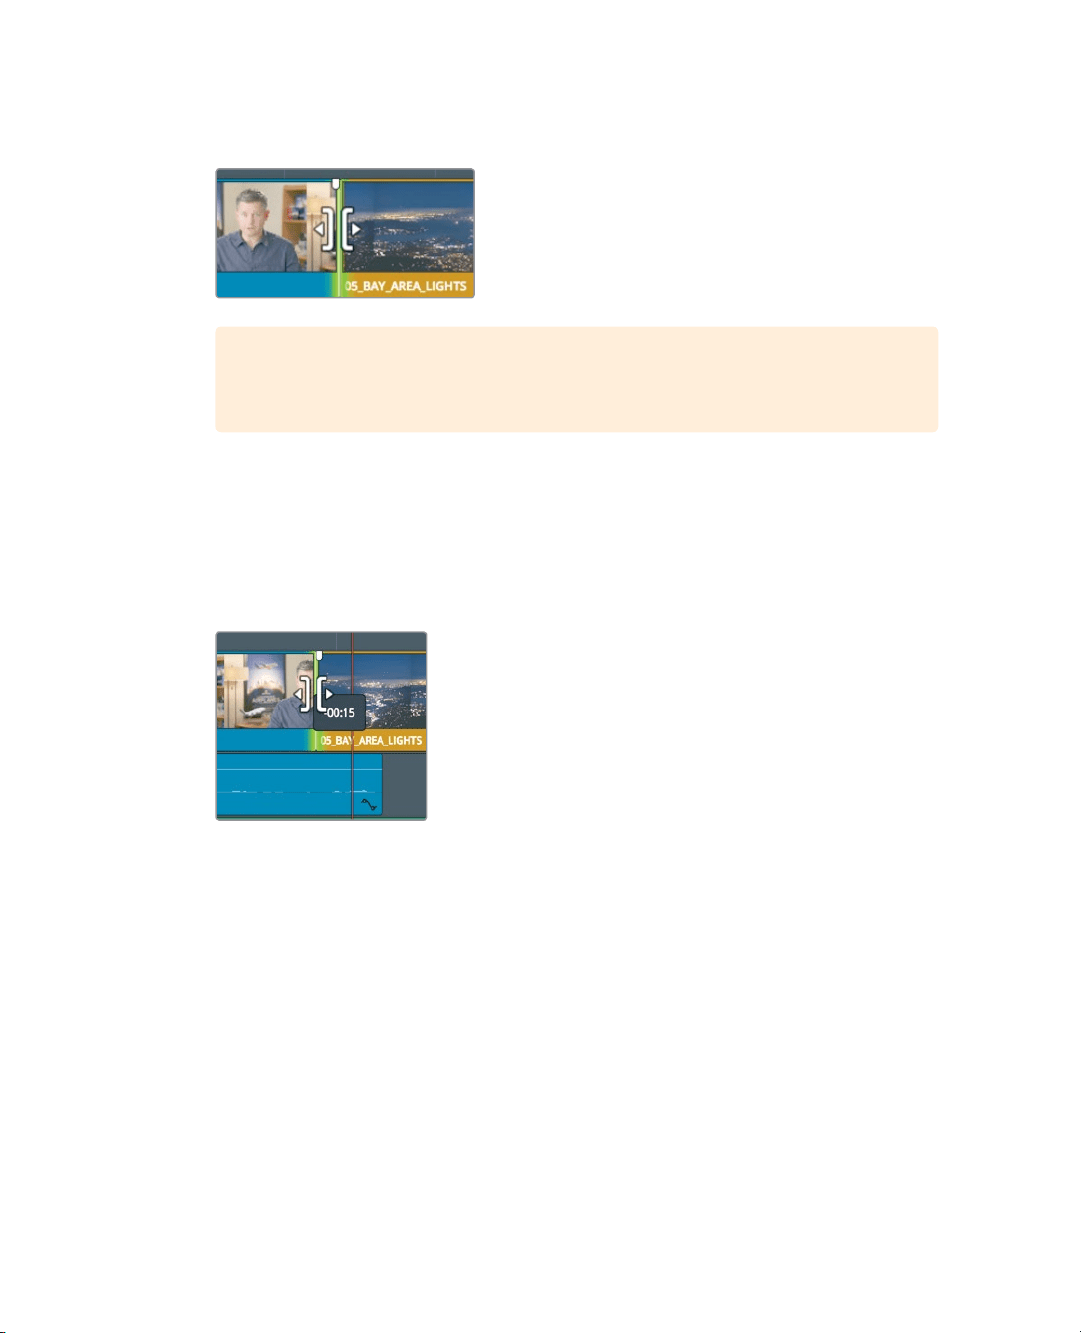
5 On the video track, click the cut point to select both the end of the 02_if_it_was_possible
interview clip and the start of the 05_BAY AREA_LIGHTS clip.
TIP When a cut point is selected with the ripple or roll cursor, pressing the
Ukey toggles between each side of the edit to select that side for trimming.
With both sides of the cut selected, any adjustments will be made equally to both sides
of the cut. Removing frames from the end of the interview clip will add frames to the
start of the Bay Area clip and vice versa.
6 Drag the cut to the left until the playhead is just before the words “was real.” In the
audio track, use the audio waveform as a guide to position the video cut just before
those words.
Let’s play the transition to see your results.
7 To review the cut, choose Playback > Play Around/To > Play Around Current Frame,
orpress / (slash).
You can continue to refine the cut by pressing the, (comma) and . (period) keys to nudge
itinto the exact spot you want.
Slipping a Clip
Slipping a clip so that you shift the range without changing the clip’s duration or position in
the timeline is done slightly differently than in the Cut page. Slipping in the edit page can
only be performed when you are in trim edit mode.
1 Choose View > Zoom > Zoom to Fit, or press Shift-Z, to see the entire timeline.
Loading ...
Loading ...
Loading ...