
Loading ...
Loading ...
Loading ...
176
Lesson 7 Applying Transitions andEffects
TIP To delete all of the rendered cache files for the current project, choose
Playback > Delete Render Cache > All.
Now that your smart caching is set, DaVinci Resolve will automatically render everything
necessary to optimize playback for your effects. When you reopen a project, cached clips
are still cached; but when you change any cached effect, it will need to be re-cached.
Creating a Constant Speed Change
Changing the playback speed of a clip is done for a variety of reasons. Sometimes it’s used
to accentuate dramatic action, and sometimes it’s used so the timing of a clip fits into a
scene. In almost every production genre, you’ll have a need to speed up clips, slow them
down, and even stop and hold on a frame for a few seconds.
The most common type of speed change is a constant speed change. It uniformly alters
the playback of a clip in the timeline to turn it into a slow-motion clip or a fast-motion clip
ofa single framerate.
1 In the timeline, position the playhead at the start of the 06_MILKY WAY clip.
2 Play over the clip (always a good idea before you change its speed.)
This clip goes on a bit too fast for a shot of the nighttime sky. You want to slow the
speed but not change its duration in the timeline.
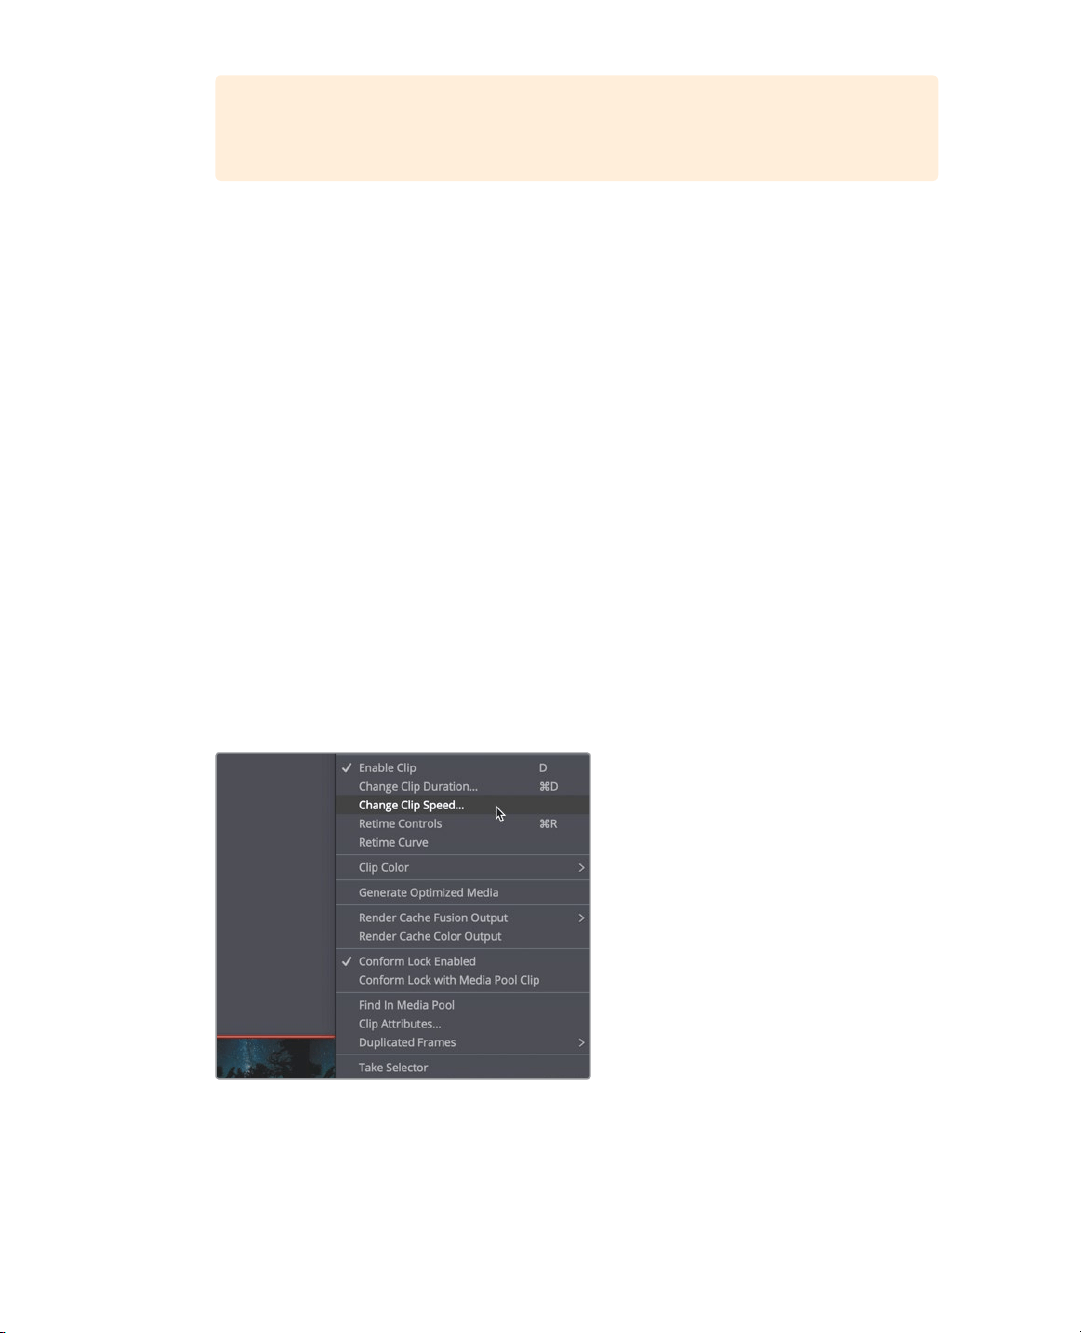
3 Select 06_MILKY WAY. Right-click the clip, and in the pop-up menu, choose
ChangeClip Speed.
The Change Clip Speed dialog appears with a number of controls for clip playback.
Loading ...
Loading ...
Loading ...