
Loading ...
Loading ...
Loading ...
175
Rendering and Background Caching
1 Choose Playback > Render Cache> Smart.
The smart cache operates on timeline-specific effects such as transitions, opacity
adjustments, and composite mode superimpositions. Regions of the timeline that
require caching have a red bar over them, whereas regions that are already cached
have a blue bar over them.
All of this is easy enough, but you have additional settings to customize the
cachingoperation.
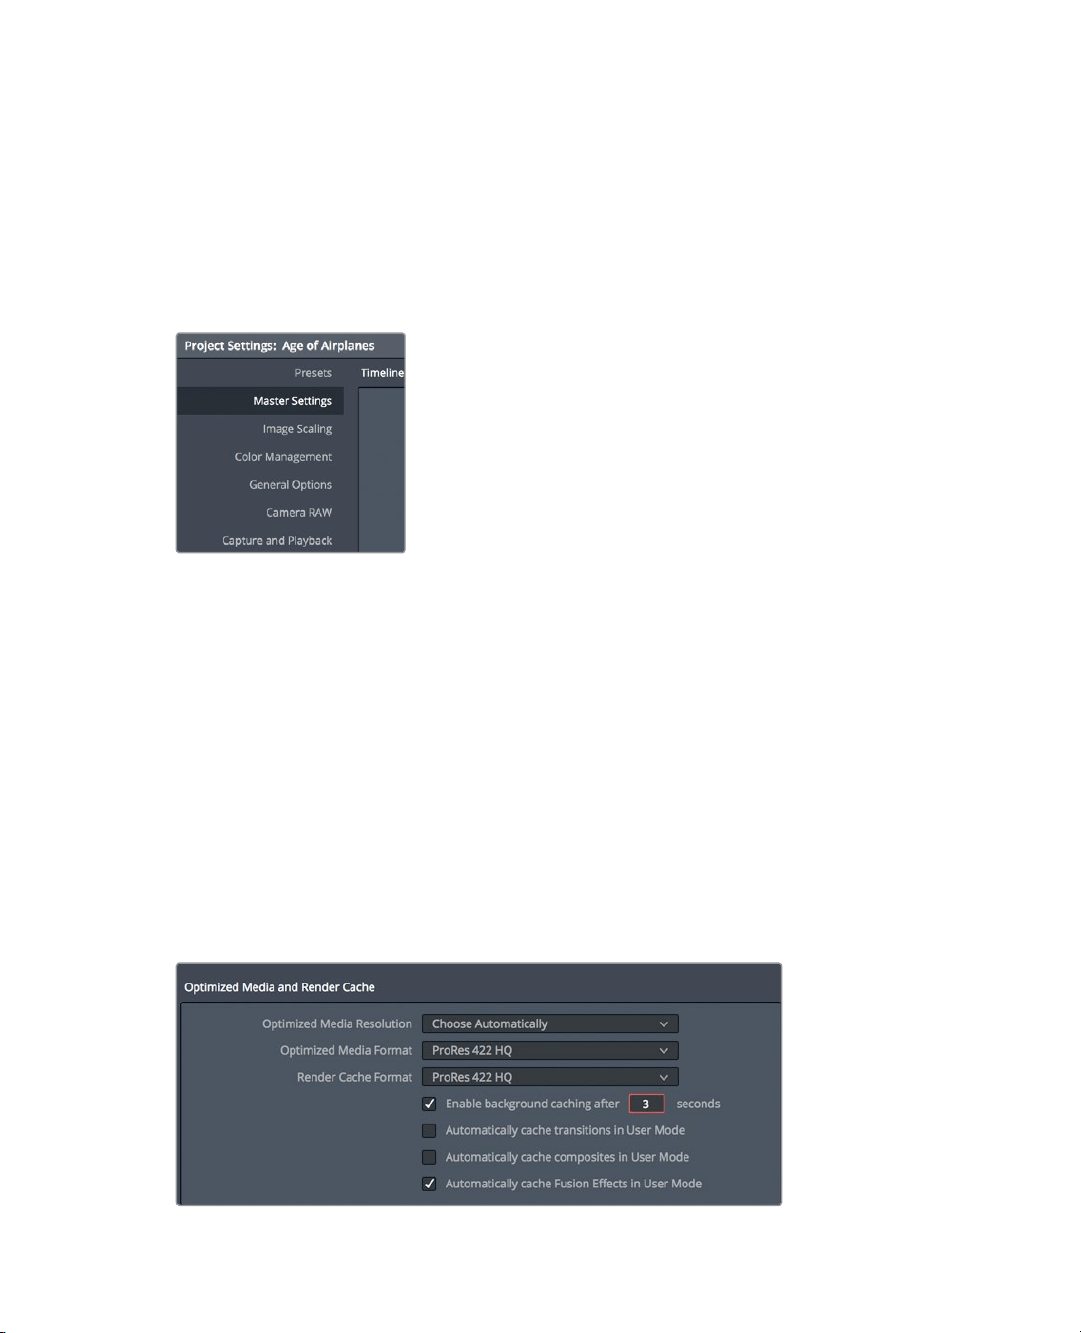
2 Choose File > Project settings > Master settings.
Master settings include a few Optimized Media settings related to caching. The “Cache
frames in” menu sets the compression format that DaVinci Resolve uses to savethe
rendered files. The choices common to macOS and Windows include uncompressed
10-bit and 8-bit formats, and Avid’s DNxHR formats. In macOS, DaVinciResolve also
includes Apple’s ProRes compression format.
The default setting creates a high-quality 10-bit file that will look good in your final
output. If you are temporarily working on a portable or a laptop with a slow disk drive,
you may want to opt for a marginally lower-quality 8-bit format such as Avid DNxHR HQ
or ProRes 422 to enable faster processing. For now, you’ll leave this setting at the
default value and move on to background processing.
3 Make sure “Enable background caching” is selected.
When background caching is enabled, effects rendering begins based on the length
oftime your computer sits idle.
4 In the “Enable background caching” numeric box, enter 3.
Background caching will now begin to render effects after your computer sits idle
forthree seconds.
Loading ...
Loading ...
Loading ...