
Loading ...
Loading ...
Loading ...
24
Lesson 1 Introduction to Editing in the Cut Page
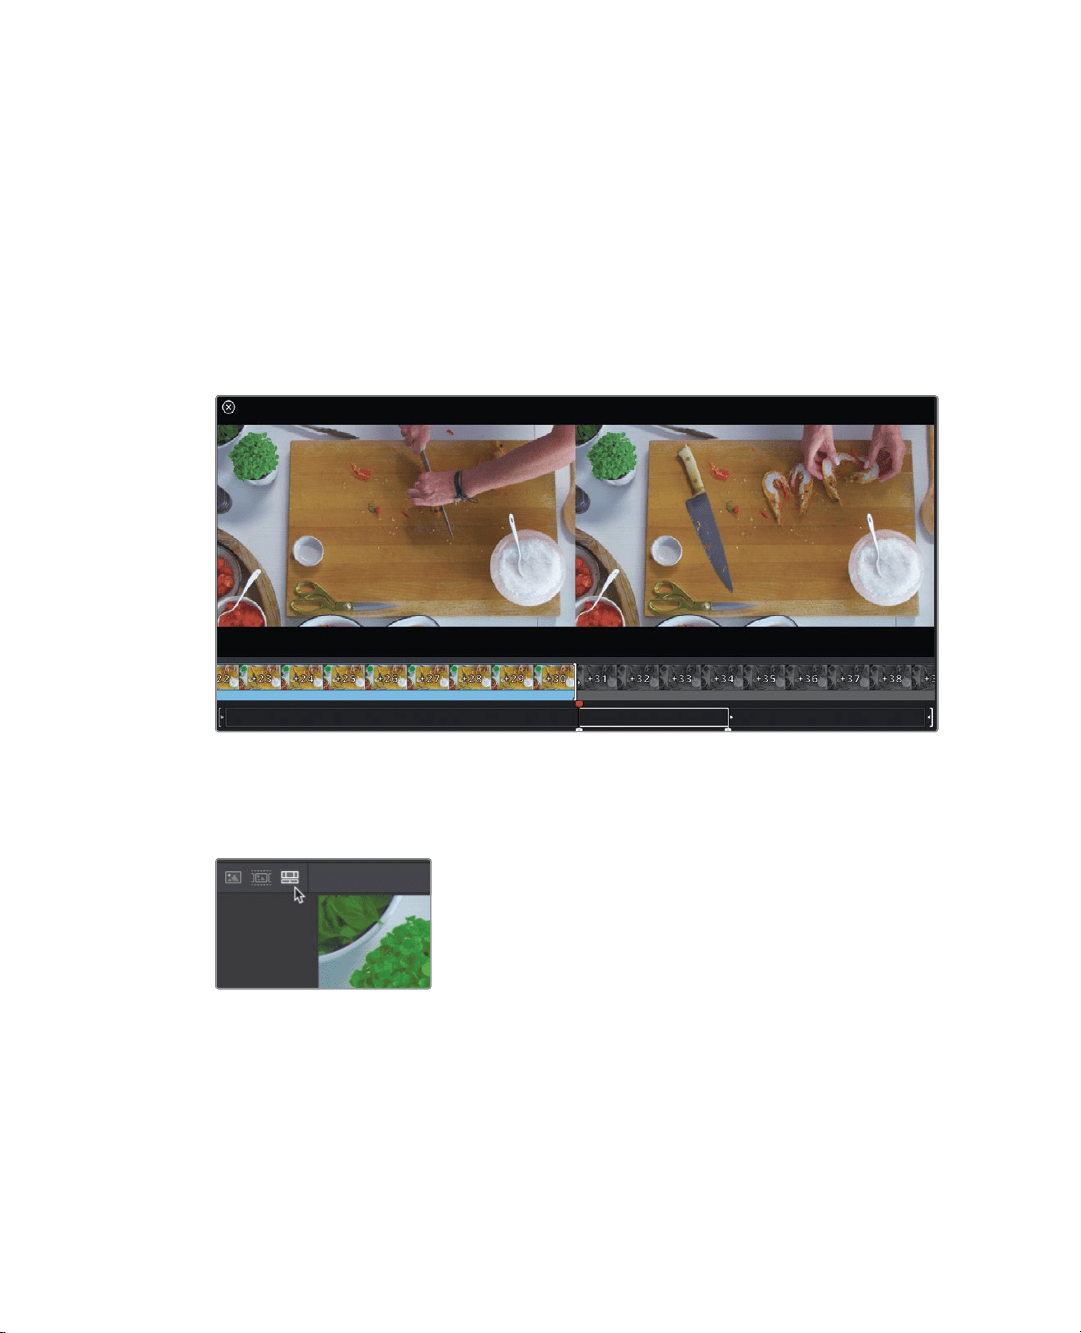
The source overwrite adds the new camera angle on top of the existing video track.
Since the source overwrite takes full advantage of the matching timecode, the angles
line up perfectly and the action remains in sync. Performing a source overwrite places
the timeline playhead at the end of the newly added clip, so you are ready to make
another edit.
7 In the viewer, click camera 4 to switch to the top view of the cutting board.
If you want to change the in or out point you can use the scratch trim controls to refine
them before you make the edit.
8 On the far bottom right of the viewer, drag the scratch trim out button to the left, and
stop after the chef’s lays out the second shrimp on the table.
9 Click source overwrite to add another perfectly synced clip to the timeline.
With two edits made quickly, let’s review this new area of our timeline.
10 Above the viewer, click the timeline button to view the timeline.
11 In the upper timeline, move the timeline play head back to where you started, seeing
the side view of the cutting board.
12 Play the timeline to review the edits.
The beauty of the sync bin is that you can see all the shots at the same time and pick
whichever you like best.
Loading ...
Loading ...
Loading ...