
Loading ...
Loading ...
Loading ...
213
Reading Meters and Setting Targets
Reading Meters and Setting Targets
Before you make any clip volume adjustments, it is a good idea to know how to read an
RMS (root mean square) peak meter such as the one used in the mixer. The meters in the
mixer use a decibel (dB) scale to measure the volume of your audio clips. These meters
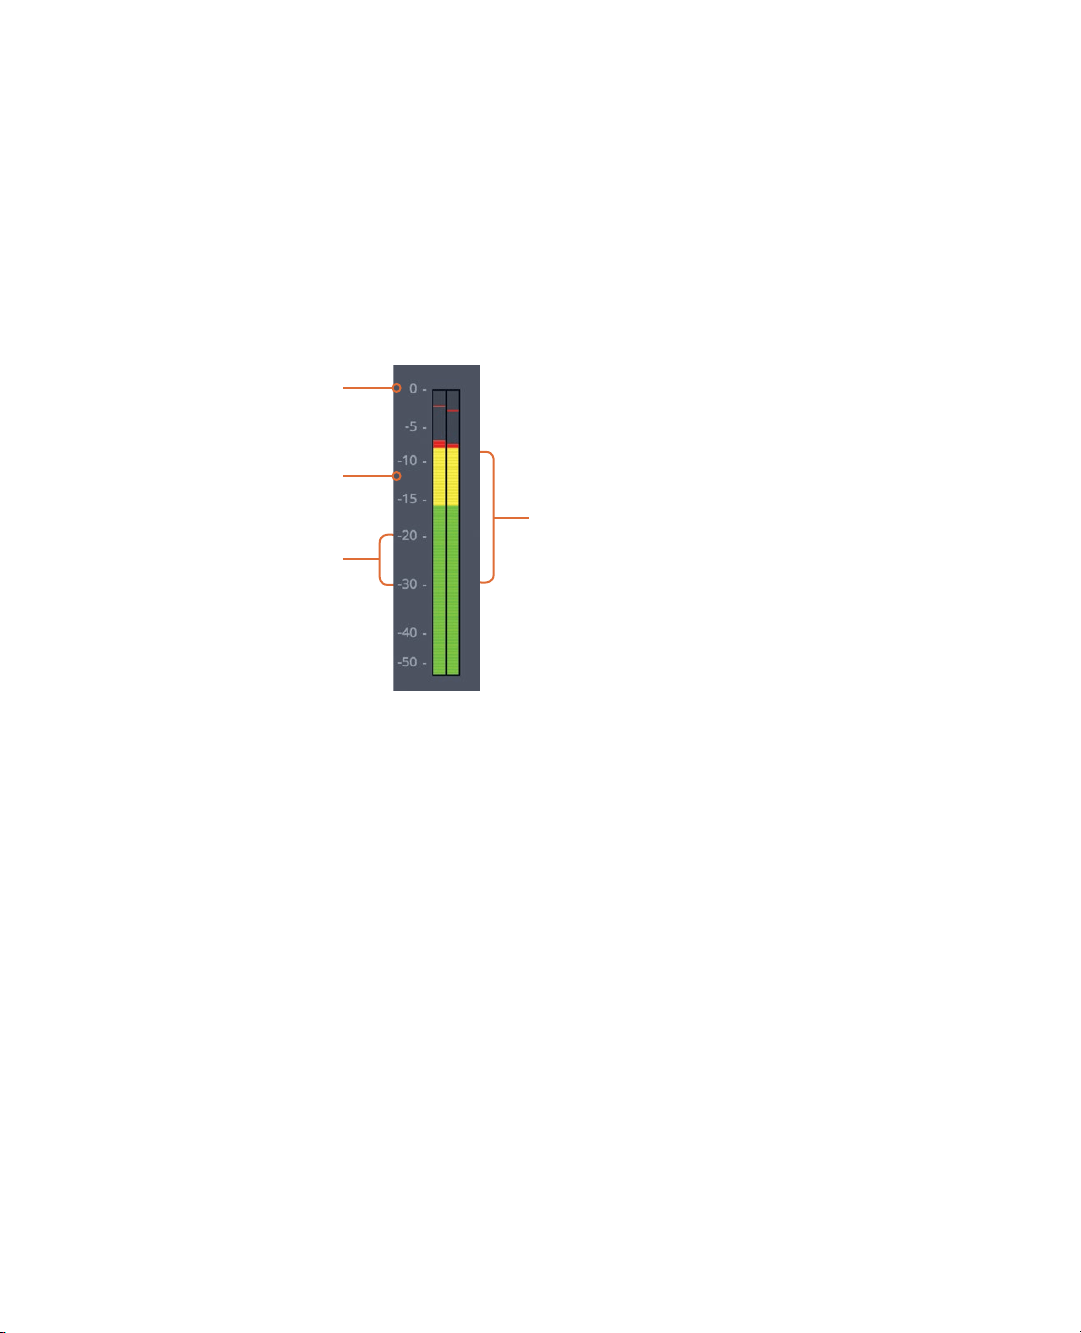
range from a maximum of 0 dB down to -50 dB. Any audio levels above 0 dB are distorted,
so you must always keep audio levels below 0 dB. Although not a hard and fast rule,
trackssuch as dialog, sound effects, and music generally have target dB levels as good
starting points.
Normal spoken dialogue should average around -12 dB on the meter.
Sound effects have a wider target range because they have such a wide variety; but in
general, try to target sound effects to fall between -10 and -30 dB.
Music tracks require a wide dynamic range but should fall between -20 and -30 dB.
These level guidelines are good starting points; but in the end, your ears must be the final
judges of what sounds right.
For this first stage of audio mixing, you will target each clip and set its level appropriately
for the type of sound it contains. Eventually, all the clips of dialogue should be placed on a
single dialogue track and play at roughly the same level. The single-track and common
dB-level strategy applies to all the sound effects and all the music. At this stage, however,
you needn’t be concerned with comparing the dialogue levels to the music or sound effect
levels because you are mixing on a clip level. Later, in the Fairlight page, you’ll tackle
track-level mixing.
Let’s start by working with your dialog on audio track 1.
Clipping level
Dialogue target
Sound effects target
Music target
Loading ...
Loading ...
Loading ...