
Loading ...
Loading ...
Loading ...
170
Lesson 7 Applying Transitions andEffects
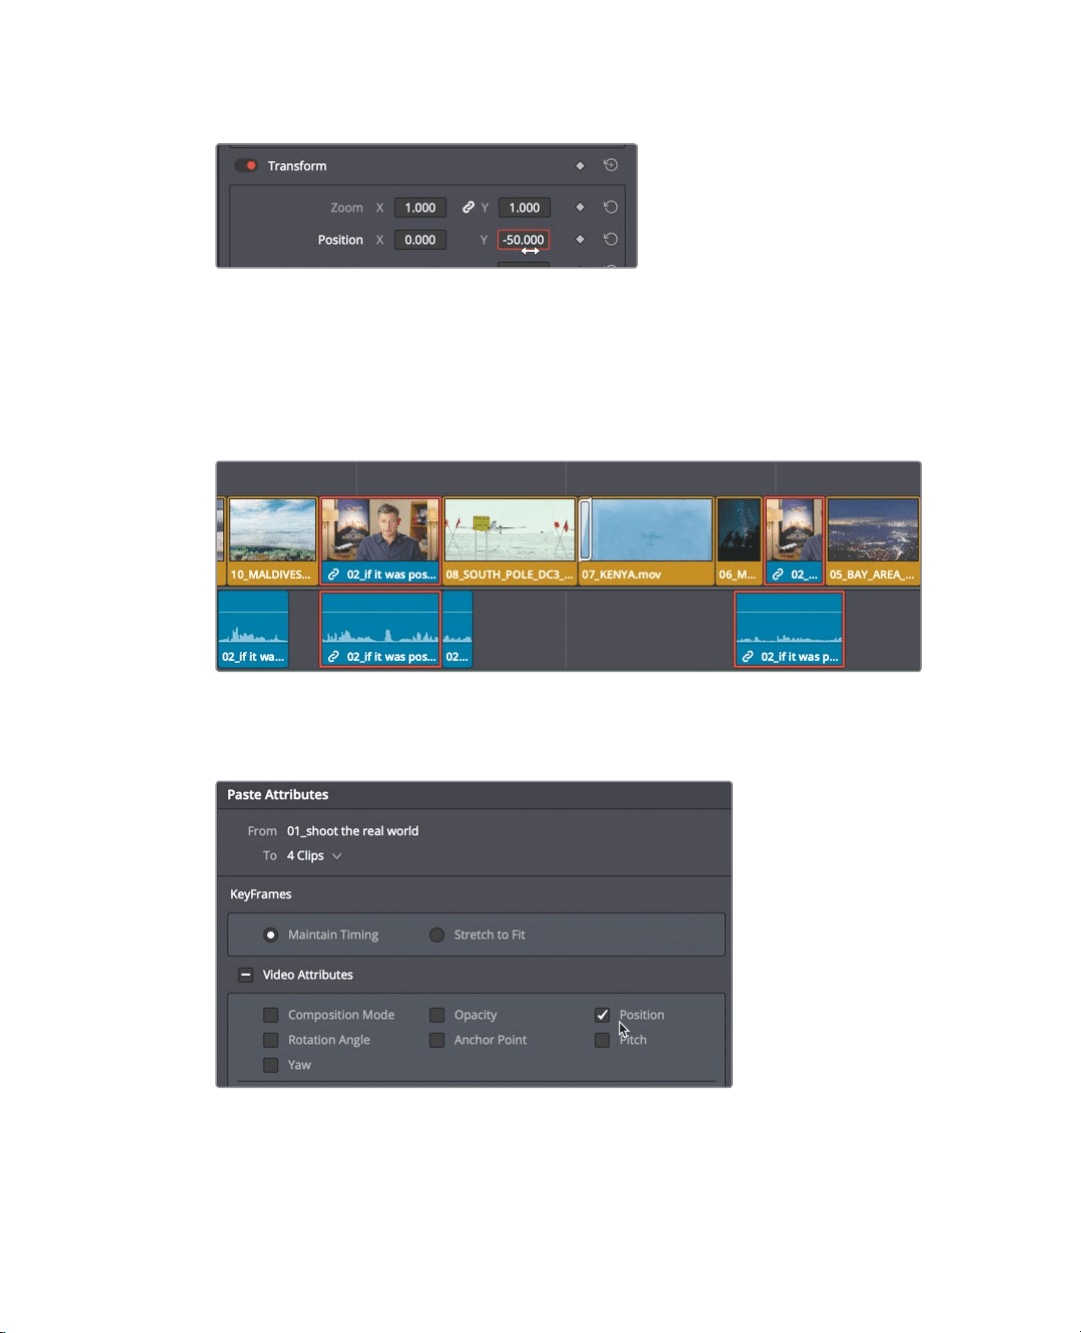
4 In the Y Position numeric field, drag to the left until the value shows -50.00.
This is better positioning for the subject. You’ll have to copy this to the remaining
interview shots.
5 Choose Edit > Copy, or press Cmd-C (macOS) or Ctrl-C (Windows).
6 From the timeline menu choose Select clips with Clip Color > Navy. This will select all
the interview clips in the timeline since previously in lesson 4, we color coded those
clips navy.
7 Choose Edit > Paste Attributes, or press Option-V (macOS) or Alt-V (Windows), to open
the Paste Attributes window.
8 In the Video Attributes category, select the Position checkbox, and click Apply.
This reposition value applied to the first interview clip is pasted onto the selected
interview clips.
Loading ...
Loading ...
Loading ...