
Loading ...
Loading ...
Loading ...
174
Lesson 7 Applying Transitions andEffects
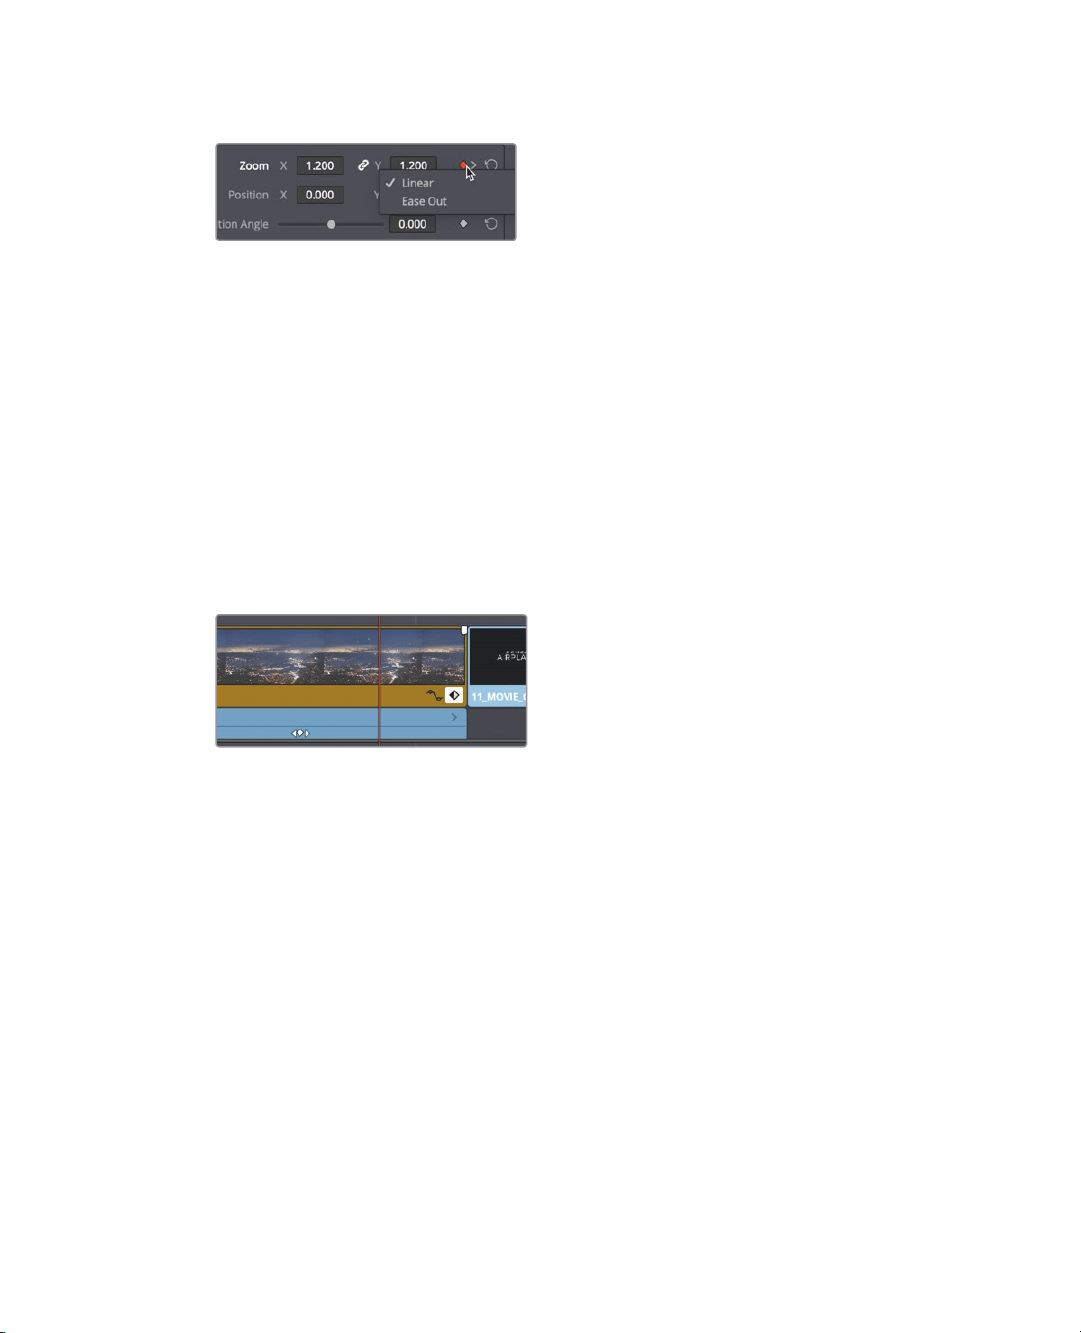
9 Right click over the red diamond keyframe icon and choose ease out.
This will smooth the motion as the animation starts.
10 Click the go to next keyframe button to jump to the last keyframe.
11 Right click over the red diamond keyframe icon and choose ease in.
This will smooth the motion as the animation ends. Now, we can adjust timing of the
animation as well.
12 Zoom into the timeline to see the 05 BAY AREA LIGHTS clip clearly.
13 With the clip still selected, in the lower-right corner of the timeline segment, click the
diamond-shaped keyframe button.
The keyframe tracks include small white dots that represent each keyframe.
Draggingthese white dots will change the position of those keyframes.
14 Select the last white keyframe in the keyframe editor and drag it slightly to the right to
extend the animation.
15 Click the keyframe button to close both keyframe displays.
16 Press the / (slash) key to play around the currently selected clip.
Rendering and Background Caching
Depending on the speed of your computer and disk drives, as well as the media file types
you are using, all effects may not play back smoothly on your computer. The fps (frames
per second) indicator above the timeline viewer shows the actual playback framerate that
your computer is achieving. If the number has a red dot next to it, your system is playing
your project slower than the actual project frame rate.
To optimize playback performance for complex effects, DaVinci Resolve can automatically
render and cache such effects to your disk drive. Although DaVinci Resolve can use three
distinct caching systems to render files, this exercise will focus on smart caching for the
Edit page.
The first task is to make sure caching is turned on.
Loading ...
Loading ...
Loading ...