
Loading ...
Loading ...
Loading ...
201
Customizing the Interface for Audio
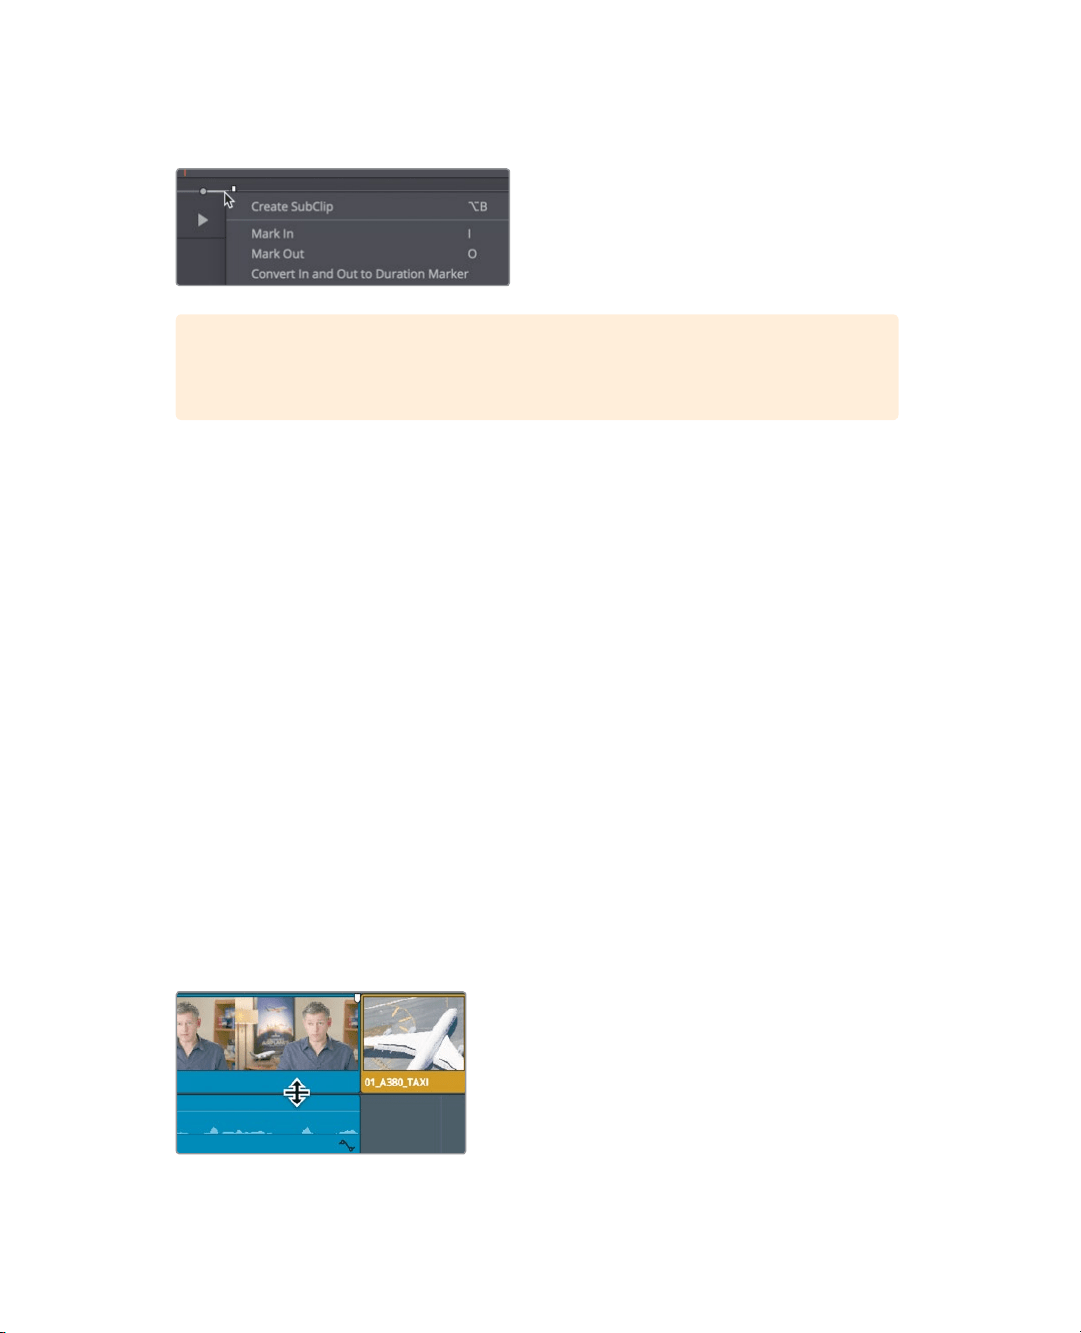
10 Right-click between the marked in and out points, and in the pop-up menu, choose
“Convert In and Out to Duration Marker”.
TIP You can also convert duration markers to in and out points in the same
contextual menu.
The Duration marker is added to identify the same frames as the in and out points.
Youcan use the same pop-up menu to open the dialog.
11 Right-click in the marker range, and in the pop-up menu, choose Modify Marker.
The dialog opens.
12 In the Name field, type Roaring Jet Take Off and click Done.
You’ve identified sound effects that fill the requirements of the markers in the timeline.
Now, you’ll edit them into your trailer to enhance the cinematic experience.
Customizing the Interface for Audio
Throughout this lesson you’ll work on the audio tracks, so it makes sense to customize the
timeline view by increasing the audio track heights so you can more clearly see the audio
waveform displays. Doing so will help you locate specific sounds and evaluate the audio
more effectively. Furthermore, those waveforms are a handy visual reference to determine
the volume of the audio.
To open up more room in the timeline for audio tracks, you can push the tracks up, thereby
removing some of the headroom that exists above the video track.
1 Locate the mouse pointer between the video track and the audio tracks in the timeline.
The pointer changes to a resize cursor, indicating that you can drag up or down to
assign more or less room to audio or video tracks.
Loading ...
Loading ...
Loading ...