
Loading ...
Loading ...
Loading ...
412
Lesson 16 Managing Media andDatabases
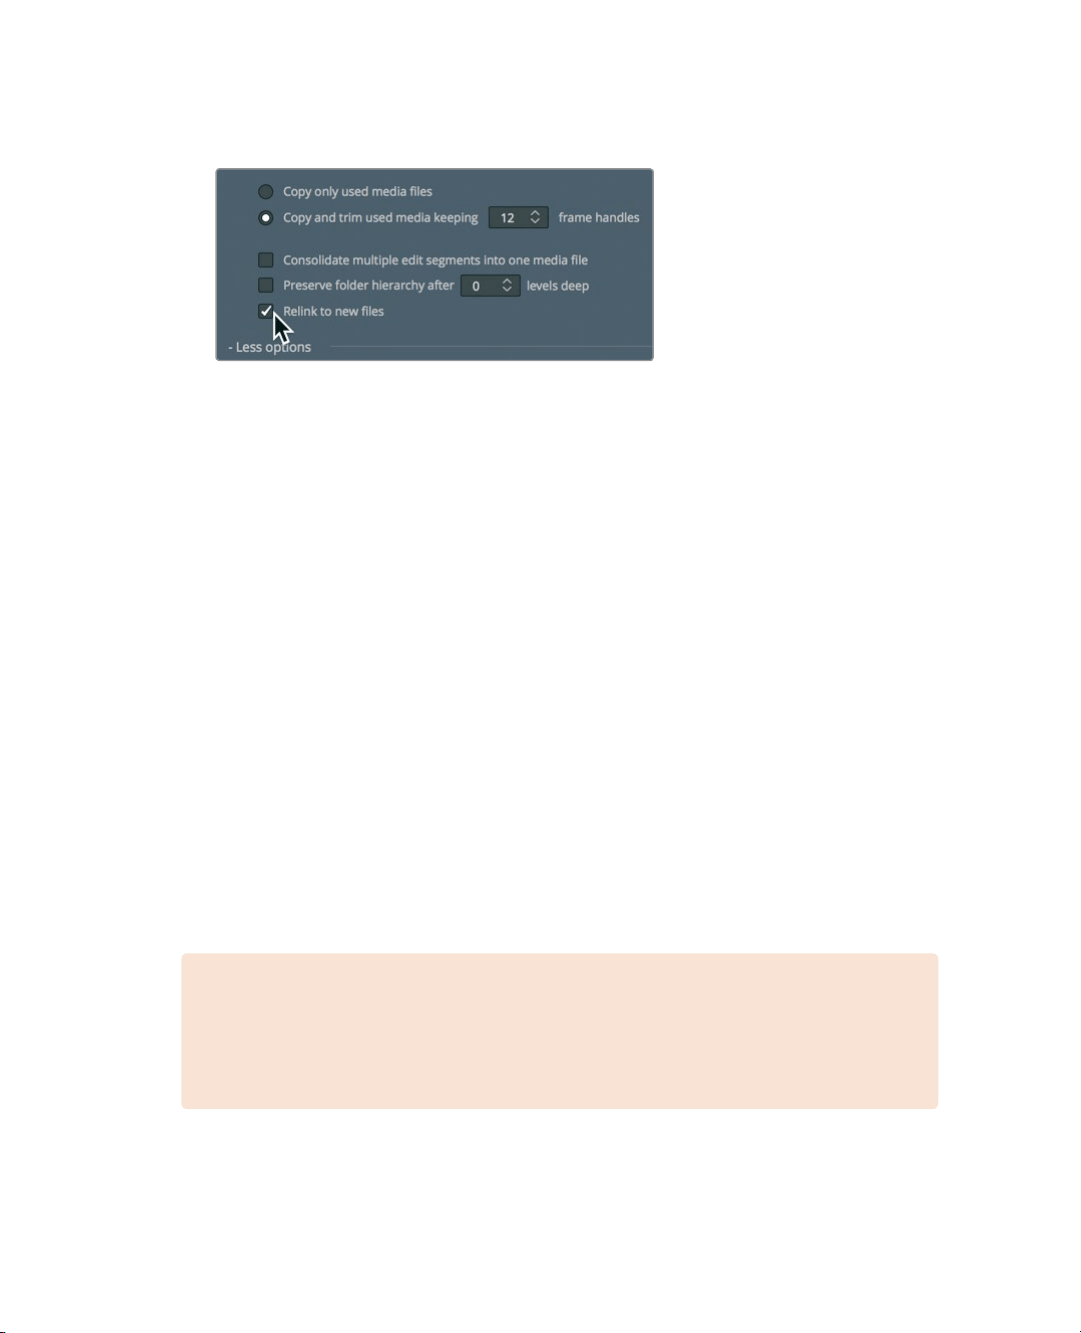
8 Select “Relink to new files” to use the new, copied media in the timeline instead of
theexisting media.
If you were finalizing these steps, you would now click Start to begin consolidating
themedia, but in this case do not do so.
After you started the consolidation process, the files used in the timeline would be copied
to the destination drive, and then trimmed so that only the clip portions in usewere saved
to disk —along with a half-second handle on each side of a clip.
The clips in your bin would now link to these new, shorter media files, but all of the original
clips would still remain in their original locations. It would remain for you to delete them
when you were confident that you would no longer need them.
Copying Projects and Media
toaNewHardDrive
Although consolidating media can save you the most storage space, it addresses only
themedia. Your timelines, clips, and metadata are not included. The easiest way to copy,
back up, or move a single project and all of its content from one computer to another is to
use DaVinci Resolve’s archive and restore features. Archiving a project collects all your
files(even if they are on different drives) and places them in the destination folder of
yourchoice along with the project file. To archive a project, you must do so using the
ProjectManagerwindow.
NOTE The following exercises use a second hard drive for copying and transcoding
media. If you do not have a second hard drive or do not want to take up valuable disk
space by copying and/or moving the training media from this book, you can still read
through the lesson to gain an understanding of theprocess.
1 Open the Project manager, right-click the Age of Airplanes project thumbnail,
andchoose Export Project Archive.
Loading ...
Loading ...
Loading ...