
Loading ...
Loading ...
Loading ...
405
Creating a Custom Preset
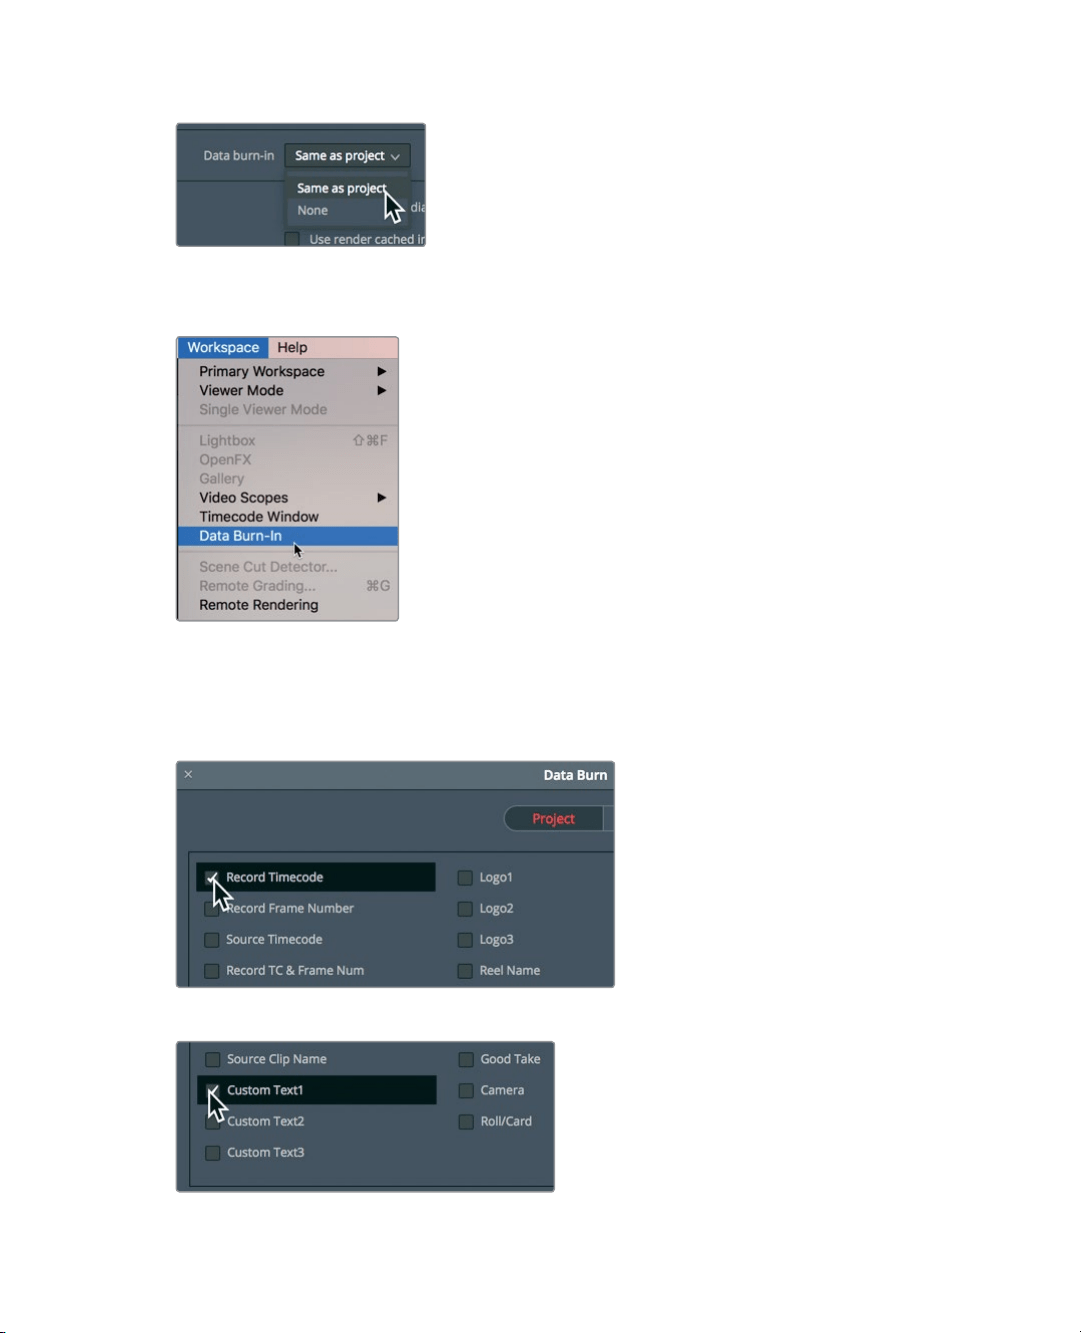
The Burn-in controls can be accessed from any page.
4 Choose Workspace > Data Burn-In to open the Data Burn window.
The left side of the Data Burn window includes a list of possible data types to overlay
on the video. Selecting the checkbox next to any option enables it.
5 In the list of burn-in data, select the Record Timecode checkbox to overlay the record
timecode on the output movie file.
6 Select the Custom Text1 checkbox to add a text watermark.
Loading ...
Loading ...
Loading ...