Loading ...
Loading ...
Loading ...

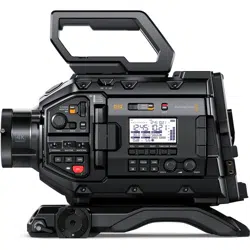
These settings work together with the switches on your URSA Broadcast G2’s internal control panel.
So after you’ve set your audio source for a particular channel, you can use the internal control
panel switches to set the signal type and whether phantom power is enabled for that channel.
Audio Settings 1
The first page of your URSA Broadcast G2’s ‘audio’ tab contains the following settings.
Channel Source
Use the ‘channel 1 source’ and ‘channel 2 source’ buttons to select your audio source for each
audio channel. The options are:
Camera Left or Right
Use this setting to record from your camera’s internal microphones.
Camera Mono
Use this setting to record audio from your URSA Broadcast G2’s built in microphone’s
left and right channels onto a single audio channel.
XLR 1 or 2
Use this setting to record from your camera’s XLR inputs. Depending on which audio
signal you’ve set on your URSA Broadcast G2’s internal control panel switches, your
XLRinput may be listed as ‘mic,’ ‘line,’ or ‘AES.’ If phantom power is enabled and you
have your XLR input set to ‘mic’ you’ll also see a ‘+48V’ indicator here. It it is important
to ensure that the +48V switch gets turned ‘off’ when you disconnect your phantom
powered microphone.
XLR 1 or 2 - Mic Backup
Use this setting to record audio from a microphone plugged into your URSA Broadcast
G2 XLR 1 or 2 input at a lower level than the standard ‘mic’ recording. This can be used
to avoid audio clipping in the event of an unexpected increase in loudness. This feature
will only be available as a selectable item if the XLR 1 or 2 input switch is set to ‘mic’.
None
Use this setting to disable your audio channel.
Channel 1/2 Level
Use these sliders to adjust the recording levels of your chosen channel 1 and 2 sources.
Audiometers are included with each slider to help you set the correct audio level. These levels
will also update when you adjust the audio using the audio knobs on the ergonomic control panel.
To achieve optimum audio quality, ensure your audio levels do not reach 0 dBFS. This is the
maximum level that your camera can record, meaning that any audio that exceeds this level will
be clipped, resulting in distortion.
96Settings
Loading ...
Loading ...
Loading ...