Loading ...
Loading ...
Loading ...
Confirming Video
You can now check that video is working and all return feeds are present.
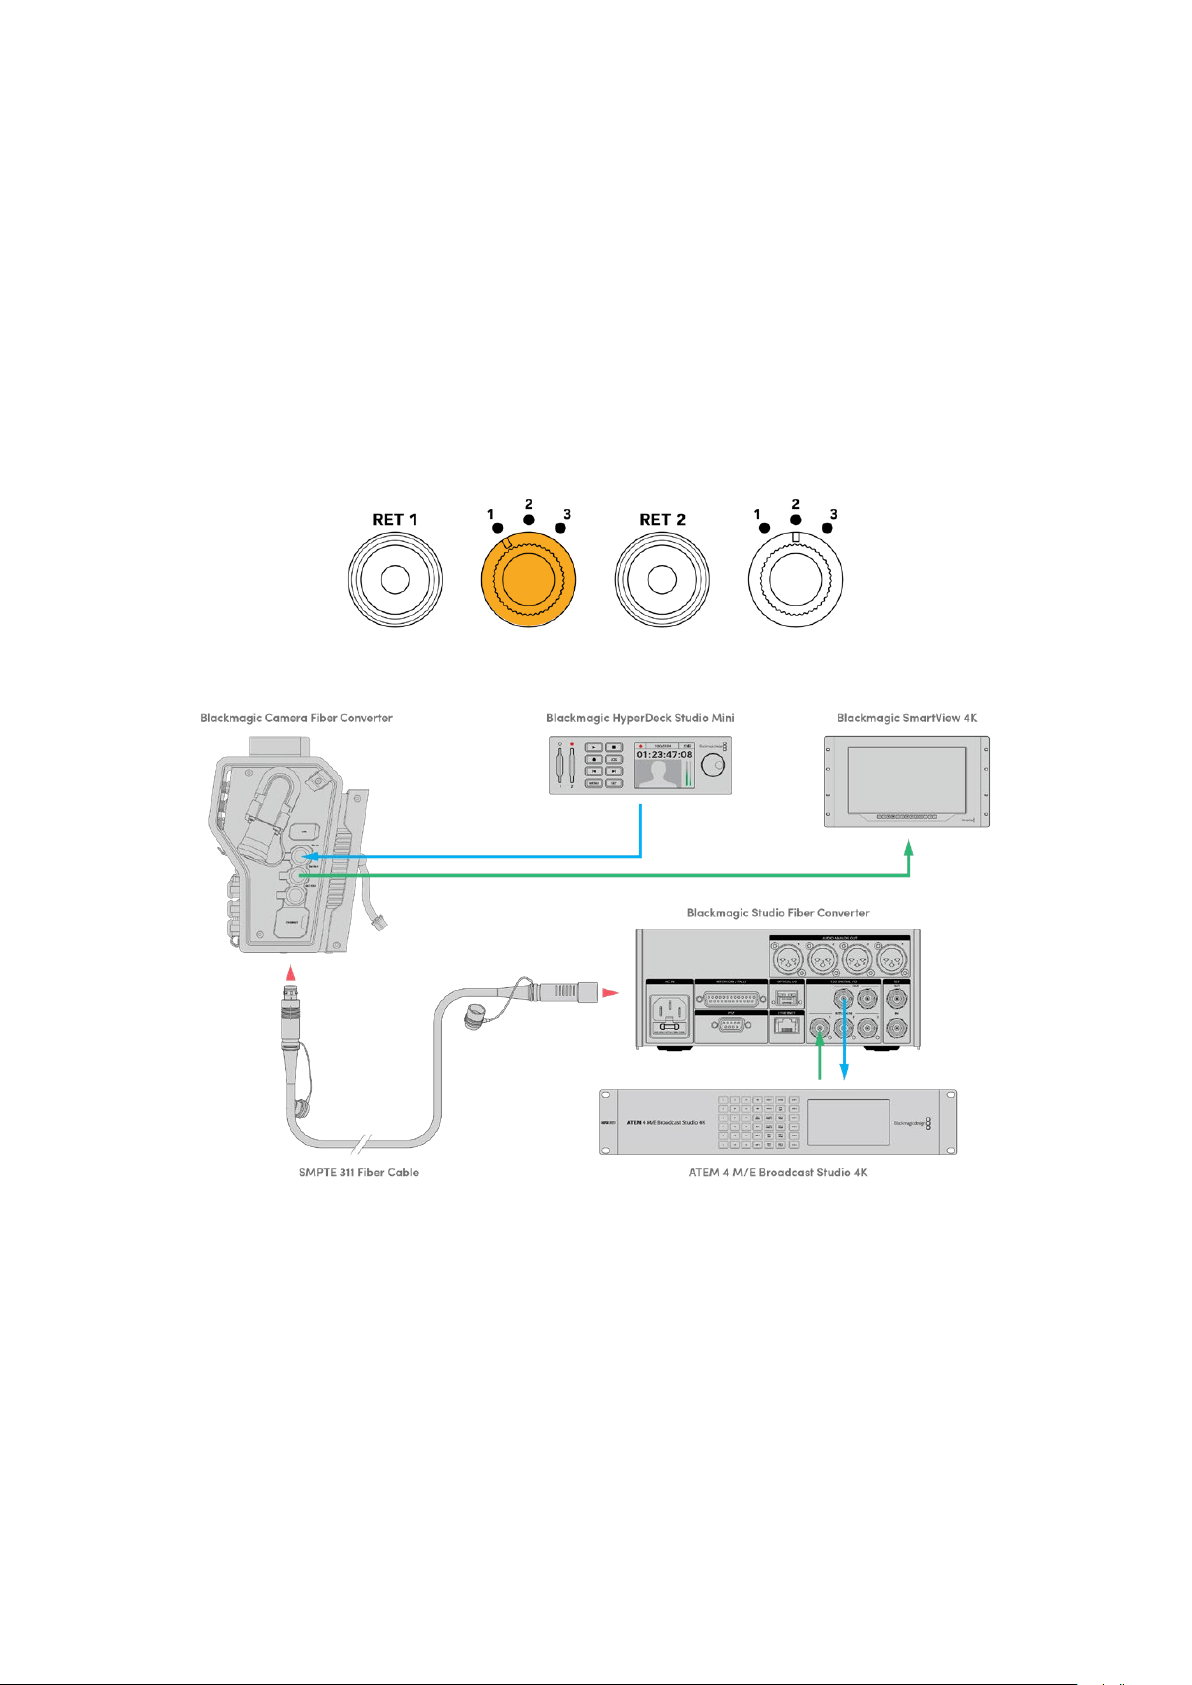
1 Ensure the ATEM switcher’s program output is connected to the studio unit’s SDI
return input 1.
2 If you want to check all return feeds, plug video sources into SDI return inputs 2 and 3.
3 Now plug an SDI monitor, such as a Blackmagic SmartView 4K, into the ‘SDI out’ on the
side panel of the camera unit.
With a monitor connected to the SDI output, rotate the corresponding selection knob next to
the return button to switch between all three return feeds. You can set the two return buttons to
monitor two different return feeds if you want to.
Switch between the return feeds on the camera unit and press the
corresponding return button to view the selected feed on a monitor
To confirm video, plug video sources into the return feed inputs on the
studiounit,then view them on a monitor connected to the camera unit
Why Connections on the Front?
The fiber connection is located on the front of the studio unit so it can become the optical patch
connection in the rear of a rack. Typically, the studio converter will be installed facing the rear of
a rack so the SMPTE cables can be plugged direct into the unit. This means there is no need for
extra rack patch panels and the cost of an extra short cable to the fiber unit. The large LCD next
to the SMPTE fiber connector lets you quickly verify a good connection to the camera.
161Getting Started with BlackmagicFiberConverters
Loading ...
Loading ...
Loading ...