Loading ...
Loading ...
Loading ...
Attaching the extension arm
B4 lenses typically feature a handgrip on the lens body, so a side handle isn’t necessary when
shooting with URSA Broadcast G2 on your shoulder.
If you have a different lens mount fitted, however, you may find it useful to fit the optional
URSAMini side handle on an extension arm for comfortable shoulder based shooting.
URSA Mini Shoulder Kit comes with an extension handle and longer LANC cable to move the
optional side handle to a more ergonomic position.
To attach the side handle extension arm:
1 Place your URSA Broadcast G2 on a flat, stable surface allowing room next to the camera to
lower the extension arm. Mounting URSA Broadcast G2 to a tripod is helpful for this purpose.
2 Attach the indented end of the extension arm to the baseplate rosette, lower the arm
to suit, and fasten with the supplied rosette thumbscrew.
3 Attach the side handle to the extension arm’s front rosette. Fasten by tightening the
side handle screw with the large flat head screwdriver, or by twisting the D ring with
your thumb and forefinger.
4 Connect the side handle LANC output to the camera LANC input using the long LANC
cable supplied with your URSA Mini Shoulder Kit.
You can easily adjust the extension arm and side handle to suit your preference by loosening
the rosette screws, making your adjustment, then retightening.
With your URSA Mini Shoulder Kit now attached, you have additional speed for fast shooting
on the run, plus the ability to quickly mount your camera on a tripod for tight, stable shots!
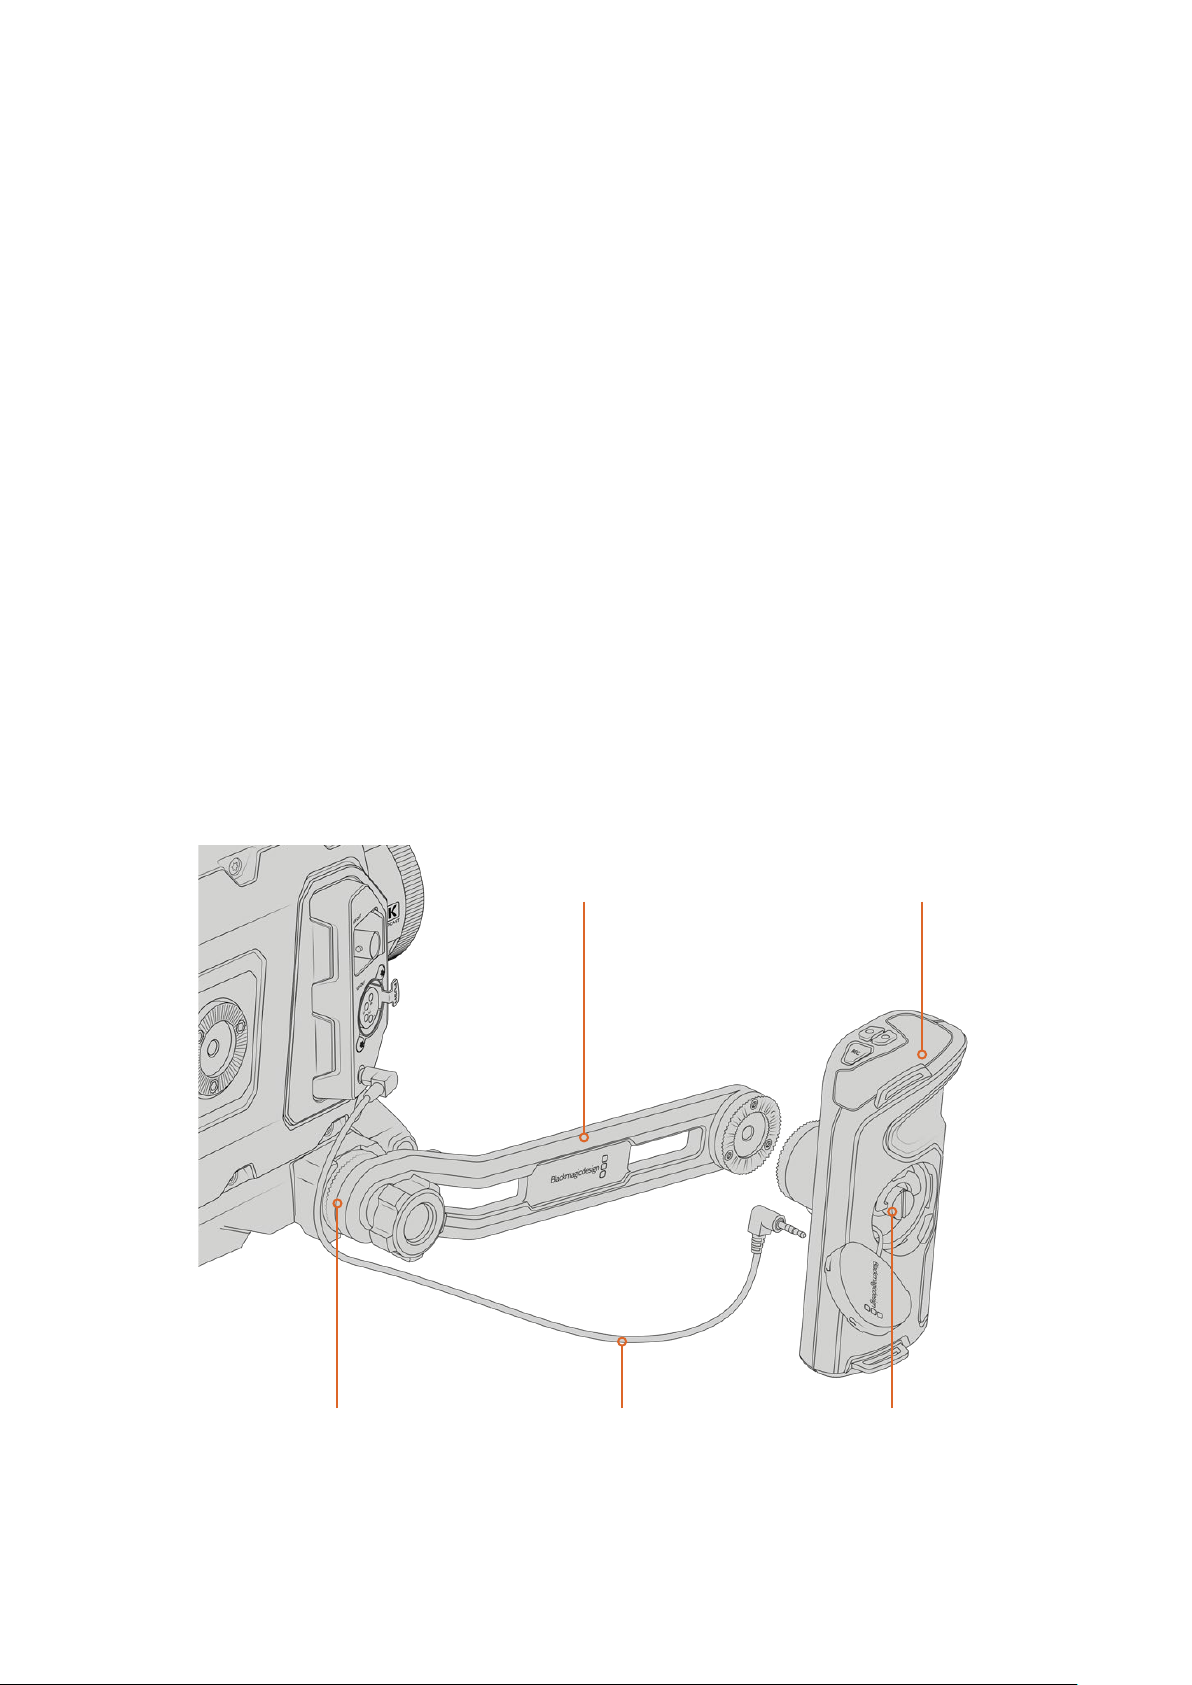
Connect the side handle to the camera using
thelongLANCcable supplied with the kit
Side handleSide handle extension arm
Extension arm attaches
tobaseplate rosette
Tighten via side
handlescrew
126URSA Mini Shoulder Kit
Loading ...
Loading ...
Loading ...