Loading ...
Loading ...
Loading ...
For more accurate control of each color using a mouse, you can change the color wheels to
‘primaries bars’ which let you adjust each color and luminance channel for the lift, gamma and
gain controls separately. Simply select ‘primaries bars’ from the dropdown menu near the top
right of the color wheels.
Adjusting the ‘lift’: With your clip selected on the color timeline, click on the ‘lift’
dial underneath the first color wheel. Slide it back and forth and watch how it affects
your image. You’ll see the brightness of the dark regions of your picture increase
and decrease.
Set it to where you want the dark areas to look their best. If you decrease the lift too
much, you’ll lose details in the blacks and you can use the parade scope to help avoid
this. The optimal position for blacks on the waveform is just above the bottom line of
the parade scope.
Adjusting the ‘gain’: Click on the ‘gain’ dial and slide it back and forth. This adjusts
the highlights which are the brightest areas of your clip. The highlights are shown on
the top section of the waveform on the parade scope. For a brightly lit shot, these are
best positioned just below the top line of the waveform scope. If the highlights rise
above the top line of the waveform scope, they will clip and you will lose details in the
brightest regions of your image.
Adjusting the ‘gamma’: Click on the ‘gamma’ dial underneath the color wheel and slide
it back and forth. Asyou increase the gamma you’ll see the brightness of the image
increase. Notice the middle section of the waveform will also move as you adjust the
gamma. This represents the mid tones of your clip. The optimal position for mid tones
generally falls between 50 to 70% on the waveform scope. However, this can be
subjective based on the look you are creating and the lighting conditions in the clip.
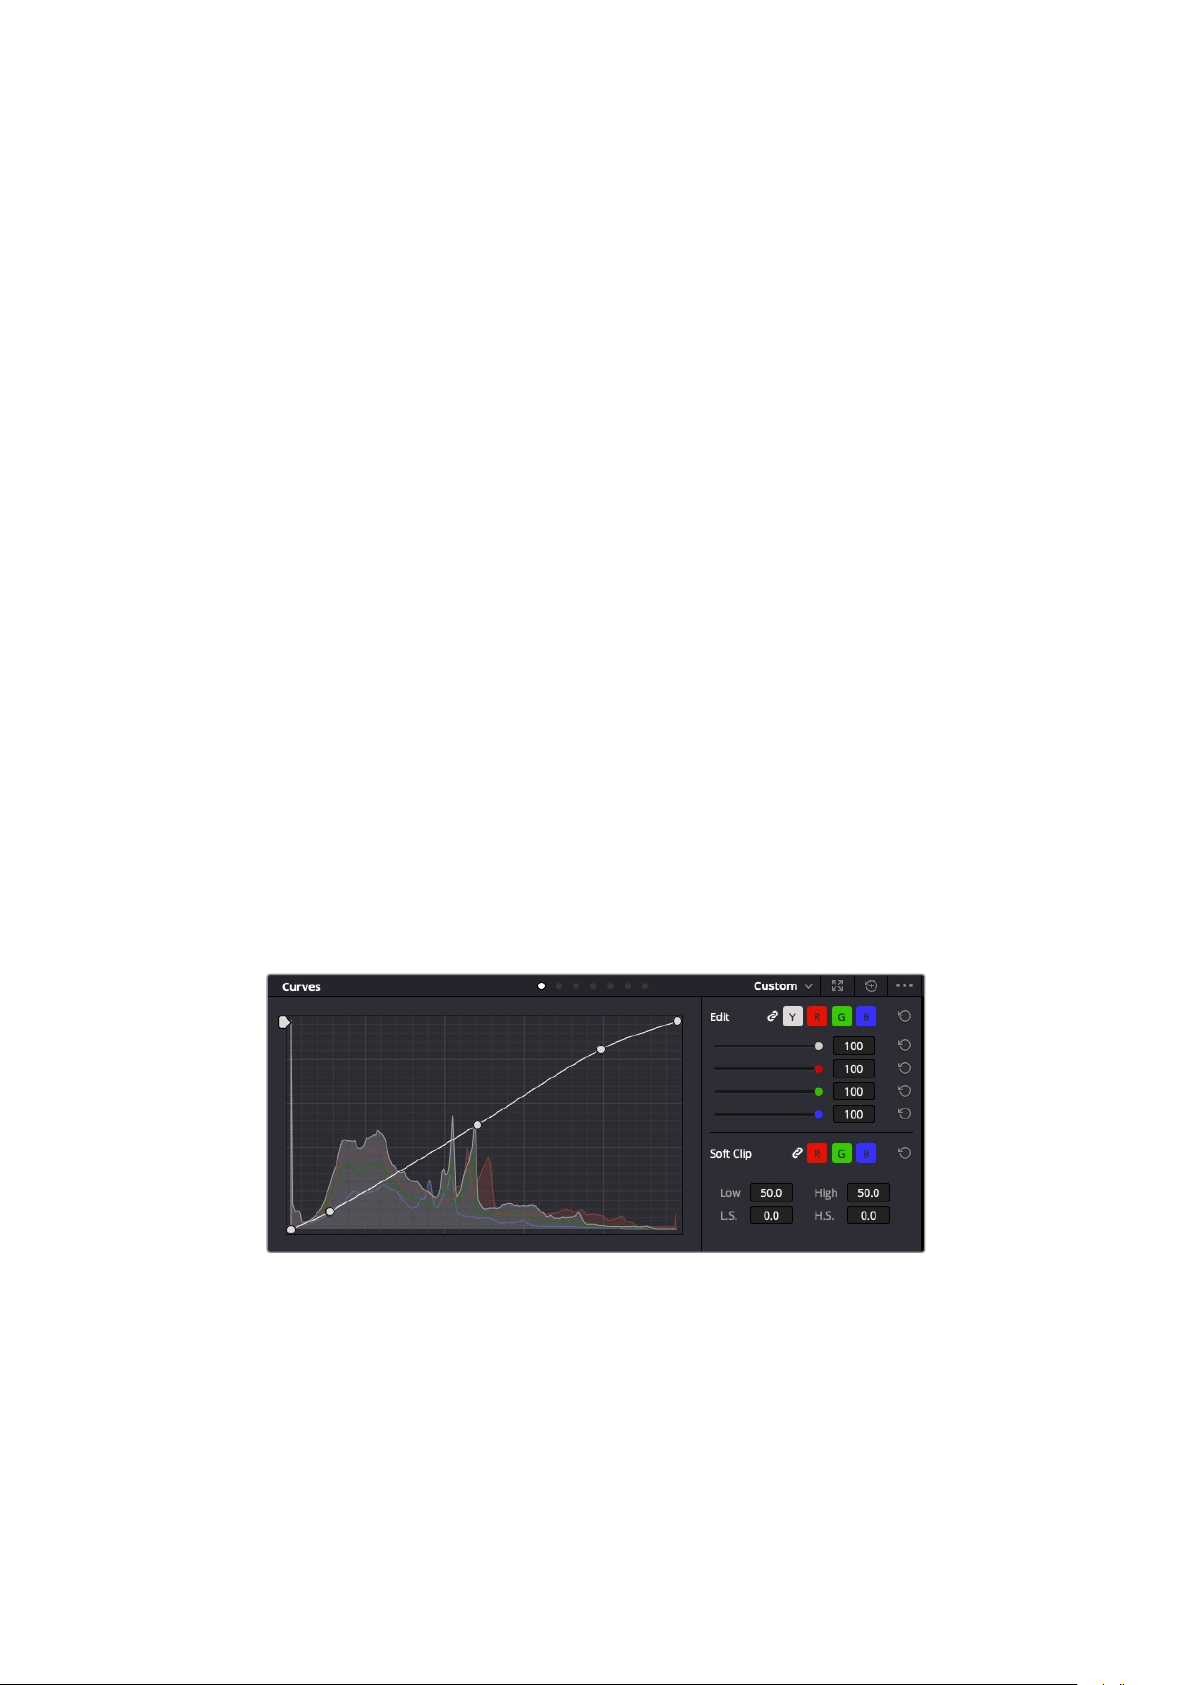
You can also use the curves palette to make primary color corrections. Simply click to create
control points on the diagonal line inside the curve graph, and drag them up or down to adjust
the master RGB contrast at different areas of image tonality. The optimum points to adjust are
the bottom third, mid, and top third of the curve line.
There are many more ways of doing primary color correction in DaVinci Resolve.
The curves palette is another tool you can use to make primary color corrections,
or enhance specific areas of your clip when using a power window
Secondary Color Correction
If you want to adjust a specific part of your image then you need to use secondary corrections.
The adjustments you have been doing up until now using the lift, gamma andgain adjustments
affect the whole image at the same time and so they are called primary color corrections.
230Using DaVinci Resolve
Loading ...
Loading ...
Loading ...