
Loading ...
Loading ...
Loading ...
Preparing the Blackmagic Studio Fiber Converter for installation into a rack:
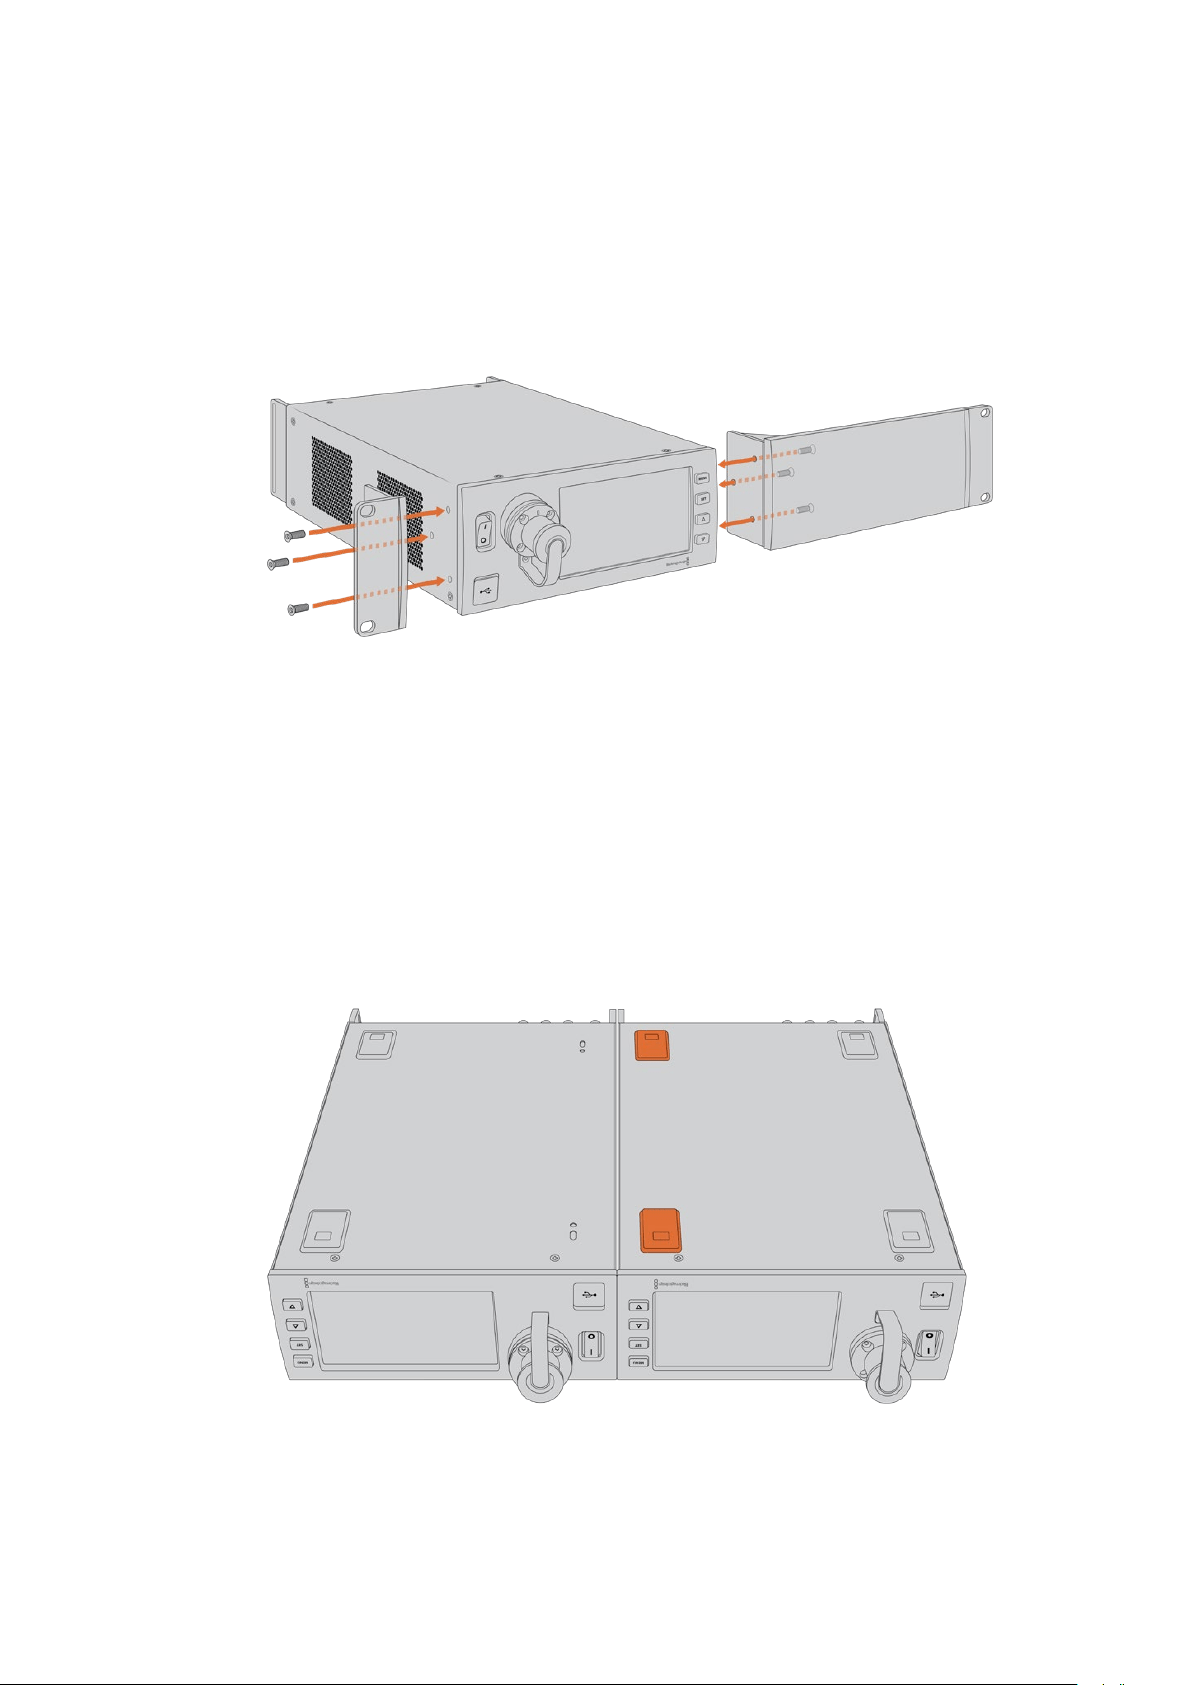
1 Position the blanking panel on one of the sides of your Studio Fiber Converter,
depending on whether you would like the unit to sit on the left or right side of the
rack shelf. The front face of the blanking panel should be parallel with the front panel
of the unit.
2 Attach the blanking panel to the side of your Studio Fiber Converter near the front
using three of the supplied blanking panel screws.
3 Use three of the supplied rack ear screws to attach a rack ear to the other side of your
Studio Fiber Converter.
With the rack ear and blanking panel attached, you can now install your converter into
astandard two rack unit space using the mounting holes on both sides and standard
rack screws.
Preparing two Blackmagic Studio Fiber Converters for side by side installation into a rack:
If you are mounting two converters side by side, you can attach them to each other using
support brackets which secures them together so you can mount them more easily.
To secure the two units:
1 Turn the two converters over so that they are upside down and placed side by side.
Remove two rubber feet from the edges of each converter where they meet.
2 Attach the two supplied T-shaped support brackets to the base of the two Studio
Fiber units at the front and the back where the two units meet, using the screw holes
provided and the supplied support bracket screws.
178Operating the Studio Fiber Converter
Loading ...
Loading ...
Loading ...