Loading ...
Loading ...
Loading ...
86
Editing a Stitch Pattern
Basic Layout & Editing Operations
3 Move the slider to select the desired
sensitivity. Click [OK].
The stitch pattern is converted to grouped
shape patterns. Being converted to shape
patterns, the outlines of the stitch pattern
can be edited.
cc For details see the following instructions;
"Setting the sew type" on page 57
"Specifying sewing attributes" on
page 64
"Reshaping Embroidery Patterns" on
page 76
"Specifying the straight sewing direction"
on page 59
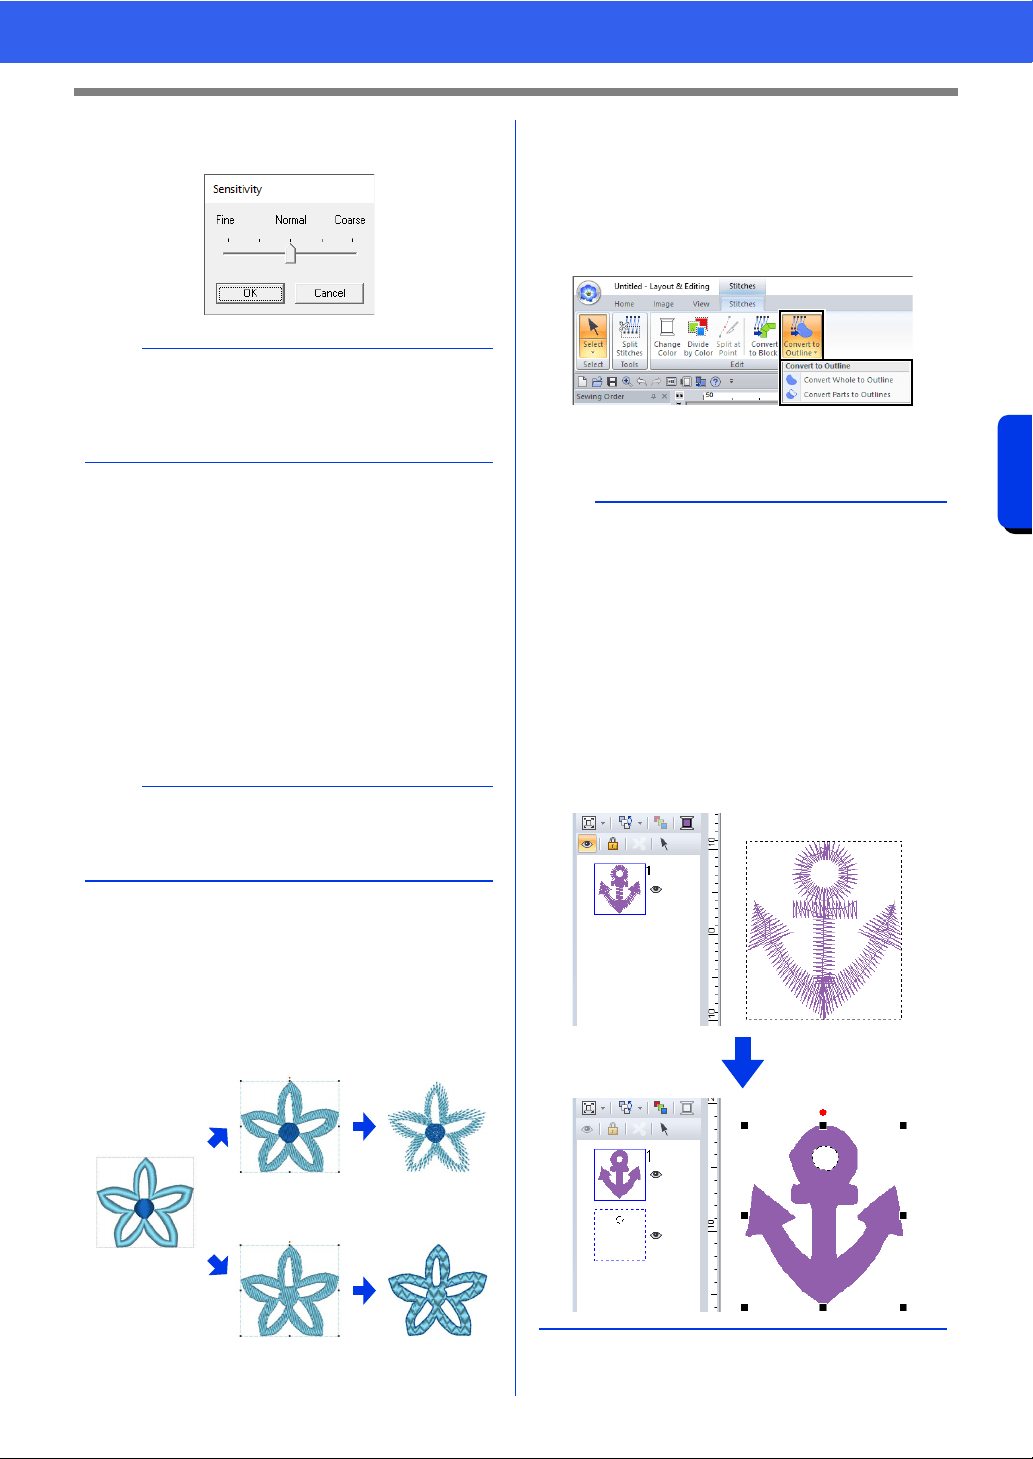
■ Converting stitch pattern to
outline pattern
Outline patterns can be created from each color in a
stitch pattern or from an outline around the entire
pattern.
1 Convert Whole to Outline
2 Convert Parts to Outlines
1 Select the stitch pattern(s).
2 Click the [Stitches] tab.
3 Click [Convert to Outline] in the [Edit] group,
and then click [Convert Whole to Outline] or
[Convert Parts to Outlines].
The outline patterns are created, and the
original stitch patterns are deleted.
b
The [Normal] setting should provide satisfactory
results in most cases, but depending on the
complexity of the pattern, you may need to select
a setting more towards [Coarse] or [Fine].
a
The [Convert to Blocks] command cannot be
used with some stitch pattern imported from
original cards.
1
2
b
• Line sewing in the created outline patterns is set
to [Not Sewn (Line)], and region sewing is set
to [Fill Stitch].
•If the [Convert Whole to Outline] command is
selected, the thread color will be set to the first
thread color in the sewing order for the original
stitch pattern.
• If multiple outline patterns are created from a
single stitch pattern, the outline patterns are
grouped.
• If there is an opening (area with no stitching, but
surrounded by stitching) in the original stitch
pattern, hole sewing may be applied.
Loading ...
Loading ...
Loading ...