Loading ...
Loading ...
Loading ...
21
Basic Software Settings
Introduction
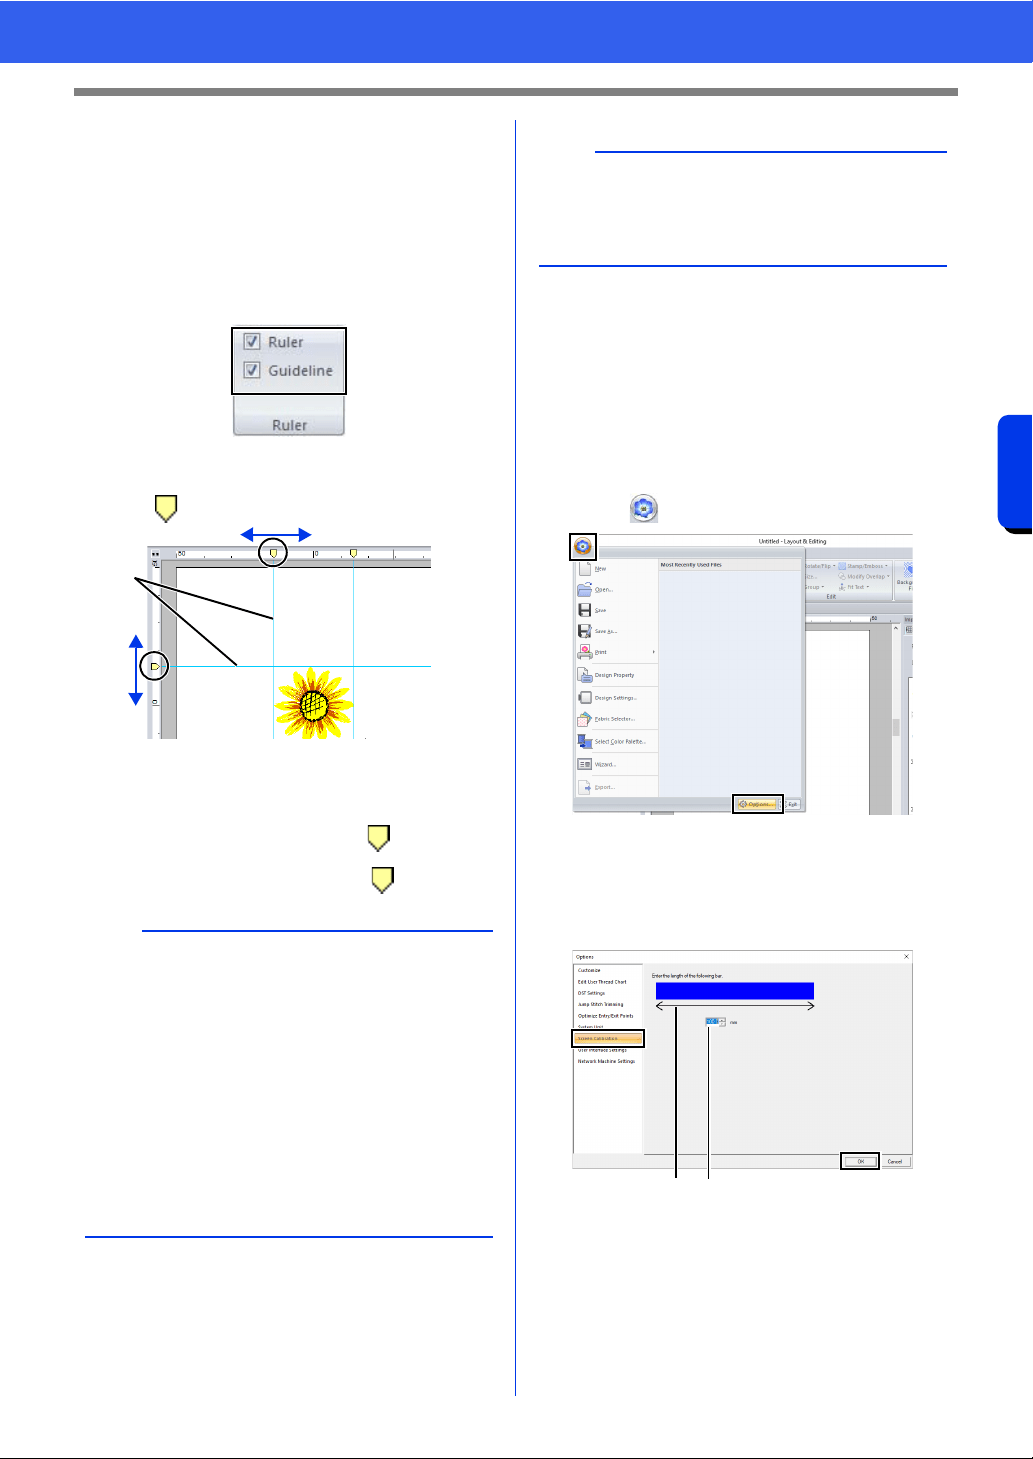
■ Changing the guideline settings
Guidelines can also be used when the ruler is
displayed.
1 Click the [View] tab.
2 Select the [Ruler] check box, and then select
the [Guideline] check box in the [Ruler]
group.
3 Click a ruler in the Design Page.
appears, and a guideline is drawn.
1 Guideline
• To move a guideline, drag .
• To delete a guideline, click .
■ Adjusting on-screen
measurements (Screen
Calibration)
Measurements can be adjusted so that objects will
be displayed at the same size as the actual
embroidery at a zoom ratio of 100%. Once this
adjustment is made, it will not need to be done again
later.
1 Click , then [Options].
2 Click [Screen Calibration]. Hold a ruler
against the screen to measure the length of
a. Next, enter the value at b, and then click
[OK].
Be sure to enter the length in millimeters. A
value in inches is invalid.
b
• A guideline is added each time the ruler is
clicked. In addition, up to 100 guidelines each
can be added to the horizontal and vertical
rulers.
• While a guideline is being dragged, its position is
shown in the status bar.
• When the [Ruler] check box or the [Guideline]
check box is cleared, the guidelines are hidden.
• If both the [Show Grid] and [Snap to Grid]
check boxes are selected, the guidelines will be
added/moved along the lines of the grid.
cc "Changing the grid settings" on page 20
1
b
When a pattern is saved, the guidelines are saved
with it. However, the guidelines are deleted if the
pattern is saved in a format for a version earlier
than version 10.
ab
Loading ...
Loading ...
Loading ...