Loading ...
Loading ...
Loading ...
207
Operations for Specific Applications
Tutorial 10-2: Creating Design for Multi-Position Hoops
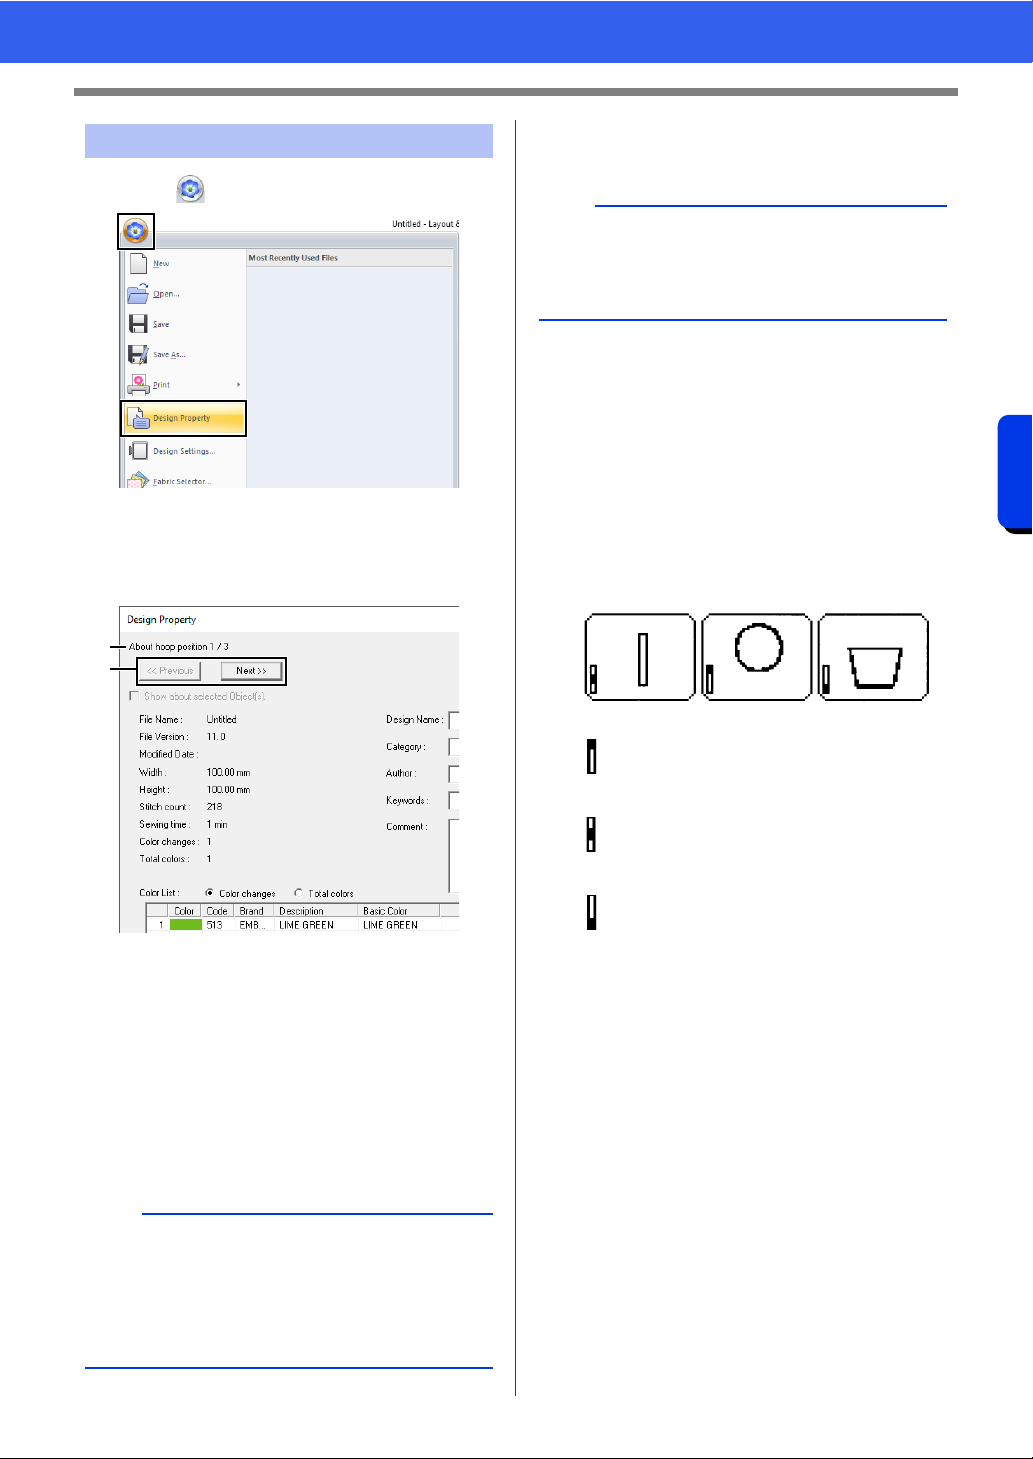
1 Click , then [Design Property].
2 Check the sewing order of each pattern and
the number of times the hoop position will be
changed.
Only the patterns that would be sewn at the
current position in the hoop installation order
appear in the Design Page, and the
embroidering area for the current hoop
position is outlined in red.
a The position in the hoop installation order
for the currently displayed pattern.
b To display information for patterns at
other positions in the hoop installation
order, click [Previous] or [Next].
■ Saving the design
The entire design is saved as a single file (.pes).
■ Writing the design to an original
card
A design for a multi-position hoop is created by
considering the pattern in each hoop installation
position as one pattern, then combining them.
Therefore, when this type of design is written to an
original card, one multi-position hoop design is
saved as a combination of multiple patterns.
Therefore, the frame installation position sewing
order for the pattern shown above is b, a, then c.
Step 4 Checking the pattern
a
If a pattern is larger than the embroidery area or if
a pattern is positioned so that it does not
completely fit within an embroidery area, the error
message appears. After the pattern causing the
error is displayed, select the pattern and change
its size or position.
a
b
b
If the file size or the number of color changes is
larger than the specified number, or if one of the
patterns does not completely fit within an
embroidery area, the error message appears.
: This pattern is sewn when the hoop is
installed at the top installation position
(position a).
: This pattern is sewn when the hoop is
installed at the middle installation
position (position b).
: This pattern is sewn when the hoop is
installed at the bottom installation
position (position c).
Loading ...
Loading ...
Loading ...