Loading ...
Loading ...
Loading ...
58
Specifying Thread Colors and Sew Types for Lines and Regions
Basic Layout & Editing Operations
■ Moving the entry/exit points
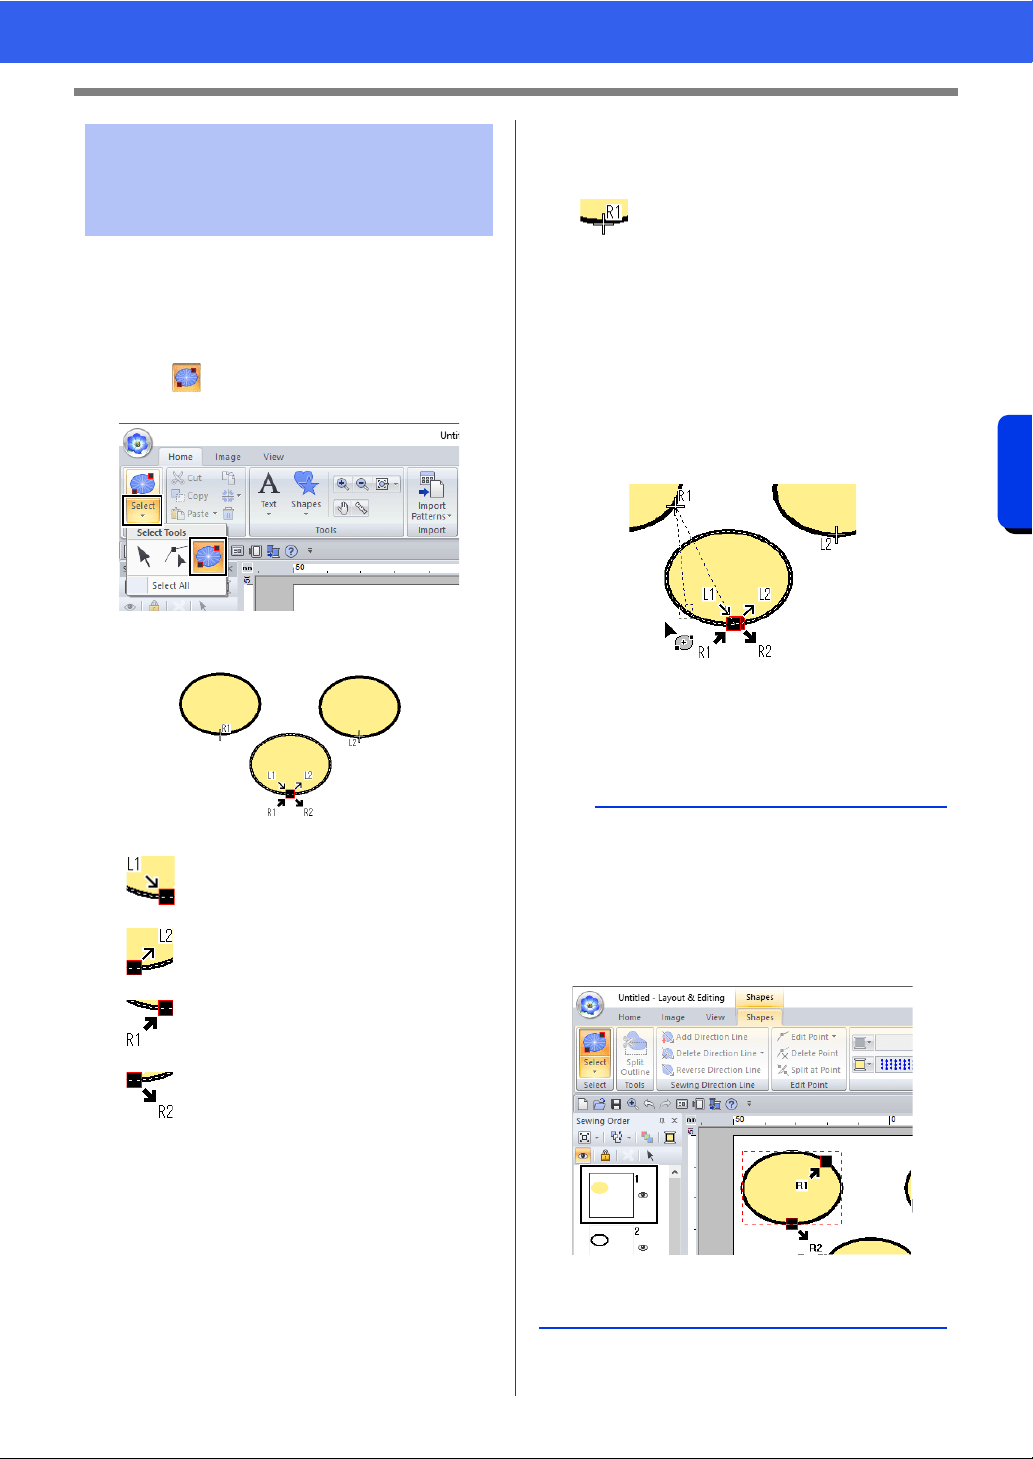
1 Click the [Home] tab.
2 Click [Select] in the [Select] group, and then
click to select the Select Entry/Exit Point
tool.
3 Click the object.
4 Drag the arrow for the point to the desired
location on the outline.
A dotted line appears between the entry (or
exit) point being moved and the cross
indicating the exit (or entry) point of the
previous (or next) pattern.
Moving entry/exit points,
the center point and stitch
pattern reference point
This is the entry point for the outline
stitching. The previous pattern is
connected to this point.
This is the exit point for the outline
stitching. Stitching continues from this
point to the next pattern.
This is the entry point for the inside
region stitching. The previous pattern is
connected to this point.
This is the exit point for the inside
region stitching. Stitching continues
from this point to the next pattern.
The codes that appear indicate the following.
L: Line sewing R: Region sewing
1: Entry point 2: Exit point
This is the entry (or exit) point for the
next (or previous) pattern that is
connected to the exit (or entry) point of
the currently selected pattern.
This point is connected to the entry/exit
point with the same code in the
currently selected pattern. In this
example, R1 in the currently selected
pattern and R1 in the previous pattern
are connected.
b
• If the outline or the inside region are set to not be
sewn, the corresponding point does not appear.
• The entry and exit points can be checked in the
[Sewing Order] pane. Select the Select Entry/
Exit Point tool, and then click a frame in the
[Sewing Order] pane. The entry and exit points
of the selected pattern appear.
• In this case, finish the operation by clicking a
blank area in the [Sewing Order] pane.
Loading ...
Loading ...
Loading ...