Loading ...
Loading ...
Loading ...
185
Operations for Specific Applications
Tutorial 9-2: Creating Embroidered Patches
1 Select all patterns, and then click the [Home]
tab.
2 Click [Embroidered Patch] in the [Wizards]
group to start the [Embroidered Patch
Wizard].
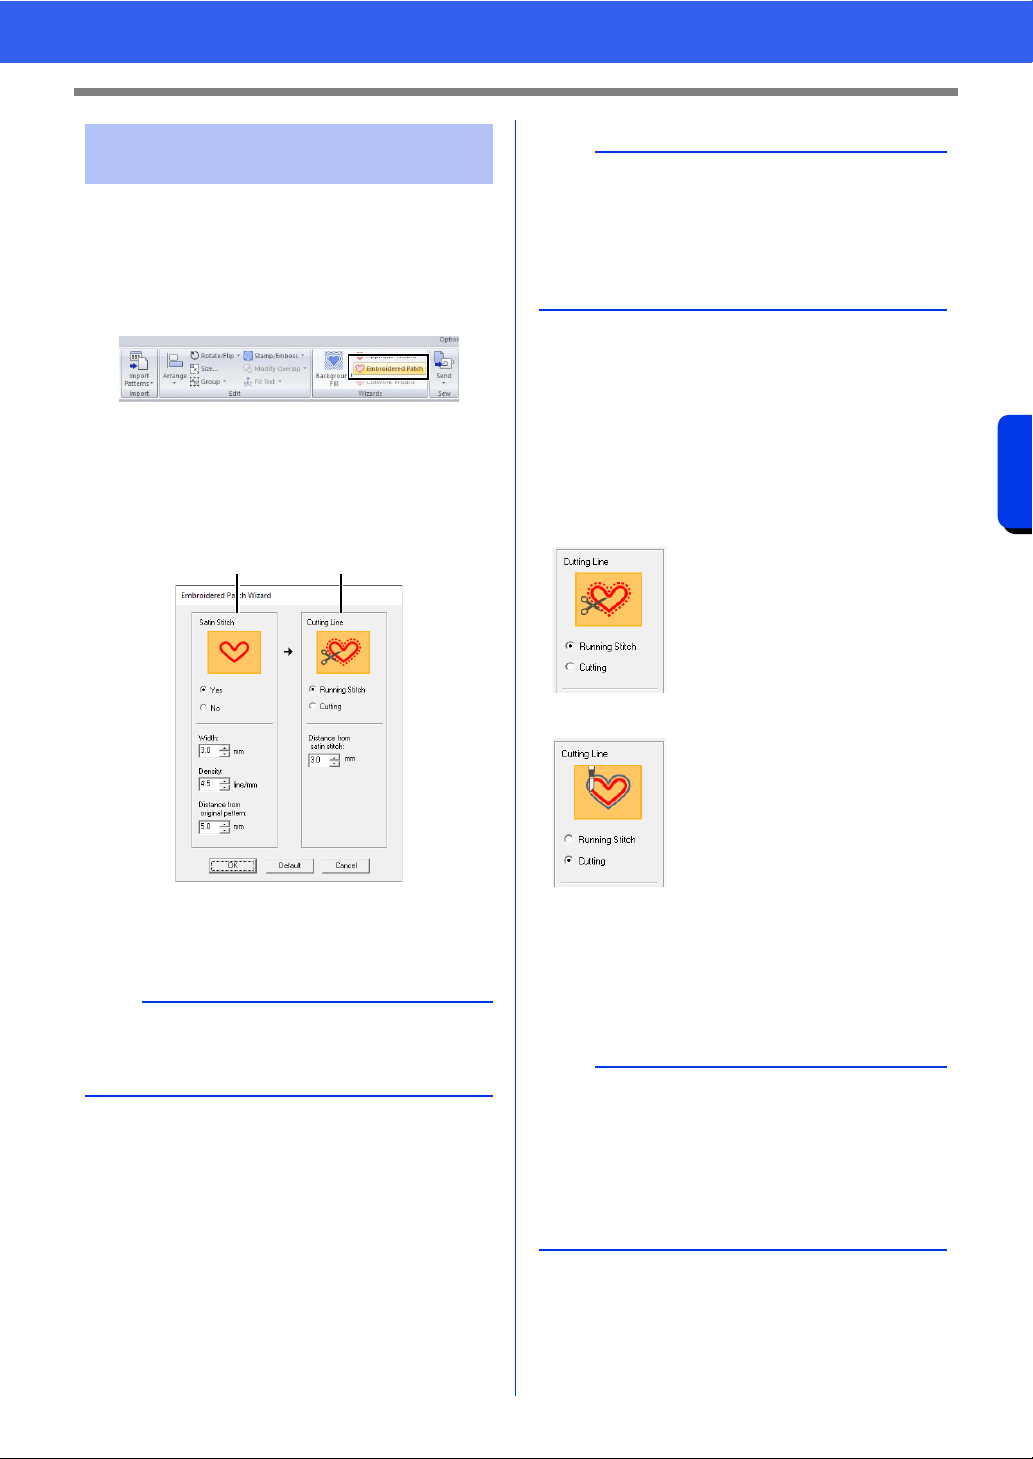
3 Specify settings in the [Embroidered Patch
Wizard] dialog box in the following order
a -
b .
a Satin Stitch
b Cutting Line
4 Under [Satin Stitch], specify a border for the
embroidered patch.
For this example, select [Yes], and then set
[Width] to "3.0 mm", [Density] to "4.5 line/
mm" and [Distance from original Pattern]
to "5.0 mm".
5 Under [Cutting Line], specify the cutting lines
for the embroidered patch.
The cutting line of the embroidered patch can
be sewn as running stitches or the
embroidered patch can be cut out.
For this example, select [Running Stitch],
and then set [Distance from satin stitch]
to "3.0 mm".
6 Click [OK] to exit the [Embroidered Patch
Wizard] dialog box.
Step 2 Using the Embroidered
Patch Wizard
b
To return all parameters in the [Embroidered
Patch Wizard] to their default settings, click
[Default].
ab
a
• [Width], [Density] and [Distance from original
Pattern] will be available if [Yes] has been
selected.
•Use [Distance from original Pattern] to specify
the distance between the original pattern and
the border.
Running Stitch
Select this setting to sew the
cutting line, then cut along
the cutting line with scissors.
Cutting
In order for this setting to be
available
cc "Basic requirements for
Cutwork functions" on
page 191
Select this setting to cut the
fabric with a machine
installed with cutwork
needles.
b
• When [Cutting] is selected under [Cutting
Line], uncut sections will remain in the cutting
lines created with the Embroidered Patch
Wizard. Be sure to cut them with scissors after
embroidering is finished.
• The thread color of the satin stitching is the color
currently specified in the Design Page.
Loading ...
Loading ...
Loading ...