Loading ...
Loading ...
Loading ...
198
Operations for Specific Applications
Tutorial 10-1: Creating Split Embroidery Designs
5 Place the positioning sheet on the fabric.
Align points A and B on the positioning sheet
with marks d and c on the fabric, and then
repeat steps
2 and 3 to draw reference lines
on the fabric for an embroidering position
below the first one.
6 Repeat steps 4 through 5 to reposition the
positioning sheet and draw the embroidering
position for each section of the embroidery
pattern.
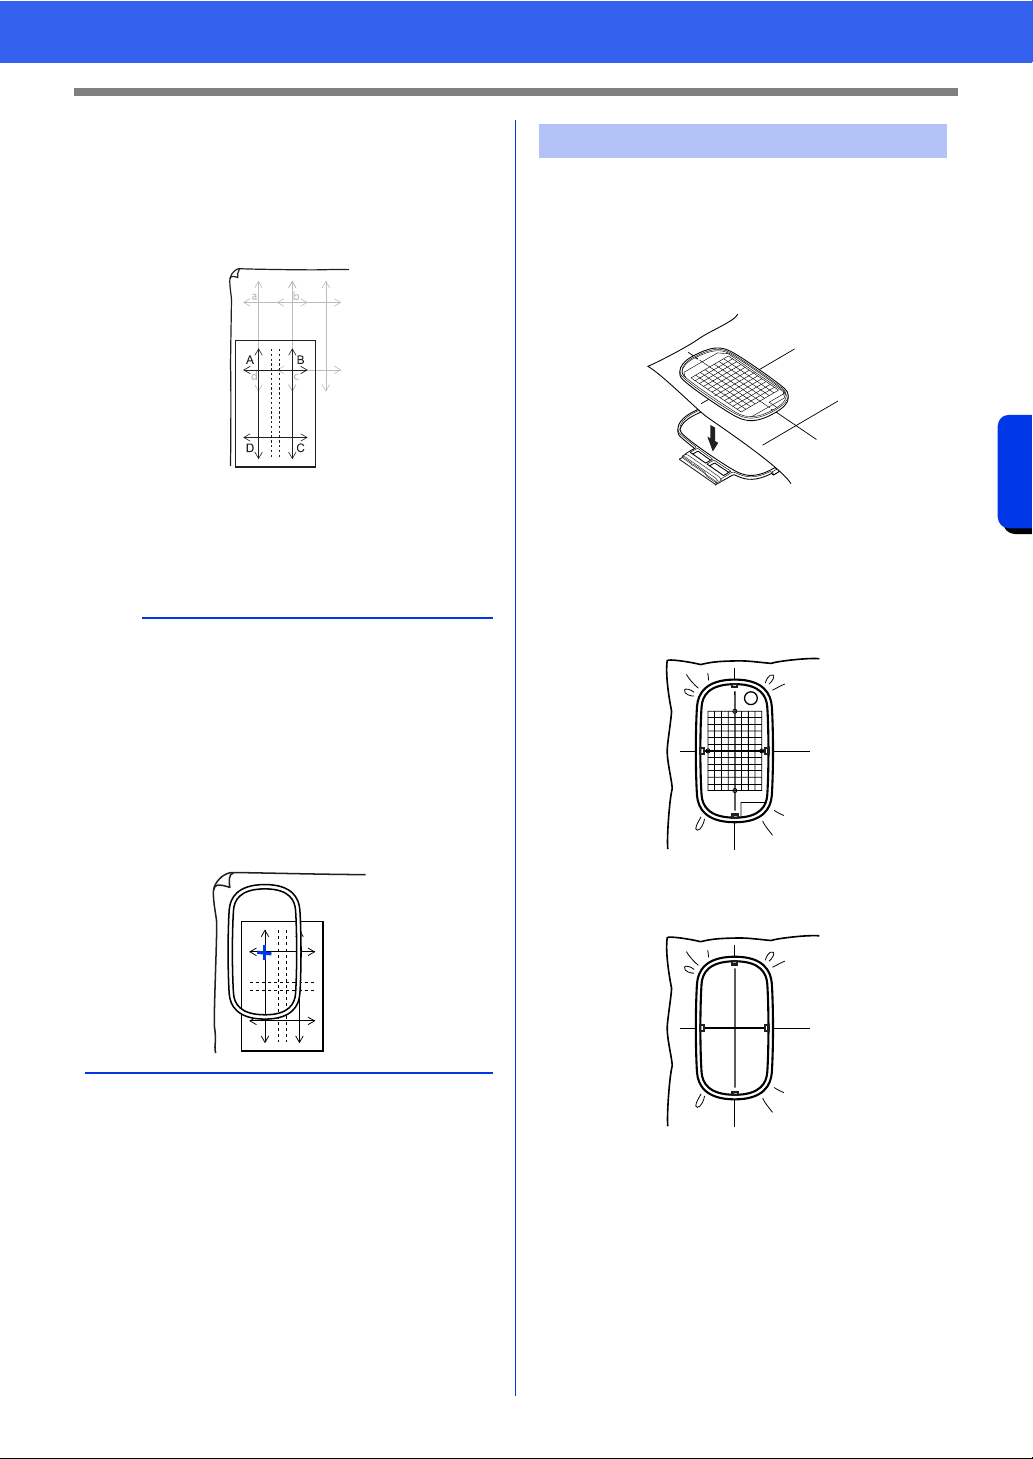
1 Insert the embroidery sheet into the inner ring
of the embroidery hoop, and then place them
on top of the fabric with the centerline on the
embroidery sheet aligned with the reference
lines (drawn on the fabric) for the first pattern
section to be sewn.
2 Keeping the reference lines on the embroidery
sheet aligned with the reference lines for the
first pattern section, place the fabric and inner
ring of the embroidery hoop into the outer ring
of the hoop, and then pull the fabric so that it
is tight.
3 Finish hooping the fabric, and then remove the
embroidery sheet.
a
• The intersection of the horizontal and vertical
line indicates the center of the embroidery hoop.
• While carefully considering how the fabric will be
hooped, place the positioning sheet on the
fabric, and then draw lines to indicate the
embroidering position. In addition, because all
embroidery areas are not drawn on the
positioning sheet for large embroidery hoops, be
careful that the embroidery area does not extend
from the marked area on the fabric as shown
below.
Step 6 Hooping the fabric
Loading ...
Loading ...
Loading ...