Loading ...
Loading ...
Loading ...
148
Creating Embroidery Patterns Using Images
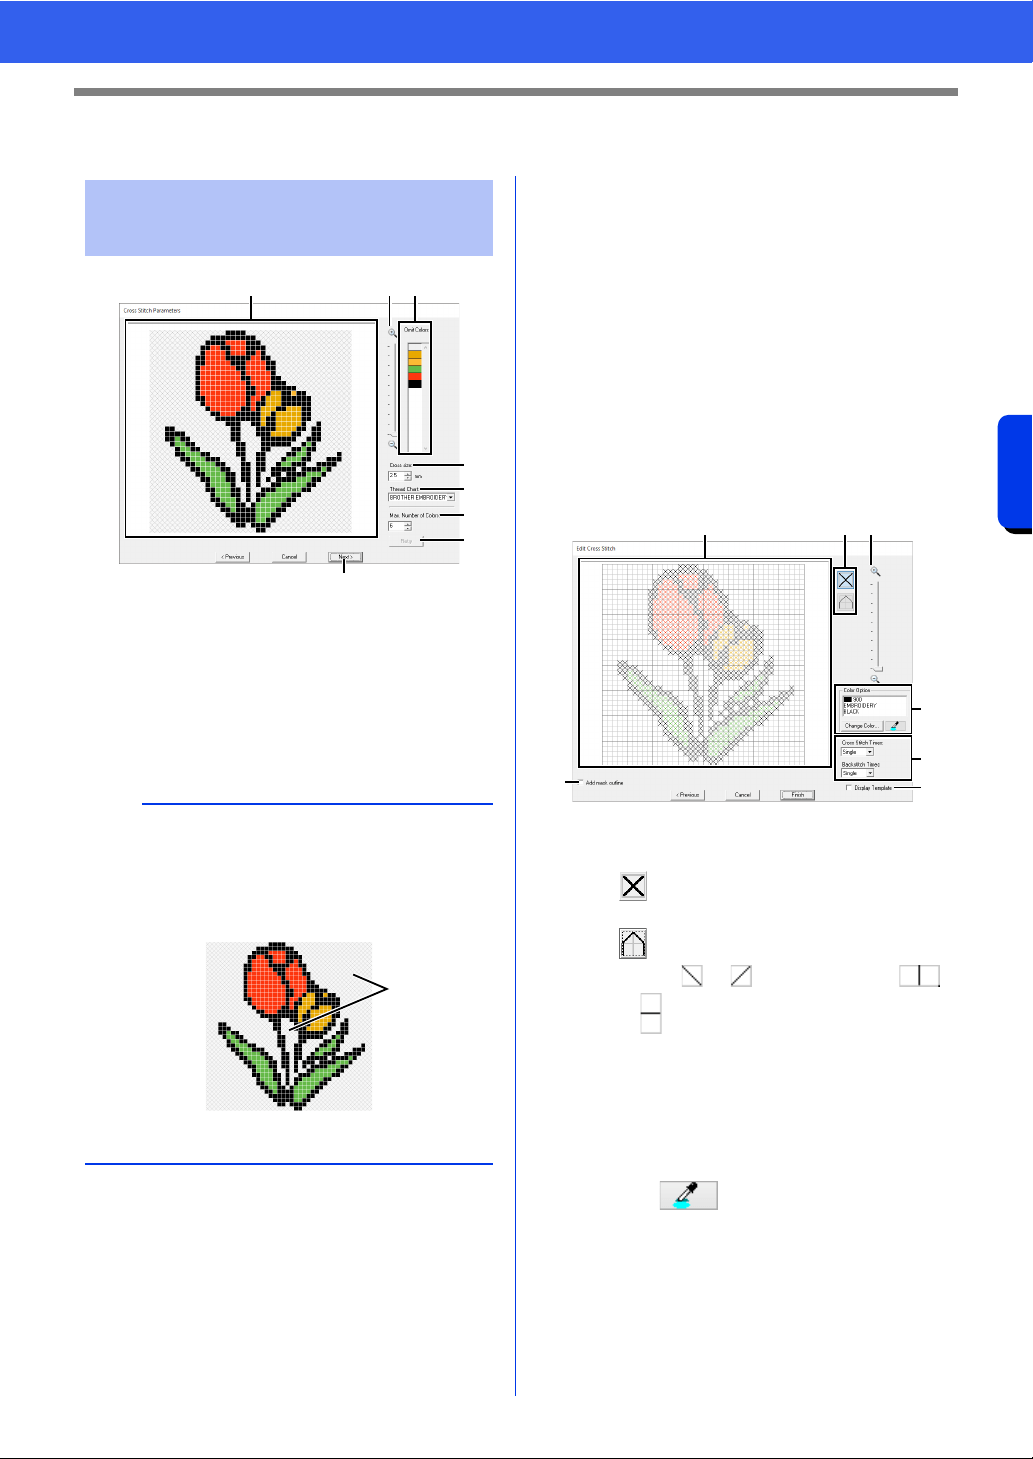
Cross Stitch Features
Cross Stitch Features
a Result View
Areas that will not be converted to cross-
stitching are shown with a crosshatch
pattern.
b Omit Colors
In the Omit Colors list, click the colors to
select whether or not they will be sewn.
c Zoom
d Cross size
Sets the size of the pattern.
e Thread Chart
You can select the brand of thread to use
in the created cross stitch pattern.
f Max. Number of Colors
Sets the number of colors used in the
created pattern.
g Retry
To view the results of the changes, click
this button.
h Next
Continues to the next step ([Edit Cross
Stitch] dialog box).
■ Edit Cross Stitch dialog box
Click a button in a to select the type of stitch,
select a thread color in
b , and then click or
drag in
c to edit the stitches.
a Selecting stitches
Selecting stitches to be added/deleted
(cross-stitches): Specifies a cross-
stitch inside a box.
(backstitches): Specifies a back stitch
inside ( or ) or on the edge (
or ) of a box.
b Color Option
To change the color, click [Change
Color] to display the [Thread Color]
dialog box, and then click the desired
color.
To select the color to be used for a stitch,
click , and then click the stitch to
be sewn with that color.
Cross Stitch Parameters
dialog box
b
• To select whether or not a part of the image is to
be sewn, click in the Result View box, or click in
the [Omit Colors] list.
• Areas filled with a crosshatch pattern in the
Result View box will not be sewn.
1 These areas will not be sewn.
a c b
d
e
f
g
h
1
cad
b
g
e
f
Loading ...
Loading ...
Loading ...