Loading ...
Loading ...
Loading ...
370
Supplement
Changing Various Settings
■ Adding jump stitch trimming to
new patterns
When creating a new embroidery pattern for our
multi-needle embroidery machines, you can specify
whether or not to add jump stitch trimming to the
pattern.
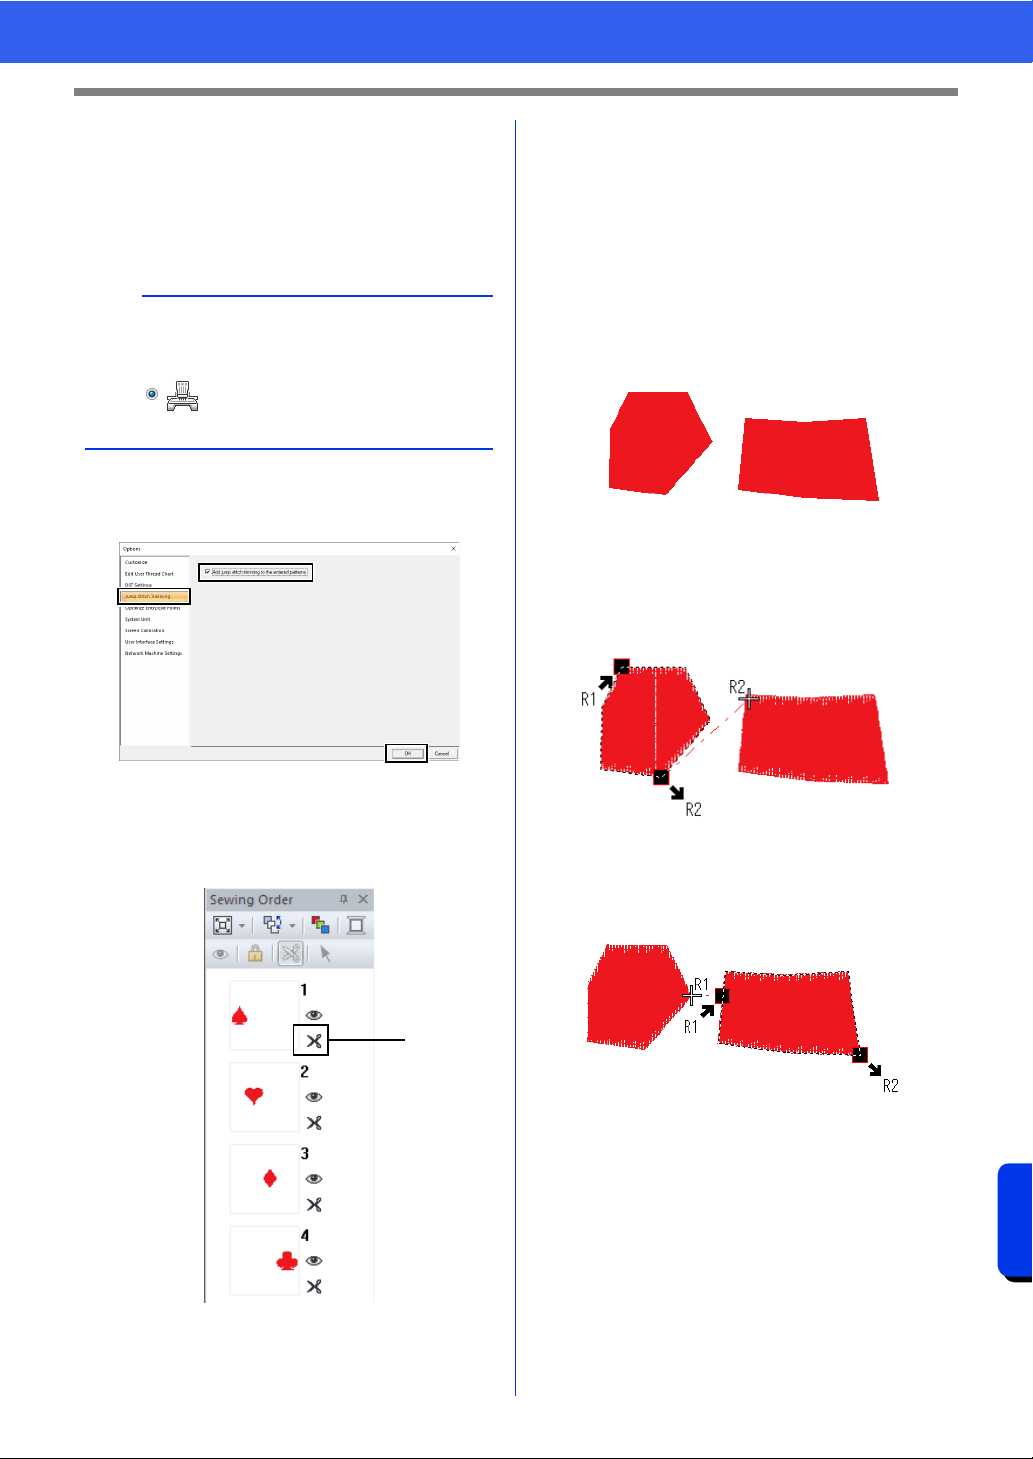
Click [Jump Stitch Trimming] in the command list,
select the [Add jump stitch trimming to the
entered patterns.] check box, and then click [OK].
When the check box is selected, scissors
icon appear beside the frames to indicate
jump stitch trimmings are applied.
1 Scissors icon
■ Optimize Entry/Exit Points
When data for multiple regions is created with a
[Shapes] tool, the exit and entry points between
regions of the same color can be automatically
optimized.
Click [Optimize Entry/Exit Points] in the command
list, select the [Optimize Entry/Exit Points.] check
box, and then click [OK].
If data is created by clicking in the order shown
below:
When the check box is cleared
The entry and exit points are set based on the order
that the data was entered.
When the check box is selected
The entry and exit points are set where a straight
line connecting the regions will be the shortest.
■ Changing the system unit
For detailed instructions, see "System unit" on
page 22.
■ Adjusting the screen calibration
For detailed instructions, see "Adjusting on-screen
measurements (Screen Calibration)" on page 21
a
These settings are applied only when
embroidering with our multi-needle embroidery
machines. Before these settings can be specified,
select under [Machine Type] in the
[Design Settings] dialog box.
1
1
2
3
4
5
6
7
8
9
0
A
B
Loading ...
Loading ...
Loading ...