Loading ...
Loading ...
Loading ...
328
Font Creator
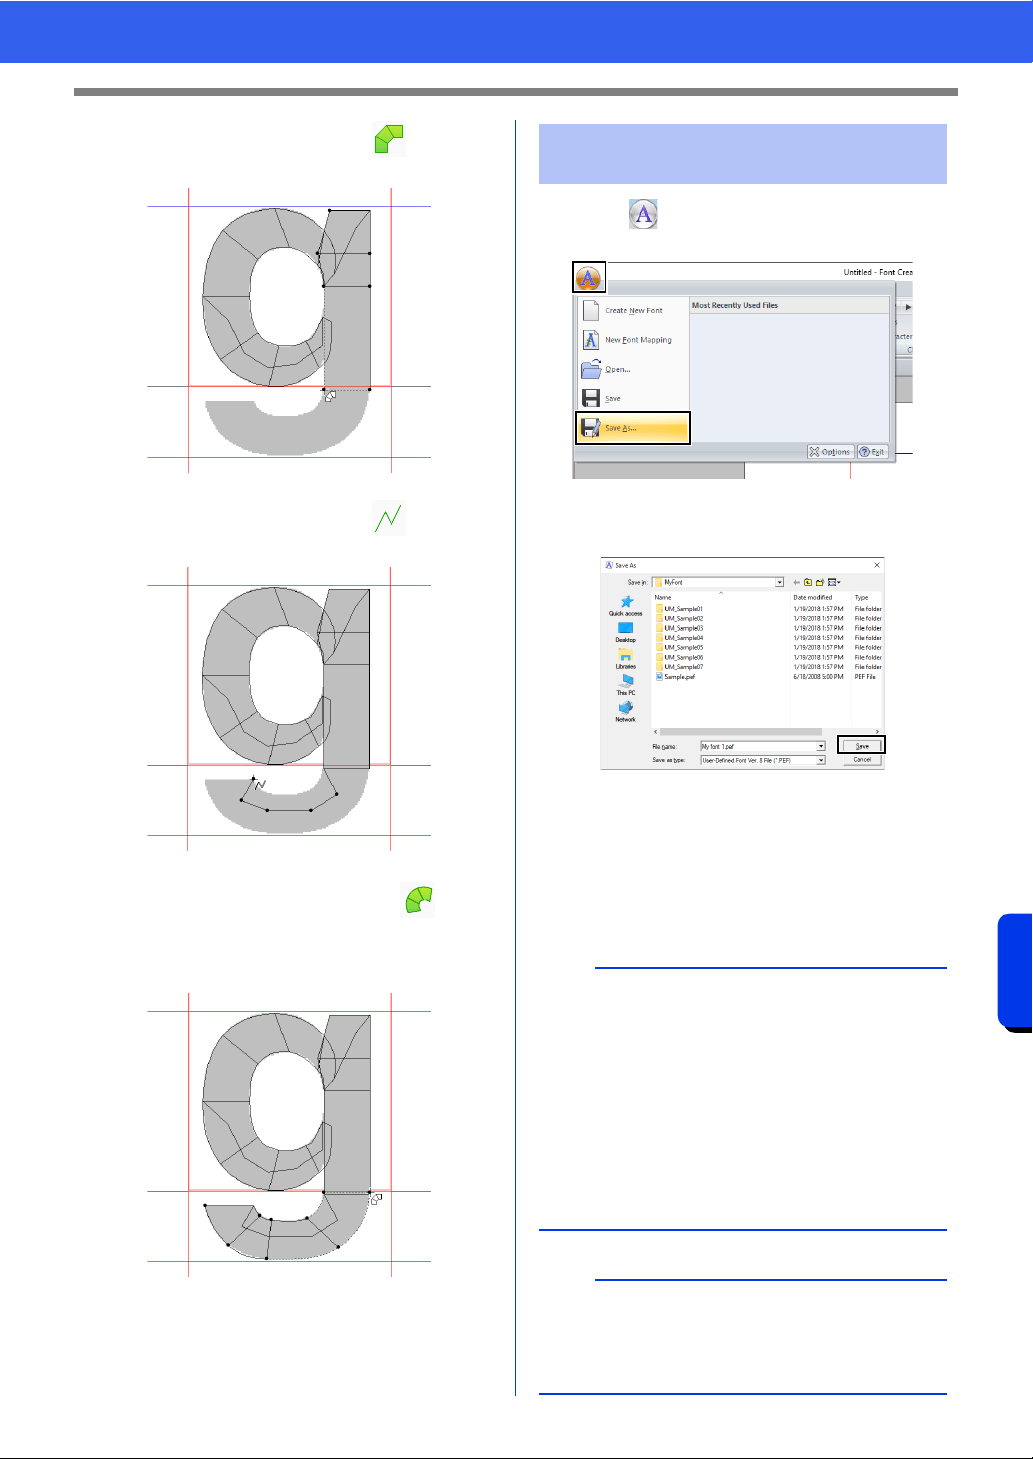
Creating New Font Characters From Background Images
9 Click [Manual Punch], select , and then
click points (27) through (33).
10 Click [Manual Punch], select , and then
click points (34) through (38).
11 Click [Manual Punch] and select . Next,
click points (39) through (46), and then
double-click point (47) (end point), or click
point (47) and press the <Enter> key.
1 Click , and then select [Save As] from the
command list.
2 Select the [MyFont] folder at the following
location.
For example, (Drive where PE-DESIGN was
installed)\Program Files (x86)\Brother\PE-
DESIGN 11\MyFont.
And then type in the file name. For this
example, type in the name "My font 1".
Click [Save].
27
28
29
3031
3233
38
37
36
35
34
39
41
40
42
43
44
47
46
45
Step 5 Save the font character
pattern
a
• The created font is saved in the [MyFont] folder
at the following location.
For example, (Drive where PE-DESIGN was
installed)\Program Files (x86)\Brother\PE-
DESIGN 11\MyFont.
• The font will not be usable in the Layout &
Editing if it's stored in a different folder.
• If any part of the character pattern extends off
the Design Page, a message appears. Edit the
character pattern so that no part extends off the
Design Page, and then save it again.
b
If the background image is displayed, the
information for the background image will be
saved with the font file. The next time that the font
file is opened, the background image is displayed.
Loading ...
Loading ...
Loading ...