Loading ...
Loading ...
Loading ...
154
Creating Embroidery Patterns Using Images
Photo Stitch 1 Features
b Sewing Option
c Brightness / Contrast
d Update Preview
Update the previewed image after settings have
been changed.
Detail
Selecting a setting closer to [Fine]
creates more details in the pattern and
increases the number of stitches. (The
stitches will be overlapping.)
Run Pitch
When the value is lowered, the sewing
pitch (stitch length) will be shortened,
resulting in finer stitching.
Sew Page
Color
(Available
only with
Color, Sepia
and Gray)
If this check box is cleared, the parts of
the pattern that are the same color as
the Design Page will not be sewn.
If it is selected, those parts will be sewn.
Add mask
outline
If this check box is selected, line data is
created from the mask outline.
Others
Click this button to display the [Others]
dialog box, where the following settings
can be specified.
[Conversion Priority]:
To give priority to creating a pattern as
close to the original photograph, select
[Stitch Quality].
To give priority to reducing the number
of jump stitches, select [Jump Stitch
Reduction].
[Image Type]:
If [Photo] is selected, the thread colors
will be mixed together, which will result
in a more natural look.
If [Cartoon] is selected, the thread
colors will not be mixed together, which
will result in a more simply colored look.
Select [Photo] for image data from a
photograph, etc. Select [Cartoon] for
image data from an illustration, etc.
The top slider is used to adjust the brightness.
The bottom slider is used to adjust the contrast.
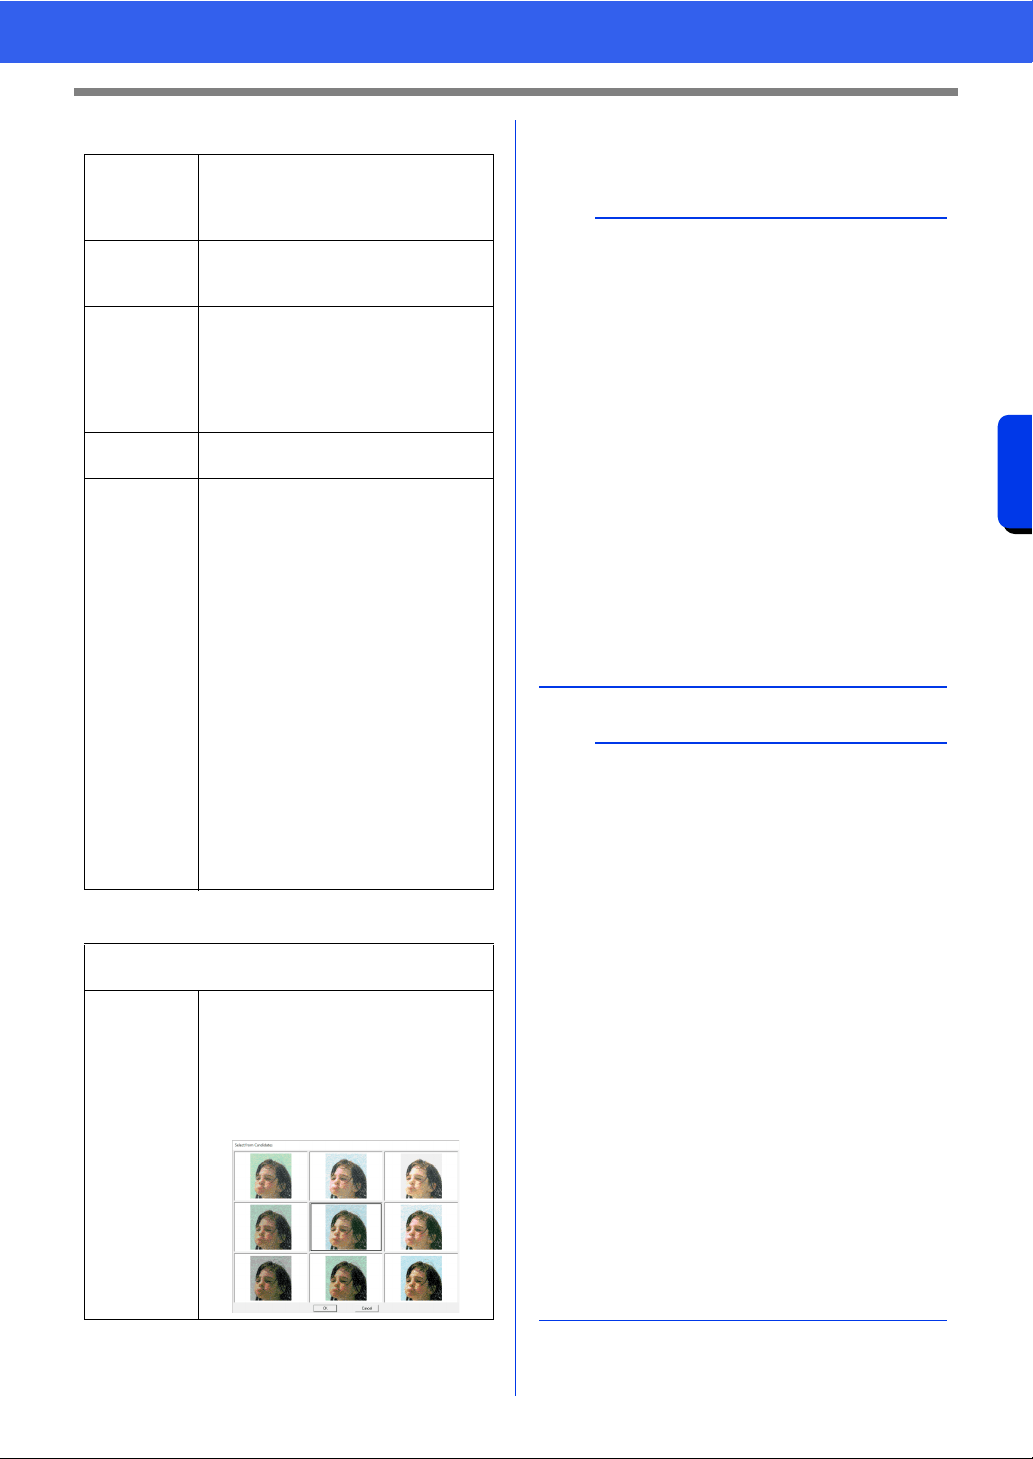
Select from
Candidates
The image can be automatically
adjusted.
Click this button to display nine patterns
with different brightness and contrast
levels based on the original image.
Select one of the candidates, and then
click [OK].
b
•If the [Auto Select] check box is selected, the
thread colors will be automatically selected from
the chart selected in the [Thread Chart]
selector. If thread colors are reserved, they will
included in the colors selected according to the
number specified in the [Number of Colors]
box.
If the [Auto Select] check box is cleared, the
settings in the [Thread Chart] selector and
[Number of Colors] box are not applied, and
only the thread colors in the current list of colors
used will be used to assign thread colors.
• When thread colors are added/deleted, the
[Auto Select] check box is cleared. To use
added thread colors and automatically select
other thread colors, select the [Auto Select]
check box, and then update.
• The thread colors in the list of colors used are
listed, in order, starting from the brightest. This
order is the sewing order and cannot be
changed.
b
Creating beautiful photo embroidery
• [Brother Chart (Photo Stitch)] in the [Thread
Chart] selector is a thread chart created to allow
you to preview, in colors nearest to the actual
embroidered thread colors, patterns using
Brother embroidery threads. This chart provides
a color scheme that best corresponds to your
expected result.
However, the colors may appear differently
depending on the computer environment. By
editing the colors to create a user thread chart
corresponding to the threads that you have, you
can create patterns while viewing them in colors
nearest to the actual threads that will be
embroidered.
cc "Editing user thread color lists" on page 213
• The following types of photos are not
appropriate for creating embroidery patterns.
Photos where the subject is small, such as in
photos of gatherings
Photos where the subject appears dark, such
as photos taken in a room or taken with
backlighting
• An image with a width and height between 300
and 500 dots is suitable.
Loading ...
Loading ...
Loading ...