Loading ...
Loading ...
Loading ...
200
Operations for Specific Applications
Tutorial 10-1: Creating Split Embroidery Designs
6 Continue hooping the fabric and embroidering
until the entire embroidery design is sewn.
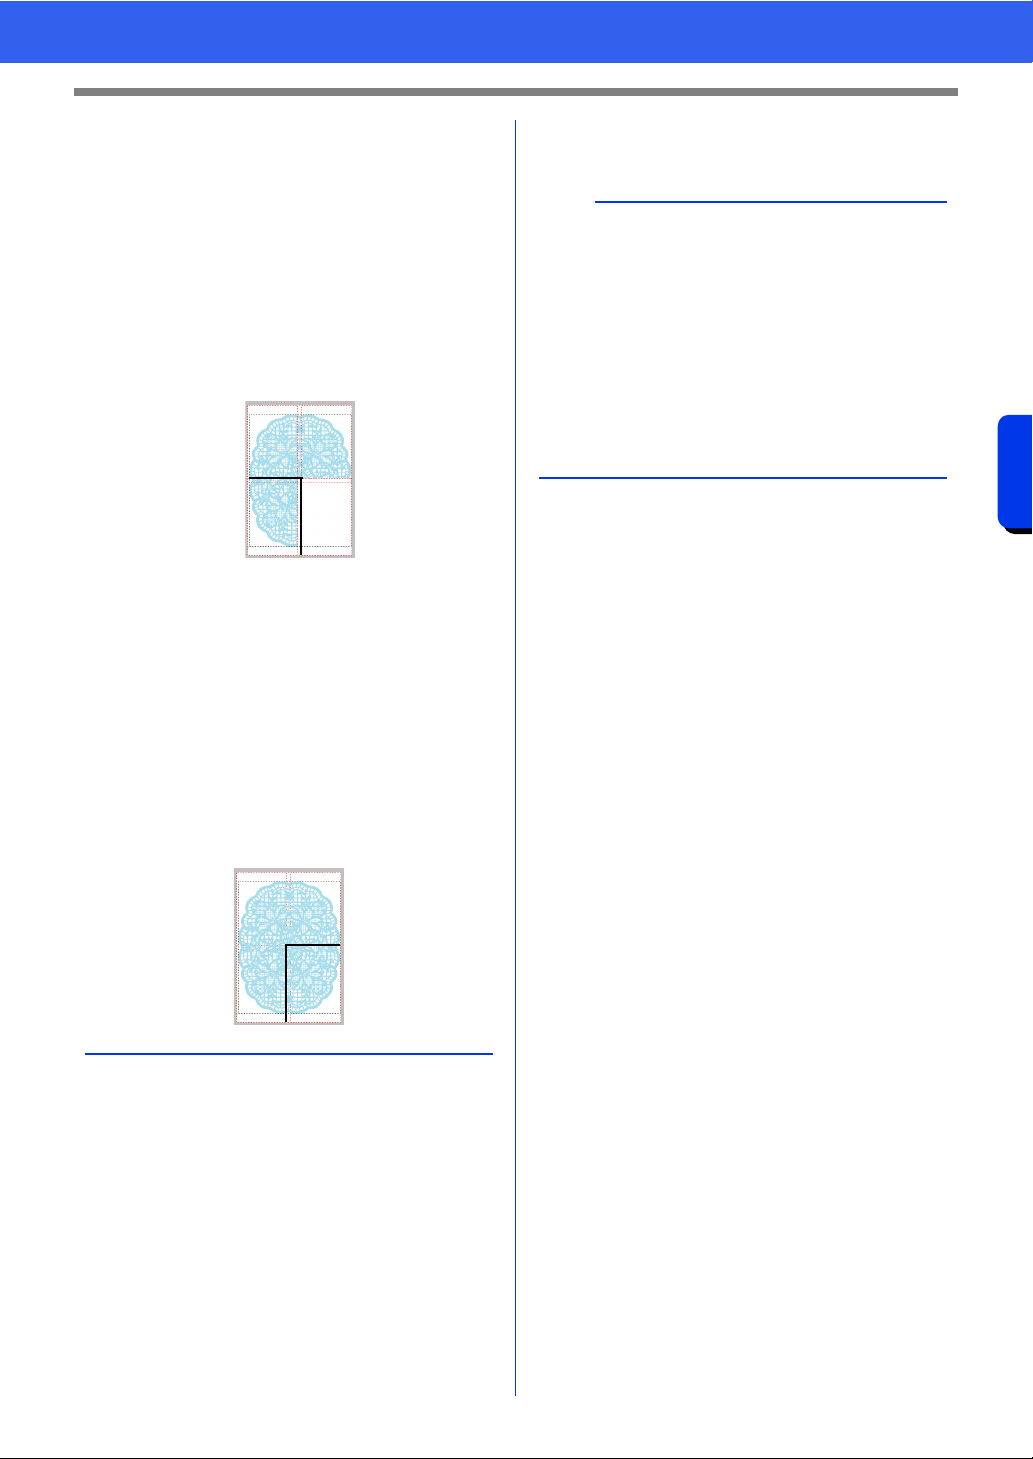
(3) Hoop the fabric for the lower-left design section
with the top of the hoop aligned on the
alignment stitching at the bottom of the design
section sewn in step (1), and then embroider
the design.
Before the design section is embroidered,
alignment stitching is sewn at the top.
Make sure that this alignment stitching
aligns with the alignment stitching sewn in
step (1). After the design section is
embroidered, alignment stitching is sewn
on the right side of the design section.
(4) Hoop the fabric for the lower-right design
section with the left side of the hoop aligned on
the alignment stitching on the right side of the
design section sewn in step (3) and with the top
of the hoop aligned on the alignment stitching
at the bottom of the design section sewn in
step (2), and then embroider the design.
Before the design section is embroidered,
alignment stitching is sewn on the left side
and at the top. Make sure that this
alignment stitching aligns with the
alignment stitching sewn in step (3) and in
step (2).
b
• The procedure is different for models that use a
built-in camera to connect large-size split
embroidery patterns.
• For models that use a built-in camera,
embroidery positioning stickers (Snowman
positioning stickers) can be used.
• For details, refer to the instruction manual
provided with the embroidery machine.
• By adjusting the size of the sections, patterns
can easily be connected.
cc "Changing the size of sections" on page 201
Loading ...
Loading ...
Loading ...