Loading ...
Loading ...
Loading ...
68
Specifying Thread Colors and Sew Types for Lines and Regions
Basic Layout & Editing Operations
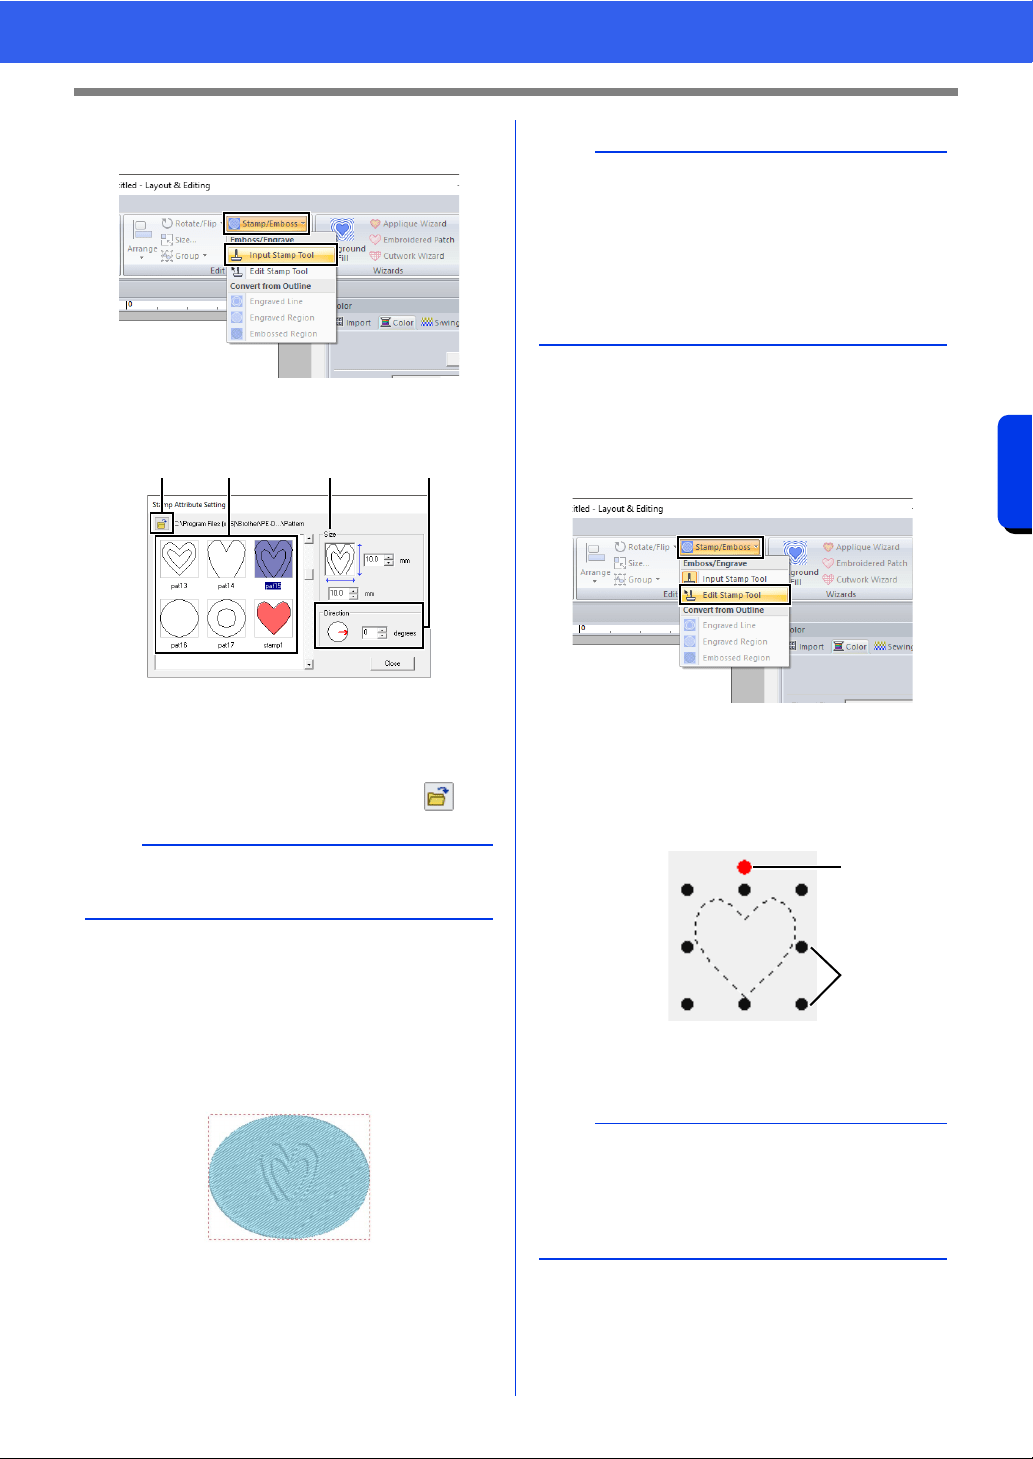
3 Click [Stamp/Emboss] in the [Edit] group,
and then click [Input Stamp Tool].
4 Select a stamp pattern (.pas file with stamp
settings applied).
a Select a stamp pattern.
b Specify the size of the stamp pattern.
c Specify the direction of the stamp pattern.
d To select a different folder, click .
5 Click the shape pattern drawn in step 1 to
select it.
"Marching lines" appear around the
selected shape pattern.
6 Click the desired locations within the shape
pattern.
You can preview the effect of the created
stamp in Realistic View.
■ Editing a stamp
1 Click the [Home] tab.
2 Click [Stamp/Emboss] in the [Edit] group,
and then click [Edit Stamp Tool].
3 Click the shape pattern with the stamp.
"Marching lines" appear around the
selected shape pattern.
4 Click the stamp.
1 Rotation handle
2 Scale handles
b
Engraving and embossing stamp settings appear
as red- and blue-filled areas.
abcd
b
• Stamps can be applied to regions of shape
pattern that have the satin stitch, fill stitch and
programmable fill stitch specified.
• Using Programmable Stitch Creator, you can
edit stamp pattern that have been provided or
you can create your own.
cc "Programmable Stitch Creator" on page 296
b
• Only one stamp can be selected at a time.
• To enlarge the stamp, drag a scale handle.
• To rotate the stamp, drag the rotation handle.
• To delete the stamp, press the <Delete> key.
1
2
Loading ...
Loading ...
Loading ...