Loading ...
Loading ...
Loading ...
151
Creating Embroidery Patterns Using Images
Tutorial 6-3: Photo Stitch 1
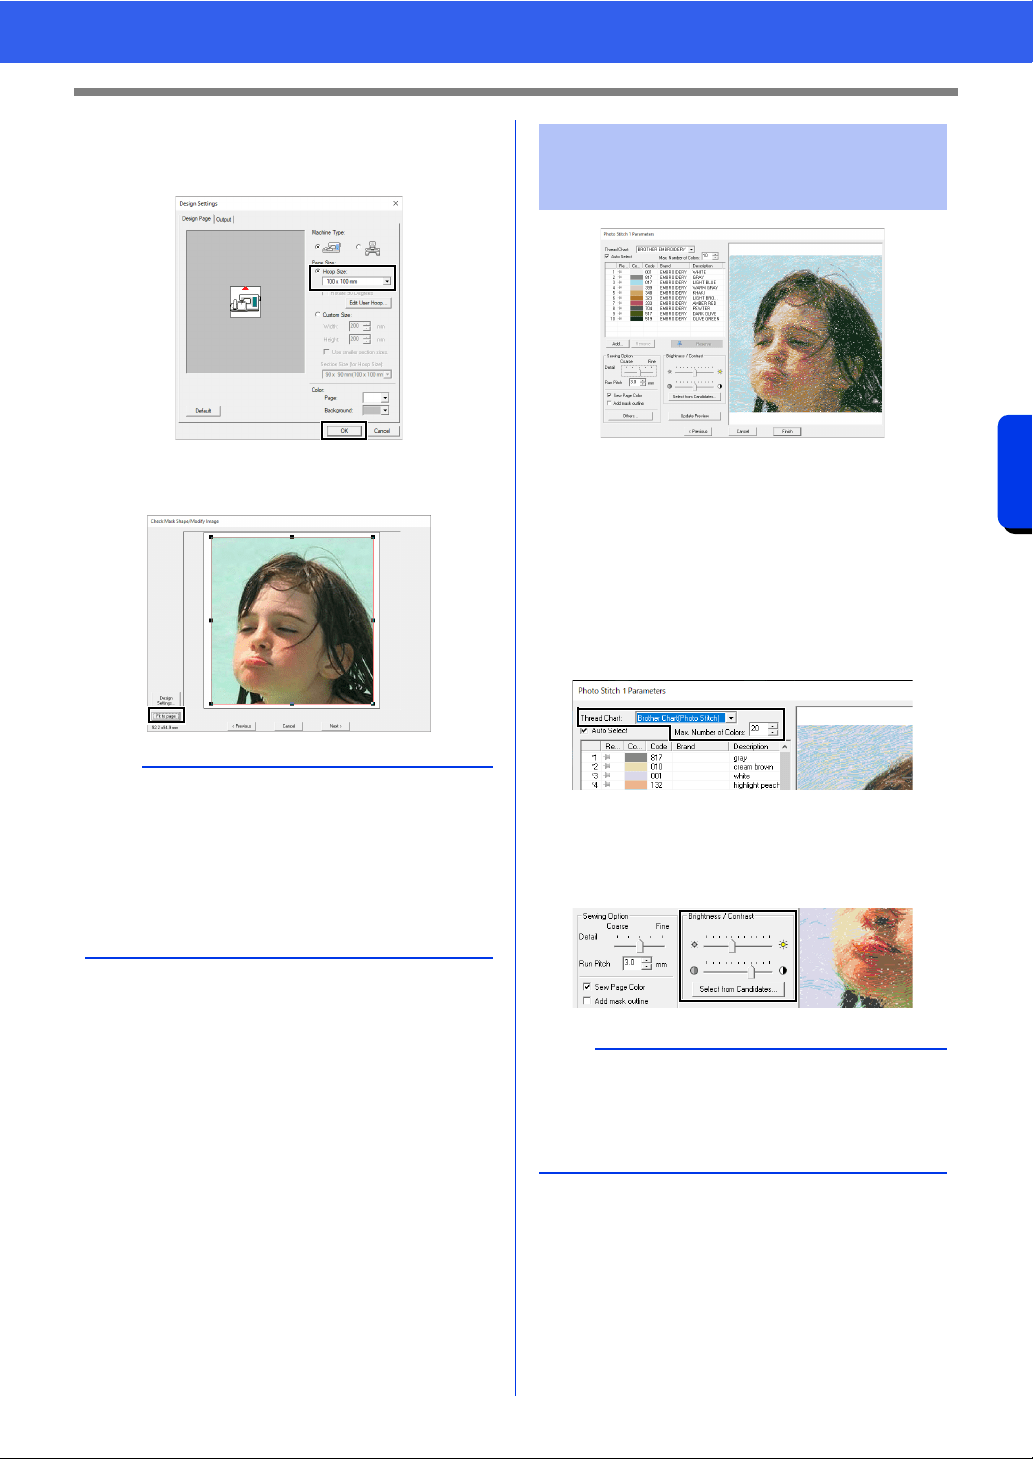
4 Select [Hoop Size] and choose a Design
Page size of 100 × 100 mm from the selector.
Then, click [OK].
5 Click [Fit to page] to change the final finishing
size.
cc "Check Mask Shape/Modify Image dialog
box" on page 161 and "Gray Balance /
Modify Image dialog box" on page 162
6 Check the preview of the area to be converted
then click [Next].
At this point, the embroidery pattern can be
completed by clicking [Finish]. However, this
section will describe how to improve the photo
stitching by changing various settings.
1 From the [Thread Chart] selector, select
[Brother Chart (Photo Stitch)].
In the [Max. Number of Colors] selector,
specify "20".
Click [Update Preview].
2 Slide the [Brightness] slider one position to
the left, and the [Contrast] slider two
positions to the right.
Click [Update Preview].
b
• The size of the embroidery pattern appears in
the lower left corner of the dialog box. The user
can change the size freely with this display.
• The minimum sizes of embroidery patterns that
can be sewn are listed below.
Face only: 100 × 100 mm
Head and face: 130 × 180 mm
Step 4 Selecting appropriate
thread colors and creating
an embroidery pattern
b
Make adjustments as needed, depending on the
image. If it is difficult to adjust the tone, click
[Select from Candidates].
cc "Select from Candidates" on page 154.
Loading ...
Loading ...
Loading ...