Loading ...
Loading ...
Loading ...

– 37 –
Chapter 3 Preparation — Mounting and adjusting the lens
Mounting and adjusting the lens
Mounting the lens
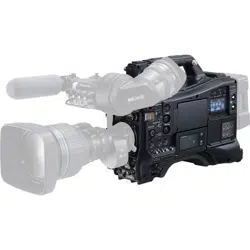
Fig. 1
Fig. 4
Fig. 2
Fig. 3
Lens lever
Mount cap
Center mark
Cable holders
<LENS> terminal
1
Raise the lens lever and remove the mount cap. (Fig. 1)
2
Align the indentation at the top center of the lens mount with the center mark of the lens to mount the lens. (Fig. 2)
3
Lower the lens lever to firmly clamp the lens. (Fig. 3)
4
Secure the cable through the cable holder and connect it to the <LENS> terminal. (Fig. 4)
5
Perform lens flange back adjustments.
For details, refer to “Adjusting lens ange back” (page 38).
@
NOTE
t For handling the lens, refer to the lens operating instructions.
t For details regarding the current from the <LENS> terminal, refer to “Details of the connector signals” (page 240).
t When the lens is removed, install the mount cap to protect the device.
Loading ...
Loading ...
Loading ...