Loading ...
Loading ...
Loading ...
– 209 –
Chapter 9 Network Connection — Network settings
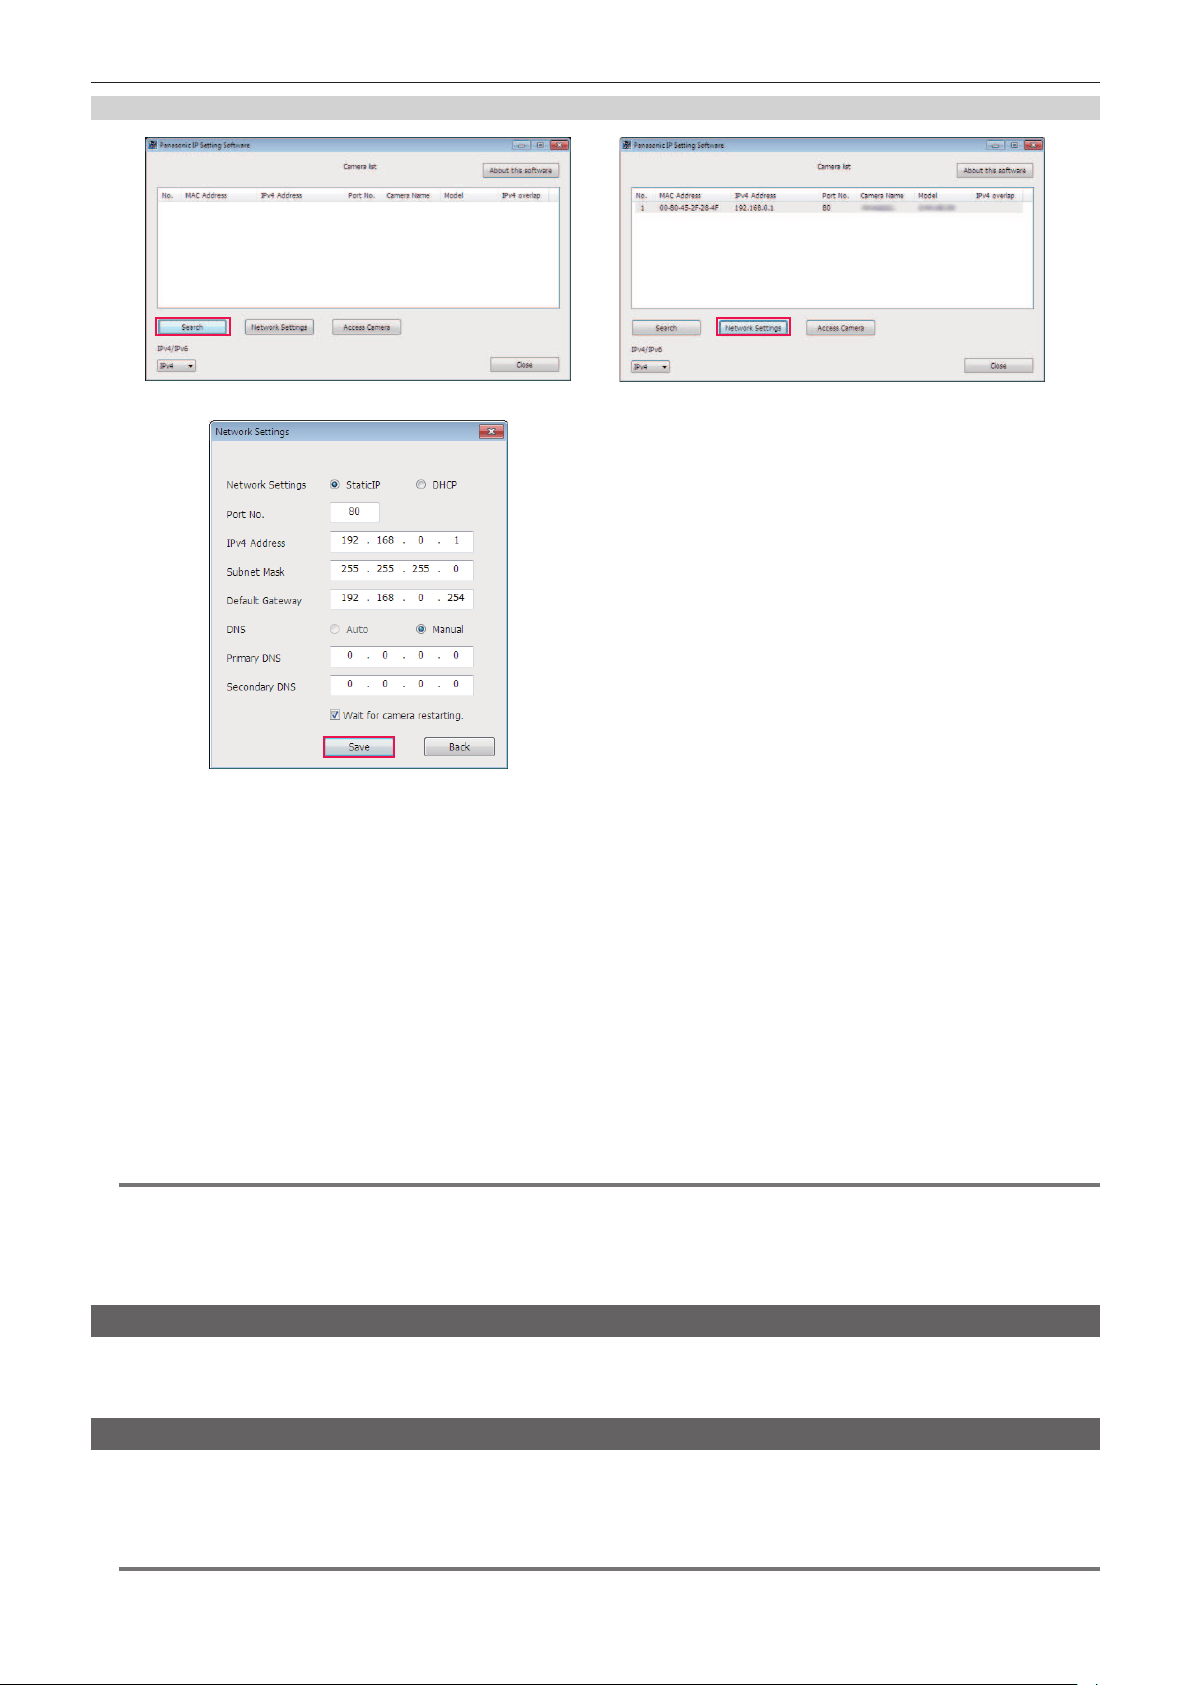
Setting procedure
Fig. 1
Fig. 3
Fig. 2
1
Start EASY IP Setup Software.
2
Click [Search]. (Fig. 1)
3
Click the MAC address/IPv4 address of the camera to set, and then click [Network settings]. (Fig. 2)
f When there are overlapping IP addresses, overlapping camera numbers are displayed in the [Duplicate IPv4 address] eld of the corresponding
camera.
4
Enter each of the network setting items, and then click [Save]. (Fig. 3)
f Network setting from EASY IP Setup Software is not possible in the following cases:
- When the [NETWORK] menu → [DEVICE SEL] → [USB TETHERING] is set
- When the [NETWORK] menu → [DEVICE SEL] → [WLAN] is set and the [NETWORK] menu → [WLAN PROPERTY] → [TYPE] → [DIRECT] is
set
f It may take approximately two minutes to complete the setting of the camera after clicking [Save].
The settings become invalid if the external DC power supply, LAN cable, or wireless module is disconnected before the settings are complete.
Specify the settings again.
@
NOTE
t The IP address assigned to the camera can be checked by clicking [Search] of EASY IP Setup Software when using the DHCP server.
t The camera does not support the IPv6 setting due to EASY IP Setup Software.
t Allow access to all of the ports for UDP when implementing a rewall (including software).
t Some of the items cannot be set on this camera.
t [View Camera Screen] displayed on Fig. 1 and Fig. 2 does not function on this camera.
Conrming the network status
The status of the camera network can be checked using the following operations.
1
Select the [NETWORK] menu → [INFORMATION] → [STATUS].
Checking the network environment
1
Select the [NETWORK] menu → [UTILITY] → [NET CHECKER].
2
Touch the [`]/[{] as necessary to confirm the results.
@
NOTE
t It may take time to display the check results as connection with external equipment is checked.
Loading ...
Loading ...
Loading ...