Loading ...
Loading ...
Loading ...
– 141 –
Chapter 5 Shooting — Special recording function
@
NOTE
t It may take some time to recognize the memory card when the memory card is inserted. When recording to three or more memory cards by replacing
a memory card while recording, replace the memory card with remaining capacity sufciently left on the memory card that is recording.
t The recording target cannot be switched when the remaining capacity of the relay memory card is less than one minute.
t The maximum continuous recording time for relay recording is ten hours.
t The recording is stopped once when the recording time of relay recording exceeds ten hours. The recording is automatically resumed after few
seconds.
t For recording limitations of the relay recording, refer to “Recording function that cannot be used simultaneously” (page 232).
t Relay recording is not possible between card slot 1 and card slot 2 or card slot 3.
t A clip recorded on three or more memory cards in succession through swapping them cannot be played back continuously.
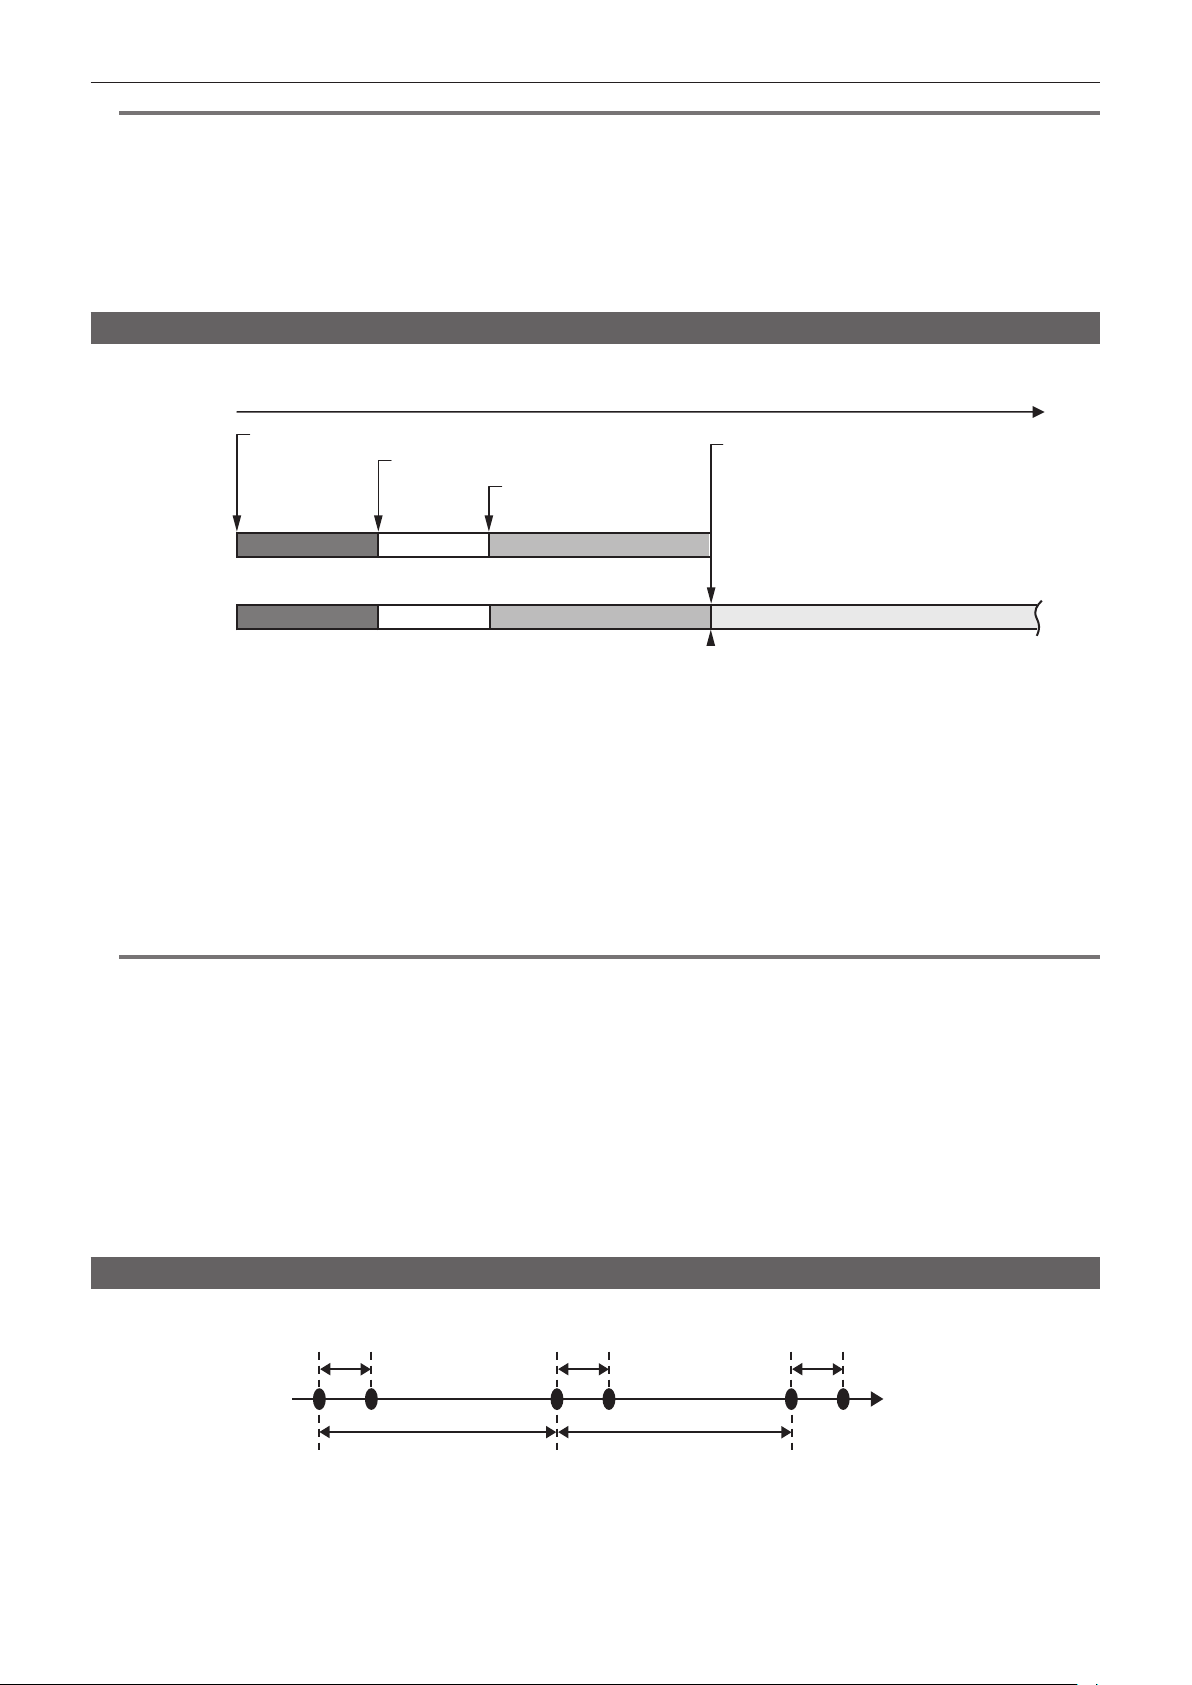
Simultaneous recording
Memory cards are inserted into the card slot 2 and the card slot 3 to record the same video onto two memory cards.
Card slot 2
Card slot 3
A clip
A clip
Stand-by
Stand-by
B clip
B clip
Start recording
End recording
Start recording
C clip
End recording (no remaining space)
Memory card recording time
1
Select the [RECORDING] menu → [2 SLOTS FUNC.] → [SIMUL REC].
[SIMUL] is displayed in the two slot function display of the camera image screen.
A slanted line is displayed on the [SIMUL] display when the simultaneous recording is not possible, such as when a memory card is not inserted in
either of the two card slots.
2
Press the <REC> button.
f The simultaneous recording will stop when the remaining capacity of one of the memory cards is exhausted.
A slanted line is displayed in the [SIMUL] display when simultaneous recording is not possible.
To start the simultaneous recording again, replace the memory card that has run out of remaining capacity with another memory card, and then
press the <REC> button.
f When the <REC> button is pressed without replacing the memory card, standard recording is performed to the memory card with remaining
capacity.
@
NOTE
t Use of memory cards with the same Speed Class or capacity for simultaneous recording is recommended.
The recording may stop due to insufcient speed when memory cards with different Speed Classes or capacities are used. If the recording is stopped,
the video right before stopping may become invalid recording.
t Start the recording after both of the two memory cards have been recognized. When the recording starts before both memory cards are recognized,
the camera performs standard recording on one of the memory cards that has been recognized. The camera conrms the status of the memory card
every time the recording is completed. If both cards are recognized at that time, it will perform the simultaneous recording from the next recording.
t When recording to one of the memory cards stops due to a recording error during simultaneous recording, recording to the other memory card
continues.
t If there is remaining recording capacity on one of the memory cards after completing the simultaneous recording, the memory card with remaining
recording capacity automatically becomes the recording target. Standard recording will start when the <REC> button is pressed.
t Standard recording is performed when only one memory card is inserted even if the camera is set to simultaneous recording.
t Once the simultaneous recording is completed, [DEL LAST CLIP] (nal clip delete function) assigned to the USER button will not operate.
t For the folder name and the le name when performing simultaneous recording in MOV format, refer to “Handling recording data” (page 55).
t For recording limitations of the simultaneous recording, refer to “Recording function that cannot be used simultaneously” (page 232).
Interval recording
The camera will repeat one frame recording at each set interval.
1 frame recording 1 frame recording 1 frame recording
(Time)
Time set in [INTERVAL TIME] Time set in [INTERVAL TIME]
1
Select the [RECORDING] menu → [REC FUNCTION] → [REC MODE] → [INTERVAL].
[INTRVL] is displayed in the special recording function display of the camera image screen.
2
Set the time in the [RECORDING] menu → [REC FUNCTION] → [INTERVAL TIME].
Loading ...
Loading ...
Loading ...