Loading ...
Loading ...
Loading ...
– 139 –
Chapter 5 Shooting — Selecting audio input signal and adjusting recording level
[W.L.]: Enabled when <W.L.> is selected for the input signal
[REAR]: Enabled when <REAR> is selected for the input signal
[ALL]: Enabled for all input signals
r Adjusting recording level of audio channels 3 and 4
Automatic adjustment will be enabled when the [AUDIO] menu → [REC CH SETTINGS] → [CH3 LEVEL]/[CH4 LEVEL] → [AUTO] is set. When
these items are set to [MANUAL], automatic adjustment stops functioning, and the recording level can be adjusted in the [AUDIO] menu → [REC CH
SETTINGS] → [CH3 LEVEL CONTROL]/[CH4 LEVEL CONTROL].
When the <AUDIO LEVEL CH1/3>/<AUDIO LEVEL CH2/4> dial is assigned to [CH3/4]
r Selecting recording level adjustment method for audio channels 3 and 4
For the level adjustment method of audio channels 3 and 4, select <AUTO> (automatic adjustment) or <MANU> (manual adjustment by the <AUDIO
LEVEL CH1/3>/<AUDIO LEVEL CH2/4> dial) with the <AUDIO SELECT CH1/3>/<AUDIO SELECT CH2/4> switch.
When <MANU> is selected, the recording level of audio channels 3 and 4 is adjusted by the <AUDIO LEVEL CH1/3>/<AUDIO LEVEL CH2/4> dial.
r Adjustment by the <AUDIO LEVEL CH1/3>/<AUDIO LEVEL CH2/4> dial
Adjustment can be made by the <AUDIO LEVEL CH1/3>/<AUDIO LEVEL CH2/4> dial as when the <AUDIO LEVEL CH1/3>/<AUDIO LEVEL CH2/4>
dial is assigned to audio channels 1 and 2.
r Adjustment by the <F.AUDIO LEVEL> dial
Similar to the audio channels 1 and 2, the audio channels 3 and 4 can be assigned to the <F.AUDIO LEVEL> dial. When operating the camera alone,
using the <F.AUDIO LEVEL> dial to adjust the recording level is recommended.
r Adjusting recording level of audio channels 1 and 2
Automatic adjustment will be enabled when the [AUDIO] menu → [REC CH SETTINGS] → [CH1 LEVEL]/[CH2 LEVEL] → [AUTO] is set. When
these items are set to [MANUAL], automatic adjustment stops functioning, and the recording level can be adjusted in the [AUDIO] menu → [REC CH
SETTINGS] → [CH1 LEVEL CONTROL]/[CH2 LEVEL CONTROL].
Selecting adjustment method
r When the [AUDIO] menu → [REC CH SETTINGS] → [VOL. SELECT] → [CH1/2] is selected
Audio channel 1, audio channel 2 Audio channel 3, audio channel 4
<AUDIO SELECT CH1/3> switch
<AUDIO SELECT CH2/4> switch
Adjustment method
[CH3 LEVEL]
[CH4 LEVEL]
Adjustment method
<MANU>
Manually adjusted with the
<AUDIO LEVEL CH1/3>/<AUDIO
LEVEL CH2/4> dial
[MANUAL]
Adjusted with [CH3 LEVEL
CONTROL]/[CH4 LEVEL CONTROL]
<AUTO> Automatic adjustment [AUTO] Automatic adjustment
r When the [AUDIO] menu → [REC CH SETTINGS] → [VOL. SELECT] → [CH3/4] is selected
Audio channel 1, audio channel 2 Audio channel 3, audio channel 4
[CH1 LEVEL]
[CH2 LEVEL]
Adjustment method
<AUDIO SELECT CH1/3> switch
<AUDIO SELECT CH2/4> switch
Adjustment method
[MANUAL]
Manually adjusted with [CH1 LEVEL
CONTROL]/[CH2 LEVEL CONTROL]
<MANU>
Manually adjusted with the
<AUDIO LEVEL CH1/3>/<AUDIO
LEVEL CH2/4> dial
[AUTO] Automatic adjustment <AUTO> Automatic adjustment
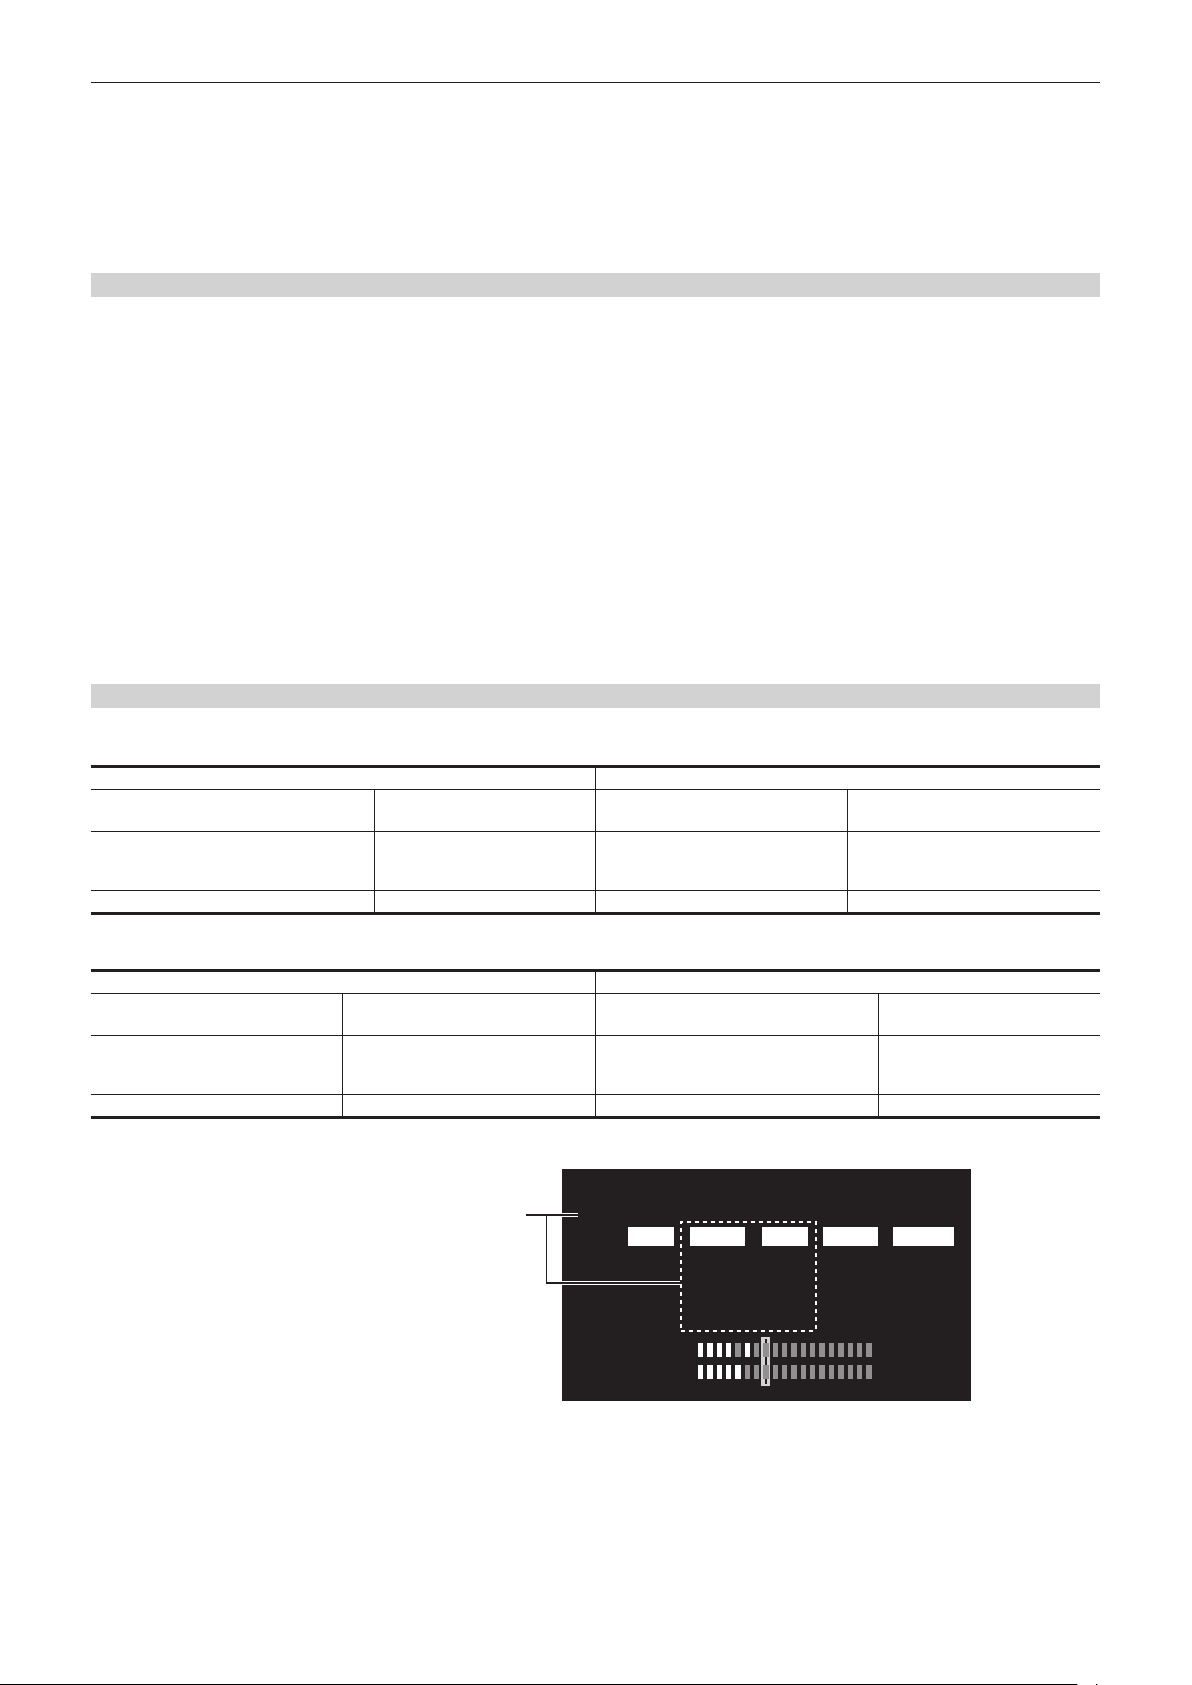
Selection status of the recording level adjustment method can be checked on the AUDIO screen of the mode check display. (page 163)
---
---
---
---
---
---
:
:
:
:
-- --
:
:
CH1
CH2
CH1
A.IN F.VOL.LEVEL LIMITER LOWCUT
MIC POWER(MENU)
VOL. SELECT
ON(FRONT), OFF(REAR)
CH1/2
AUDIO
CH2
CH3
CH4
FRONT
FRONT
REAR
REAR
AUTO
AUTO
AUTO
AUTO
OFF
OFF
OFF
OFF
OFF
OFF
Selection status of level adjustment method
Loading ...
Loading ...
Loading ...