Loading ...
Loading ...
Loading ...

– 173 –
Chapter 5 Shooting — Scene le
Scene le
Scene les
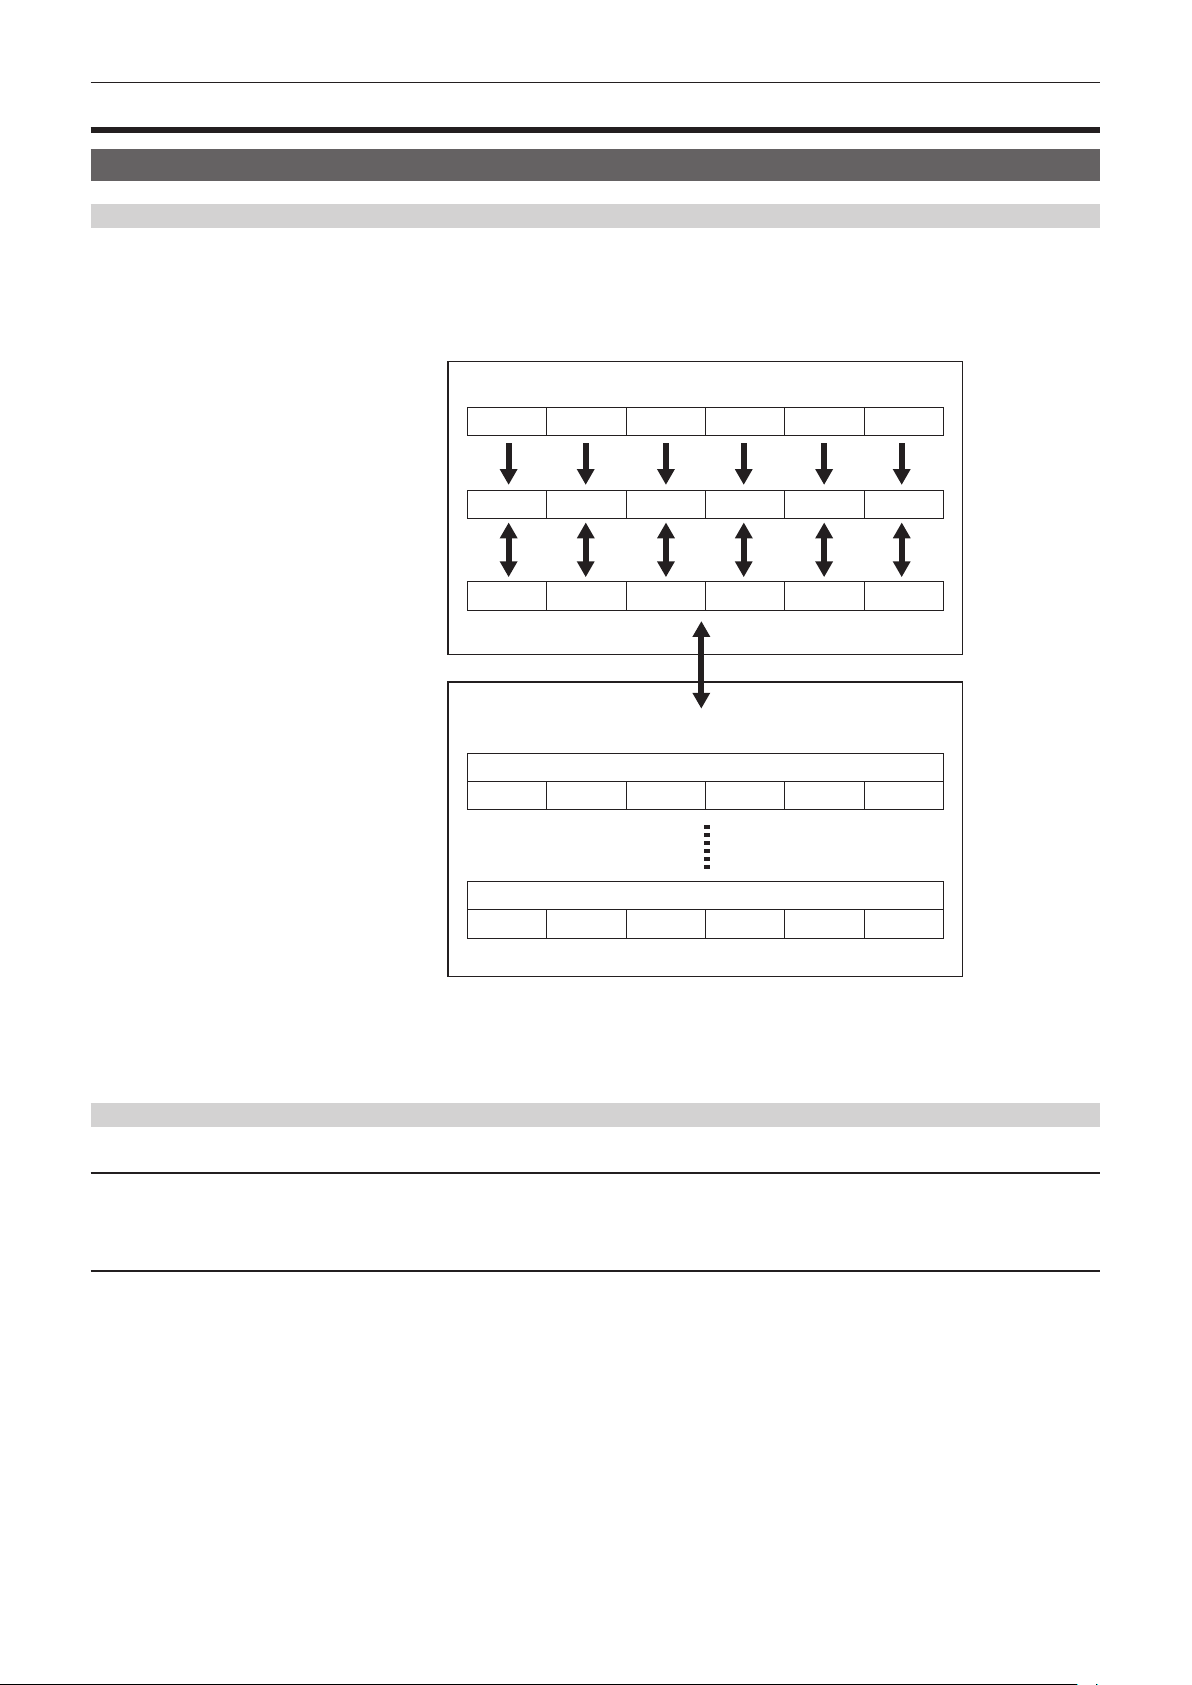
File structure of the setting data
The scene les of [F1:] to [F6:] can be saved in the camera memory in accordance to the scene le number.
What can be saved as a scene le is the setting contents of the [SCENE FILE] menu.
In addition, the current setting values of the scene les of [F1:] to [F6:] can be saved as a le to the camera memory or a SD card, and that data can be
loaded and used in the camera.
Setting data le structure of the camera is as follows.
*1 *1 *1 *1 *1
*2 *2 *2 *2 *2
*1
*2
*3
(Factory setting)
The camera
(Current value)
(Value saved on the camera)
Memory card
Scene file 1
Scene file n
[F1:] [F2:] [F3:] [F4:] [F5:] [F6:]
[F6:]
[F6:]
[F6:]
[F6:]
[F1:] [F2:] [F3:] [F4:] [F5:]
[F1:] [F2:] [F3:] [F4:] [F5:]
[F1:] [F2:] [F3:] [F4:] [F5:]
[F1:] [F2:] [F3:] [F4:] [F5:]
*1 The scene le can be initialized.
Select the [SCENE FILE] menu → [LOAD/SAVE/INITIALIZE] → [INITIALIZE].
*2 Current setting value of each scene le can be individually saved in the camera body. Also, the scene les saved in the camera memory can be loaded.
Select the [SCENE FILE] menu → [LOAD/SAVE/INITIALIZE] → [LOAD]/[SAVE].
*3 The scene le can be saved in a SD card. Also, the scene le saved in the SD card can be loaded.
Saving the scene le
Saving the scene le into the camera memory
Saves the current setting value of the camera into the camera memory.
1
Select the [SCENE FILE] menu → [LOAD/SAVE/INITIALIZE] → [SAVE].
Saving the scene le to a SD card
The scene le can be overwritten to a le on the SD card, or saved as a new le.
r Saving a scene le as a new le on a SD card
Current setting values of the camera is saved as a new le in a SD card by specifying the le name.
1
Select the [OTHERS] menu → [FILE] → [SCENE FILE(SD CARD)] → [SAVE AS].
The le name entry screen and the keyboard are displayed.
2
Enter the text to set with the keyboard.
3
Select [Enter].
A conrmation screen is displayed.
4
Select [SET].
The le is saved.
f An error message may be displayed. For details about the error message, refer to “Warning system” (page 227).
Loading ...
Loading ...
Loading ...
