
Loading ...
Loading ...
Loading ...
– 211 –
Chapter 9 Network Connection — Connecting to the iPhone/iPad or Android terminal
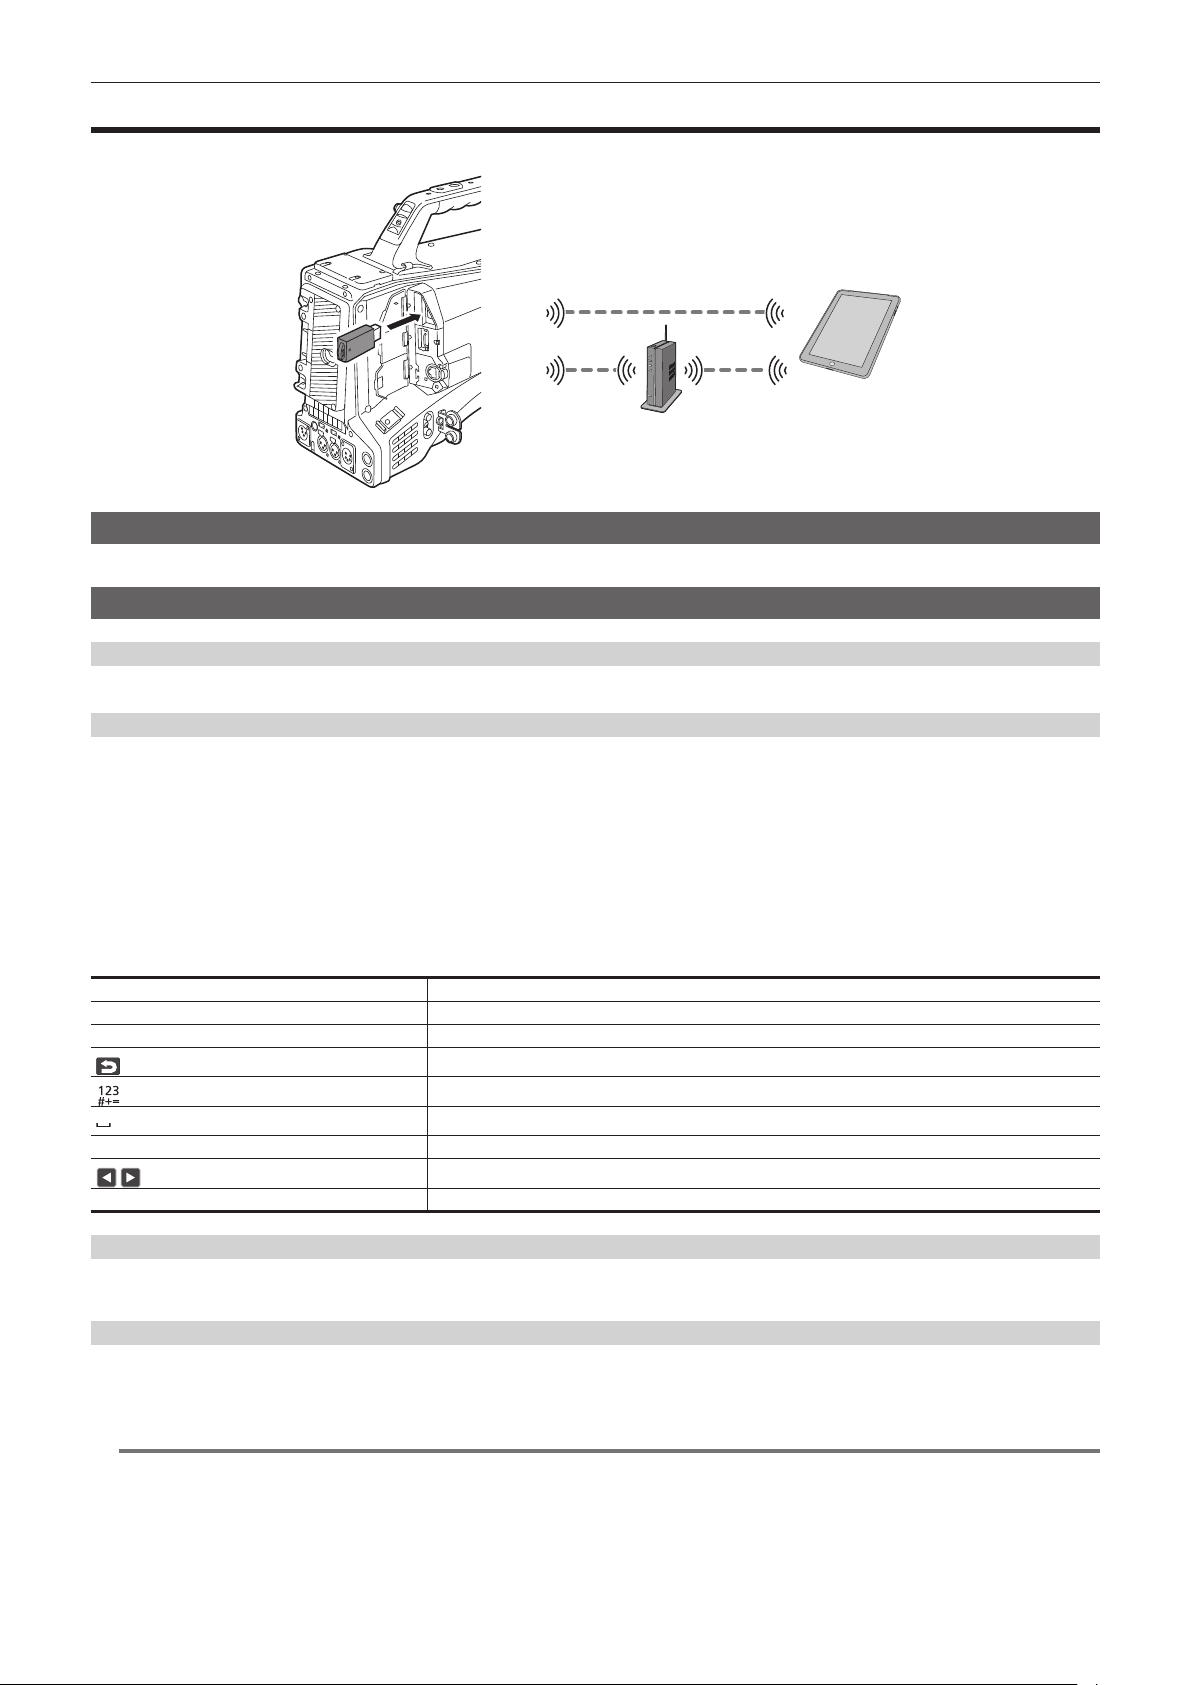
Connecting to the iPhone/iPad or Android terminal
The camera can be operated from the iPhone/iPad or Android terminal.
Mounting the wireless module
Mount the wireless module (optional) to the camera. (page 203)
Camera settings
Specifying the network settings
Specify the network settings. (page 205)
Setting the user account name and the password
1
Select the [NETWORK] menu → [IP REMOTE] → [USER ACCOUNT].
2
Enter the user account name and select [Enter].
f Enter the user account name with 31 characters or less.
3
Enter the password and select [Enter].
f Enter a password between 8 characters and 15 characters.
r To enter a character
Operation is the same as entering with a keyboard.
Icon Description of operation
[A-a] Switches between upper case and lower case. (Displayed during the text entry mode)
[@-#] Switches the type of the symbols. (Displayed during the symbol entry mode)
Returns to the previous screen. Entered character is not reected.
Switches the character to symbol/number.
Enters space (blank).
[BS] Deletes the character. Previous character is deleted when the cursor position is empty.
/
Moves the cursor to right or left.
[Enter] Completes the character entry.
Enabling the IP remote function
1
Select the [NETWORK] menu → [IP REMOTE] → [ENABLE/DISABLE] → [ENABLE].
Setting the standby port number
Depending on the environment, set the port number for standby if required.
1
Set the port number in the [NETWORK] menu → [IP REMOTE] → [CX ROP PORT].
@
NOTE
t The setting value is not reected until the [NETWORK] menu → [IP REMOTE] → [ENABLE/DISABLE] is switched to [DISABLE] once, or when the
camera is restarted.
t Number 80 and the same value as the port number set for other menu item cannot be specied.
t The TCP port set as the setting value and the UDP port set as the setting value +1 will be used.
t Inquire the administrator of the network or the device whether change is required.
Loading ...
Loading ...
Loading ...