Loading ...
Loading ...
Loading ...
63
• Rule: This setting allows you to set diagnosis types to specific targets. For more information on this
setting, refer to section 4.8.5.1. Setting Types of Diagnosis Targets.
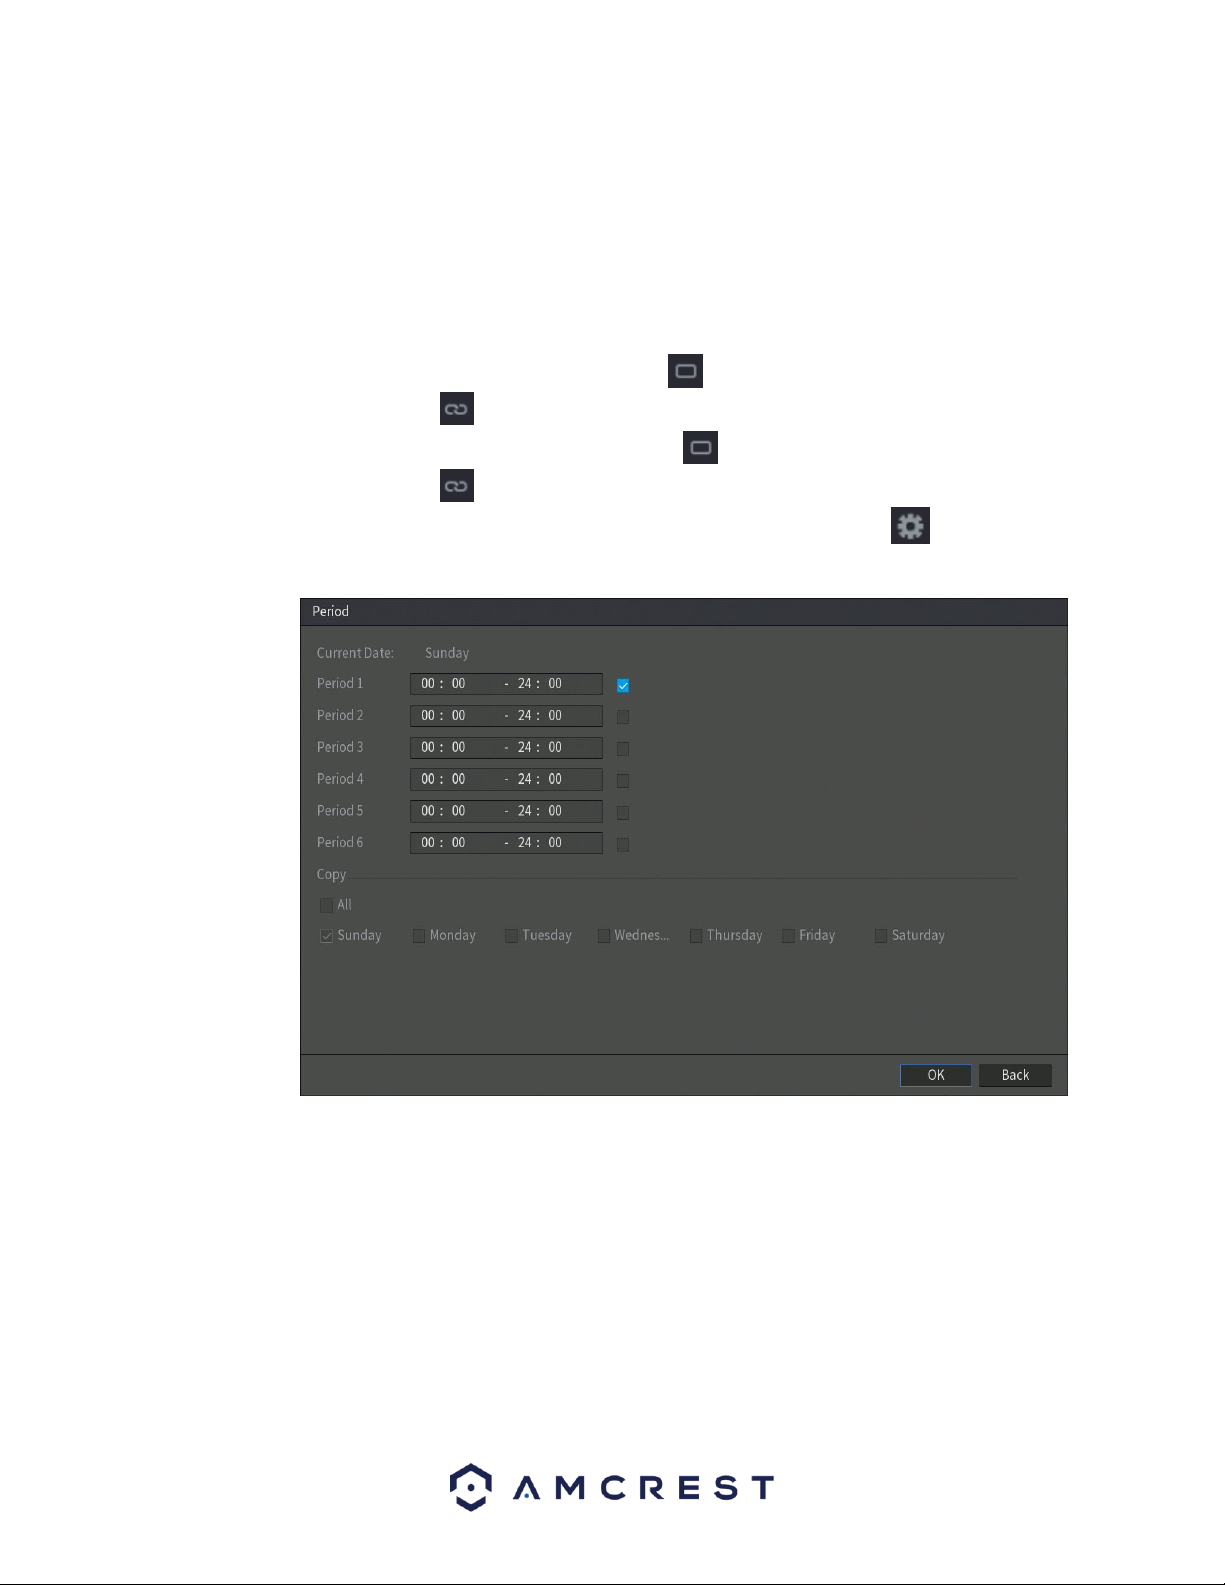
• Period: This setup button takes the user to the tampering period settings screen. Below is a screenshot
of the motion detection period settings screen.
In this menu, you will define the tampering period for the selected channel. By default, it is it is active to
record 24/7. You can define the period, or schedule,
• Define a period for a specified day of the week by clicking the half-hour clocks you wish to
enable.
• Define several days of the week by clicking the icon before each day. The icon selected will
then switch to the icon which indicates it is linked.
• Define for all days of the week by clicking on the icon located by the All option. Each day will
then switch to the icon and all days of the week will be selected.
• Define the period by editing. In this example, we will use Sunday. Click the icon to access the
Period interface.
In the period interface, enter the time frame you would like to set as your period and select the
checkbox to enable the settings. There are a total of six periods that you can set for each day.
Under the Copy menu, you can apply these settings to all days of the week by checking the All
option or you can also select specific days as well. To save the settings in this menu, click OK to
continue.
4.8.5.1. Setting Types of Diagnoses Targets
This menu allows you to set the specific features or rules, of the features listed in the diagnosis screen.
To set a diagnosis type, click on the Setting button next to the Rule field to access the Diagnosis interface.
Loading ...
Loading ...
Loading ...