Loading ...
Loading ...
Loading ...
116
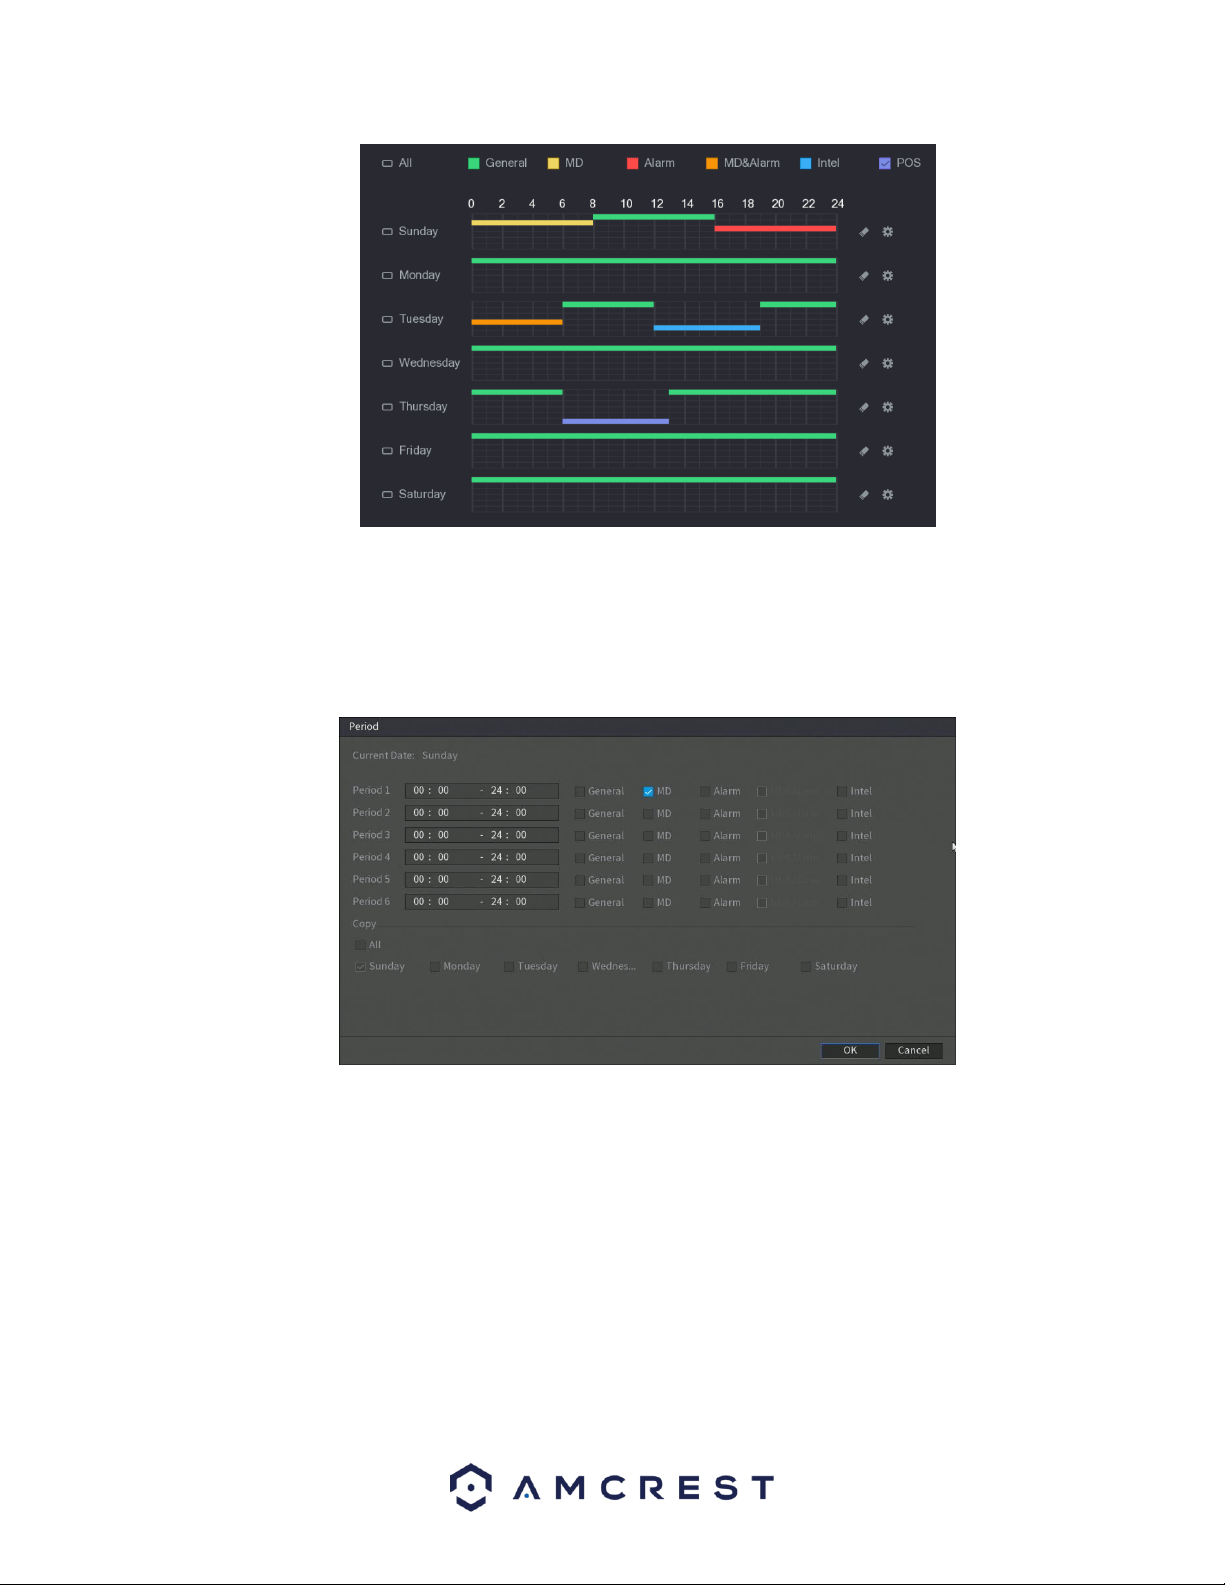
If you choose to set periods via the set Period menu, enter in the time frame for the period you want and
select the event checkbox you wish to apply. There are total of six periods. If you wish to copy these
settings and apply them to multiple days, you can do so in the Copy menu. To apply all settings for each
day, click on All. If you wish to apply these settings to activate on specific days, click on the day you wish
to choose from this menu. When you are finished, click OK to continue.
When you have finished applying your schedule settings, be sure to click Apply to apply the settings to
your DVR. To revert to default settings in this menu, click on Default. If you wish to apply these settings to
multiple channels on your DVR, click on the Copy button and select which channels you would like to be
configured. To select all channels, click on the All button in this menu. To exit the schedule menu, click on
Back button.
6.3.3. HDD Manager
This screen is meant to help the user monitor the DVR’s hard drives. Using this screen, the user can see
the current HDD type, status, and capacity. The user can also use this screen to format hard drives and
change hard drive properties. Below is a screenshot of the HDD Manage settings screen:
Loading ...
Loading ...
Loading ...