Loading ...
Loading ...
Loading ...
33
you have successfully completed setting up your desired encode settings, click the Next button to save
and proceed to the next screen.
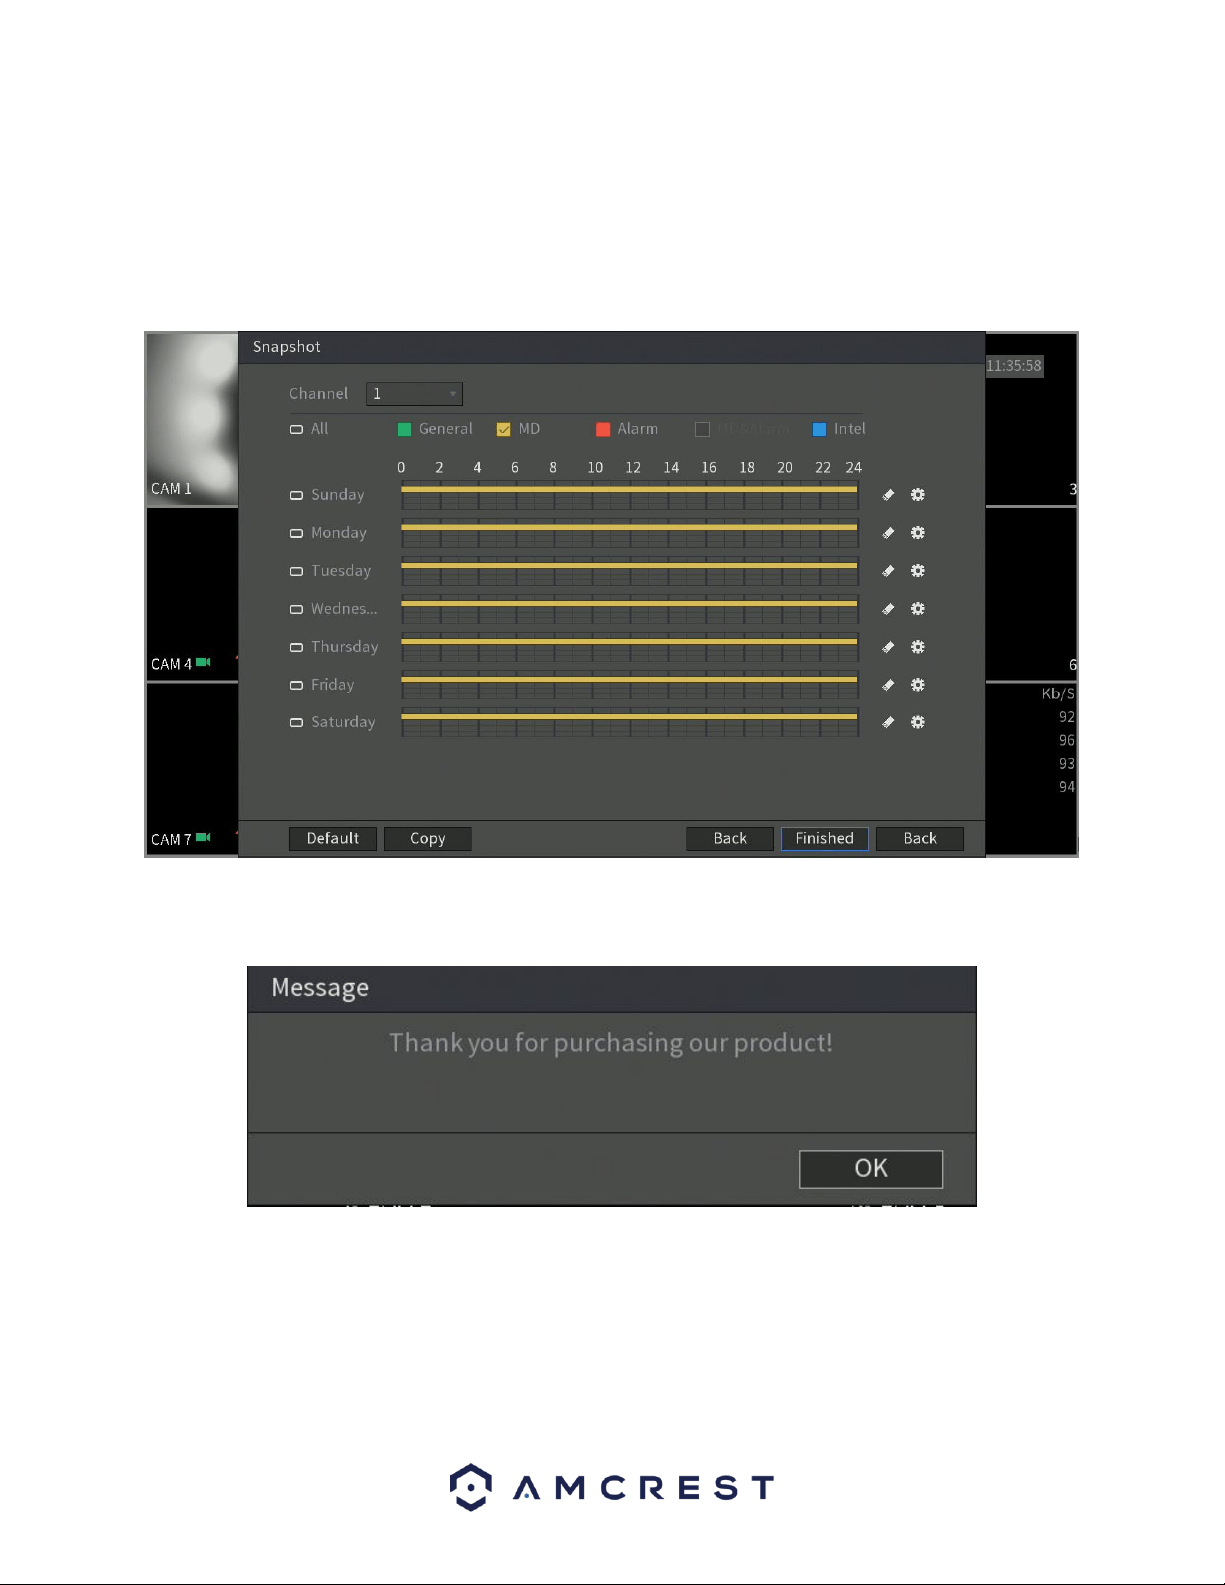
Next, you will be able to configure your snapshot settings for your scheduled recordings. You can also use
this screen to set up motion detection and alarm schedules for snapshot events. Once you have scheduled
your events, click on the Finished button to continue.
Once the setup process is finished and you have clicked the “Finished” button, you should see the below
dialog box:
Click OK to continue and the next screen you will reach will be the home video wall screen for your system.
4.4. Live View
When you have completed initial setup of the DVR, you will notice a video wall. The video wall will display
all live connected cameras, excluding IP cameras.
Loading ...
Loading ...
Loading ...