Loading ...
Loading ...
Loading ...
45
⚫ Double-click anywhere in the time bar colored area to start playback.
Next, click on the time bar to select the start time, and then click the icon to start clipping. To stop clipping a
video, click on the icon again while in operation. To save the clipping to a USB storage DVR, click on the
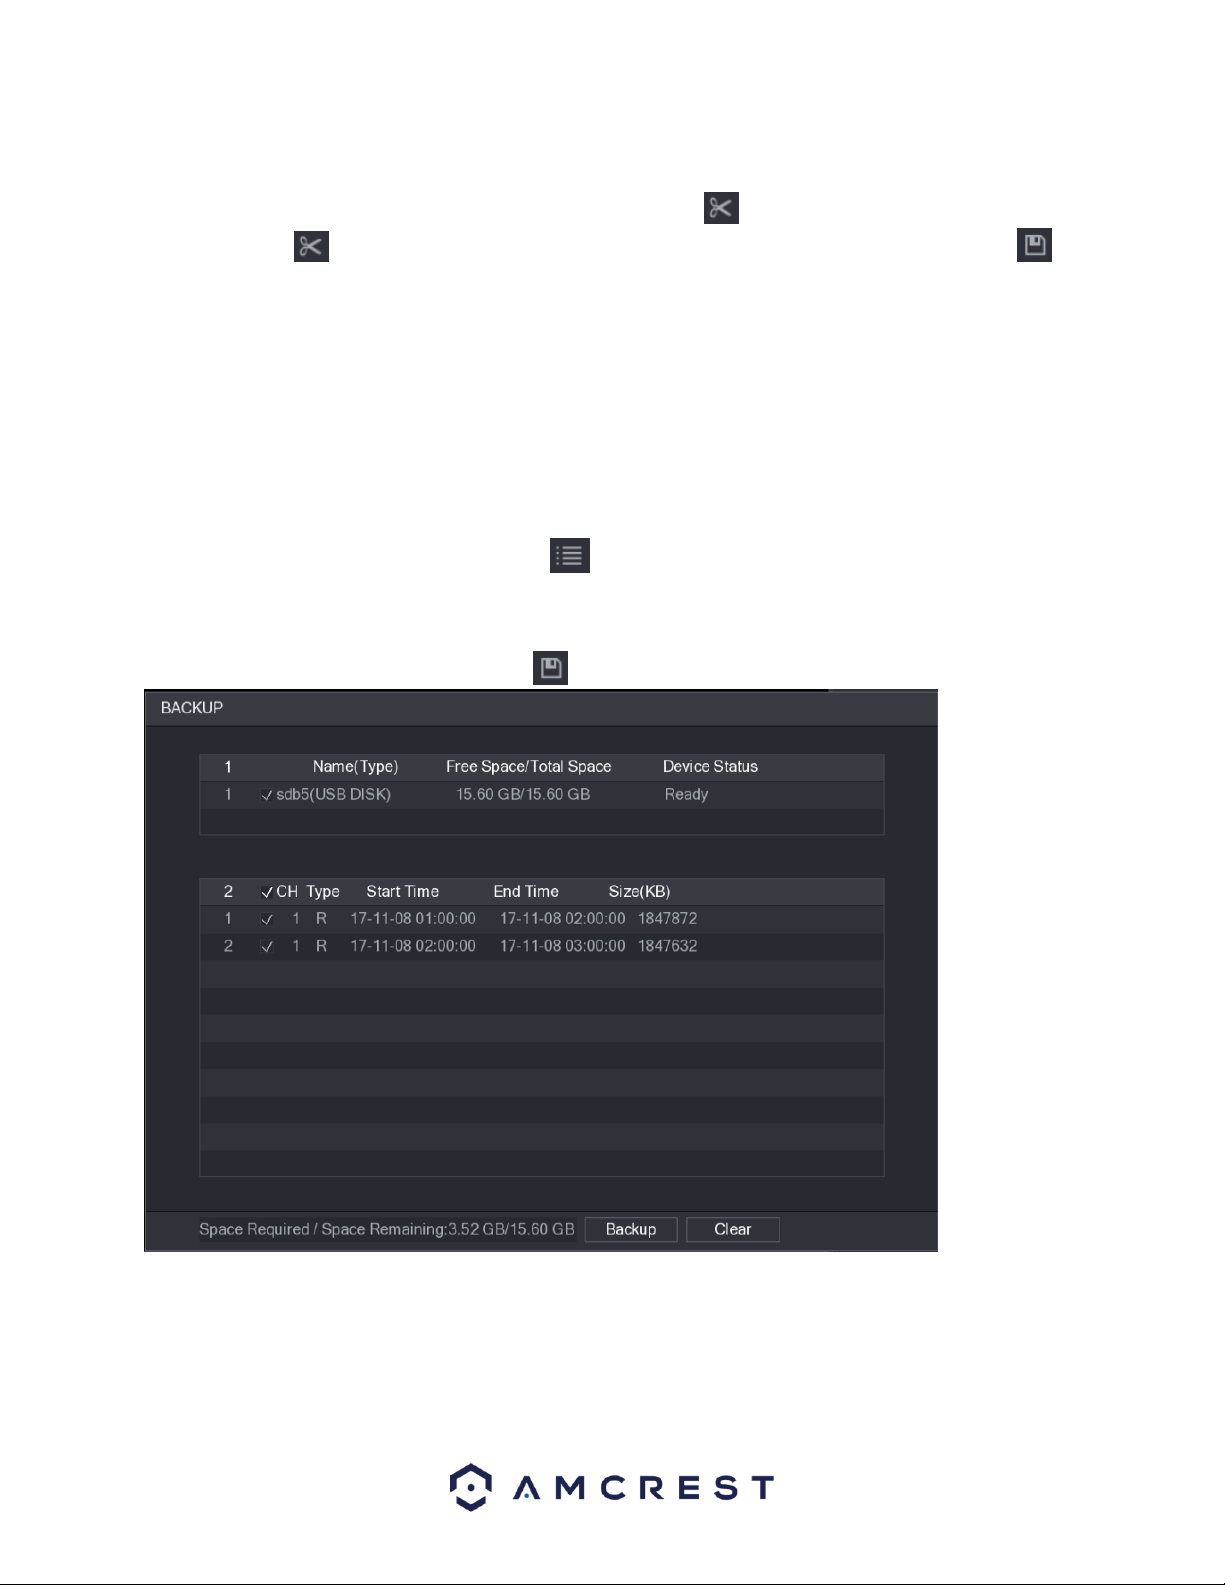
icon. The BACKUP dialog box will then be displayed.
Note: You can clip the video of either a single channel, or multiple channels. A maximum of 1024 files can be
backed up at one time. The files selected from the File List cannot be clipped.
4.8.1.4. Backing up Recorded Video
This feature allows you to backup recorded video, or spliced files, into a USB storage DVR.
To use this feature, select the recorded video file that you want to backup. You can select the following
two types of files:
⚫ Recorded video file: Click , the File List area is displayed. Select the file(s) that you
want to back up.
⚫ Spliced video files.
After selecting a video file, click on the icon, the BACKUP dialog box with then be displayed.
In the backup dialog box, click on Backup to begin backing up the selected files to an external USB storage DVR.
Note: If you do not want to back up the file, click on the Clear button to return to the previous menu.
Loading ...
Loading ...
Loading ...