Loading ...
Loading ...
Loading ...
47
3.
Select your sorting criteria by touching your
choices in the Sort window. For example, if
you choose rows, ascending, and D5, the
data in the selected range, C4:E7, are
rearranged with the data in cells D4 through
D7 in increasing order.
4.
Touch Sort.
NOTE
If you sort a column or row that contains both numeric
values and labels, the numeric values come before the
labels in the ascending sort.
If you want to restore the range to its original order,
touch EDIT and select “Undo.”
Inserting and deleting cells
Occasionally you need to reorganize a worksheet so
you can incorporate new cells or remove obsolete ones.
Updating your worksheet might involve adding new
blank cells or deleting cells. PenCell lets you add and
delete cells while automatically maintaining cell refer-
ences in the remainder of the worksheet.
When you insert new blank cells, all the cell and range
references automatically continue to refer to the same
cells, even if those cells have changed location.
To add new, empty cells to your worksheet:
1.
Select the cell or range that is currently at the
location where you want to place the new
cells.
For example, to add a new, blank column or row to
the worksheet, select the column or row that
currently occupies that location.
2.
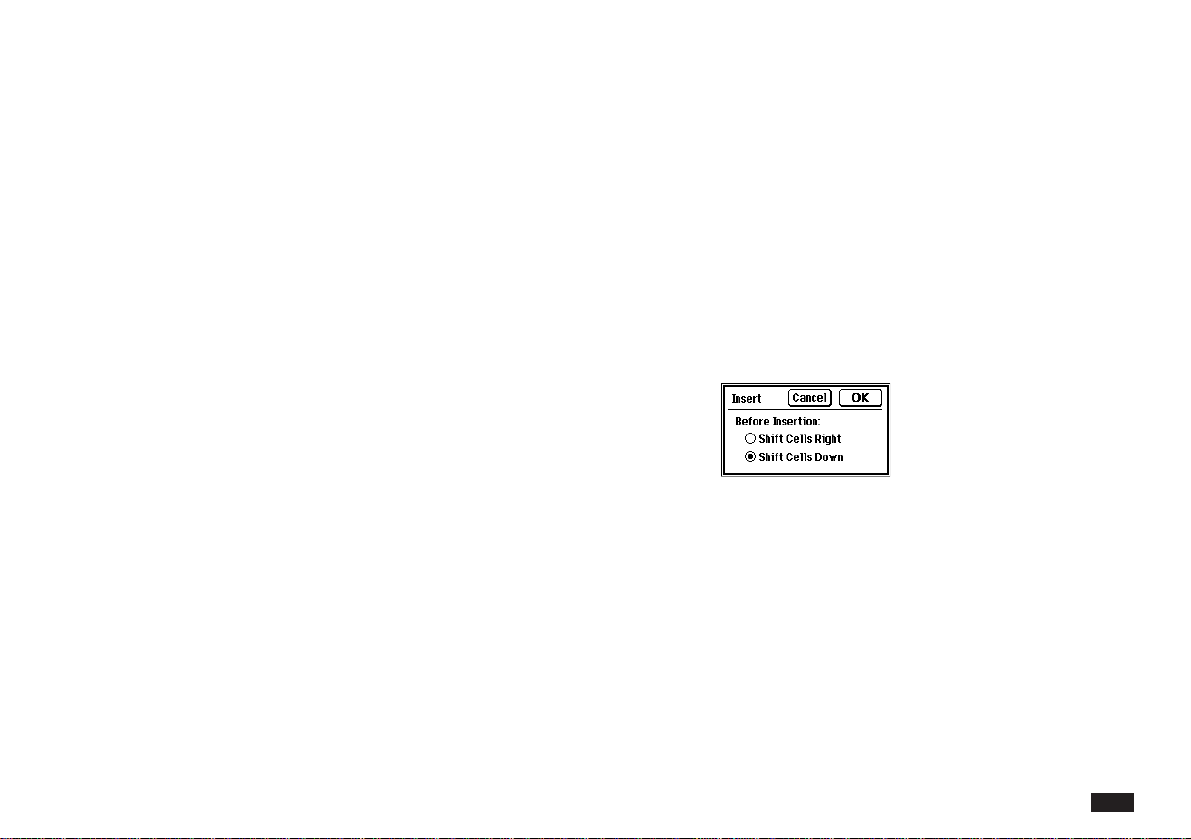
Touch CELLS, then select “Insert....” If the
range is not a row or column, then the
following dialog box appears.
3.
Decide whether to shift the selected cells
down or to the right before insention. Then
touch OK.
When you want to delete cells (and cell contents), the
remaining cell references automatically adjust so they
continue to refer to the same cells.
Loading ...
Loading ...
Loading ...