Loading ...
Loading ...
Loading ...
108
4
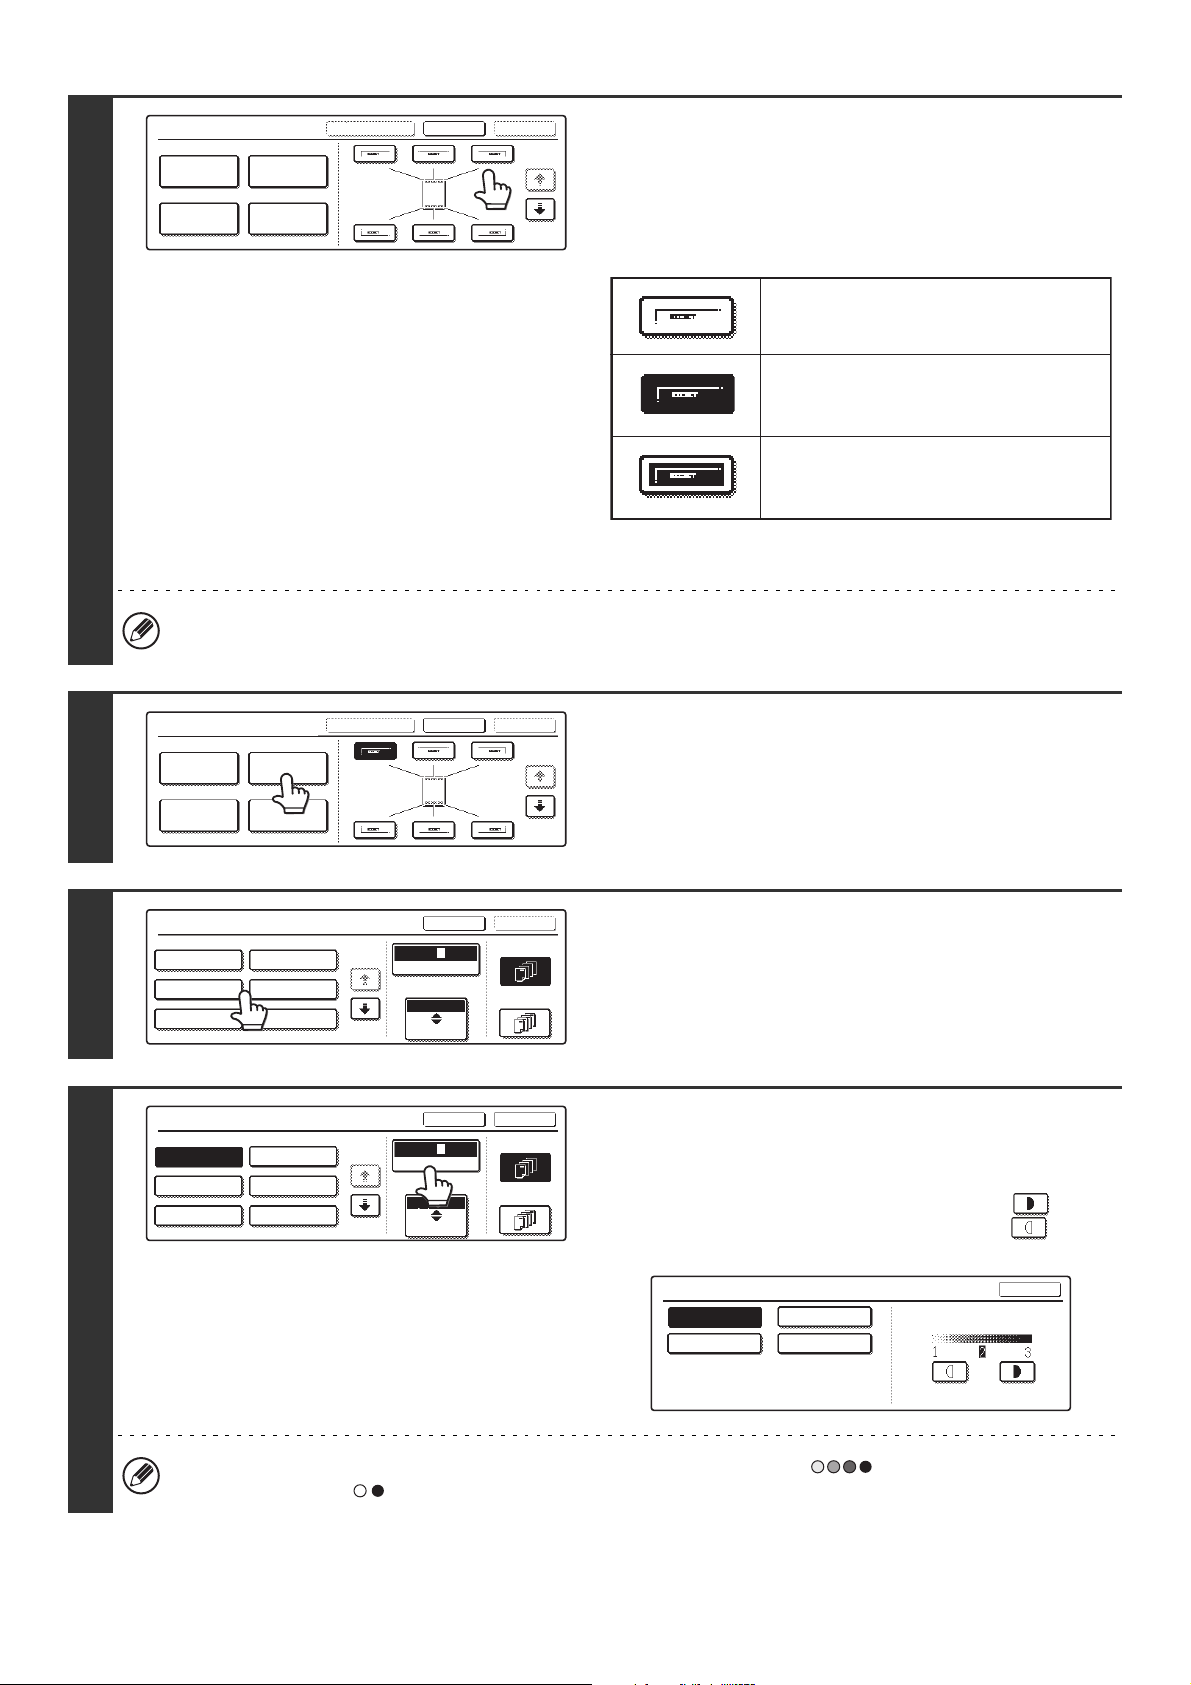
Select the print position.
Select from 6 positions: top left, top center, top right, bottom
left, bottom center, bottom right.
The keys that show the print positions will appear as follows
depending on the state of the settings.
The above key is the top left key. The appearance of the keys
varies by position.
If a "Stamp" is set without selecting a position, the stamp will be printed in the top left position.
5
Touch the [Stamp] key.
6
Touch the key of the stamp that you
wish to use.
7
Touch the [Print Color] key and set the
color and density.
Touch the color that you wish to use.
If you wish to darken the selected color, touch the key.
If you wish to lighten the selected color, touch the key.
When you have finished the settings, touch the [OK] key.
If you selected a color other than [Bk (Black)], press the [COLOR START] key ( ). Pressing the [BLACK &
WHITE START] key ( ) will print the stamp in black and white.
Stamp
OKCancelLayout
1/2
Date
Page
Numbering
Stamp
Text
Not selected, stamp setting has not
been selected.
Selected during selection of the stamp
setting.
Not available, stamp setting has already
been selected.
Stamp
OKCancelLayout
1/2
Date
Page
Numbering
Stamp
Text
Stamp
Bk 1 3
Bk(Black)
Size
Smaller
Larger
OK
Cancel
First Page
All Pages
CONFIDENTIAL PRIORITY
DO NOT COPY
DRAFT
FOR YOUR INFO.
URGENT
2
1/2
Stamp
Bk 1 3
Bk(Black)
Size
Smaller
Larger
OK
Cancel
First Page
All Pages
CONFIDENTIAL PRIORITY
DO NOT COPY
DRAFT
FOR YOUR INFO.
URGENT
2
1/2
Print Color
OK
Bk(Black)
M(Magenta) Y(Yellow)
C(Cyan)
Exposure
Loading ...
Loading ...
Loading ...