Loading ...
Loading ...
Loading ...
32
Specifying the size with numbers
1
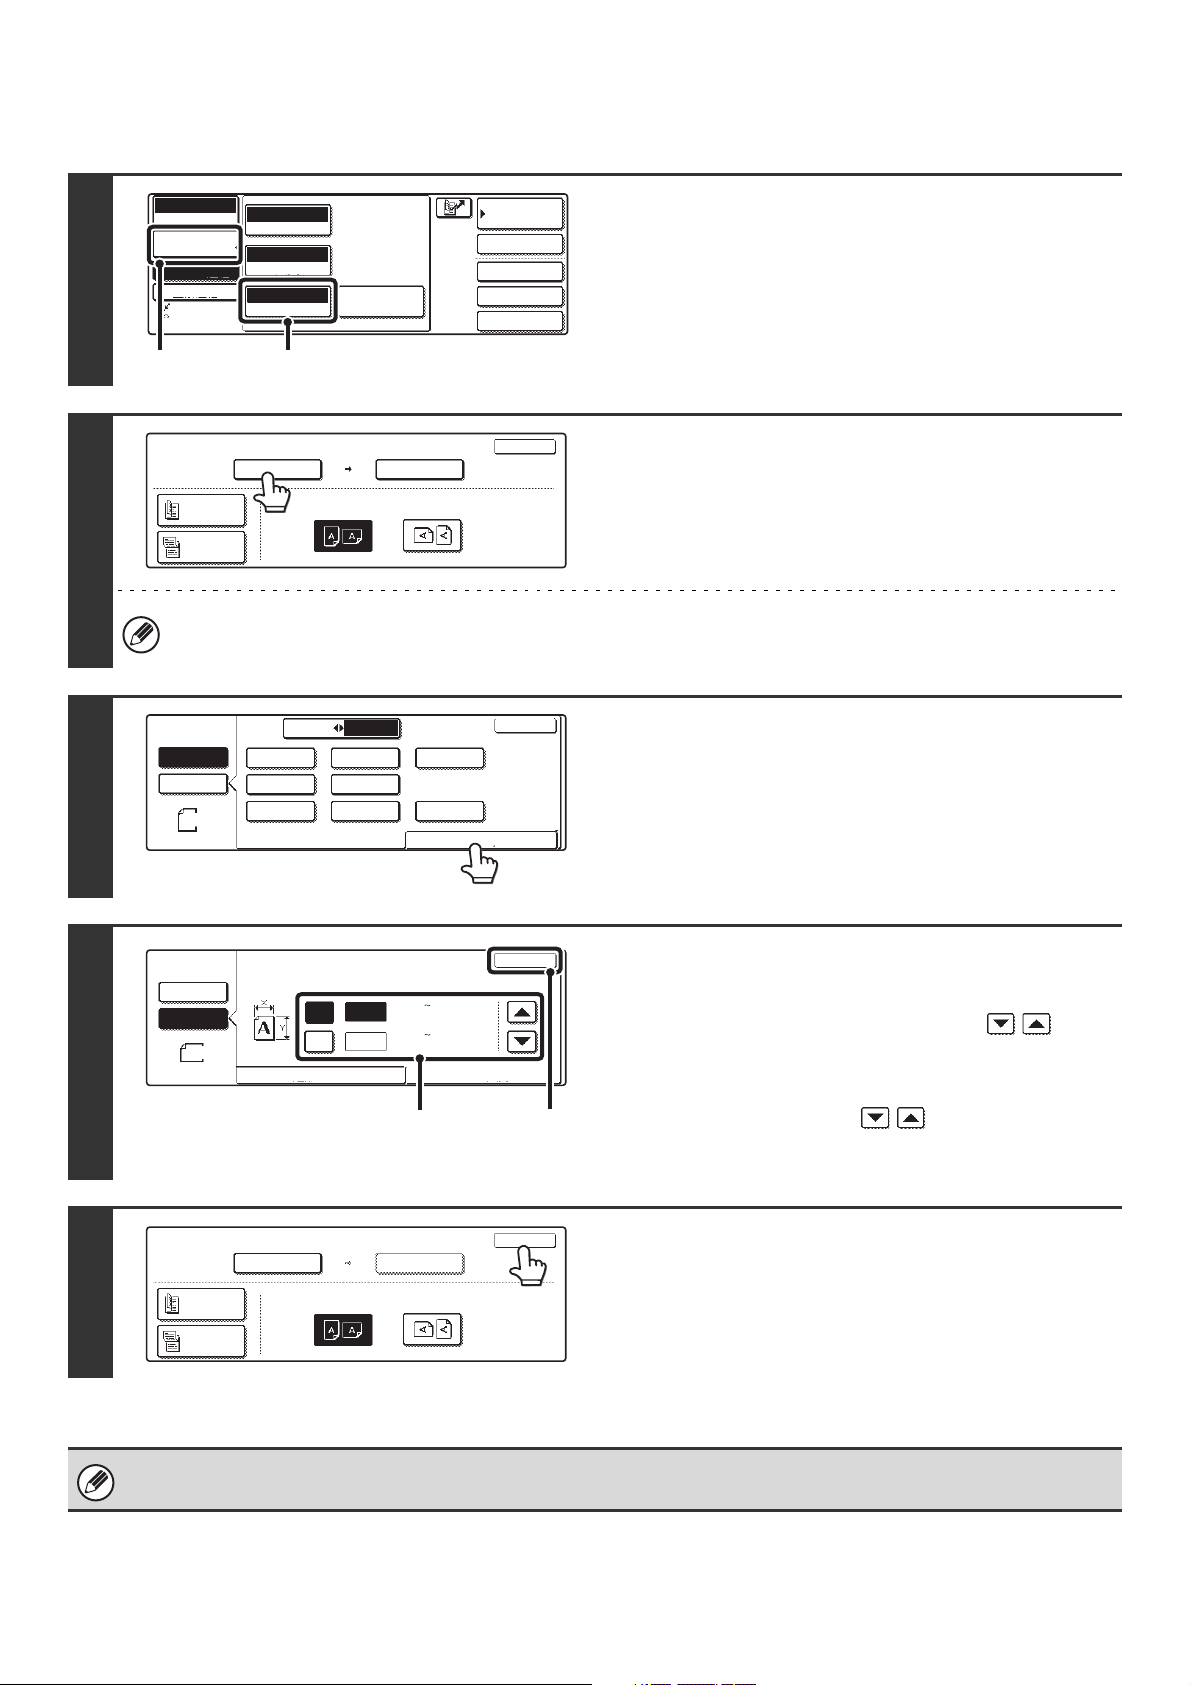
Display the original settings screen.
(1) Touch the [Image Settings] key.
(2) Touch the [Original] key.
The current status appears at the top of the [Original] key
2
Touch the [Scan Size] key.
To specify the image orientation...
Touch the appropriate image orientation key so that it is highlighted.
3
Touch the [Size Input] tab.
4
Enter the scan size.
(1) Touch the [X] key and enter the X
(horizontal) dimension with the
keys.
(2) Touch the [Y] key and enter the Y (vertical)
dimension with the keys.
(3) Touch the [OK] key.
5
Touch the [OK] key.
The specified size appears in the "Scan Size" key.
When the scan size is specified with numbers, the send size cannot be specified.
Auto
Exposure
Standard
Resolution
Original
Special Modes
Quick File
File
Special Modes
Sub Address
Address Book
Fax
Mode Switch
Image
Settings
Direct TX
Memory TX
Auto Reception
Fax Memory:100%
Auto 8 x11
1
/
2
(2)(1)
Fax
Original
OK
Auto
Scan Size Send Size
100%
Image Orientation
2-Sided
Booklet
2-Sided
Tablet
Auto 8 x11
1
/
2
Inch
AB
5 x8
5 x8 R
11x17
Long Size
8 x11
OK
Size InputStandard Size
1
/
2
1
/
2
8 x11R
1
/
2
1
/
2
8 x14
1
/
2
8 x13(216x330)
1
/
2
1
/
2
1
/
2
Fax
Original
Auto
Manual
8 x11
1
/
2
Manual
Auto
Fax
Original
Manual
OK
Size Input
Standard Size
Y
X
11
17
(2 1/2 17)
inch
(2 1/2 11 5/8)
inch
(1), (2) (3)
Fax
Original
OK
X17 Y11
Scan Size Send Size
Auto
Image Orientation
2-Sided
Booklet
2-Sided
Tablet
Loading ...
Loading ...
Loading ...