Loading ...
Loading ...
Loading ...
43
CHANGING THE PORT
4
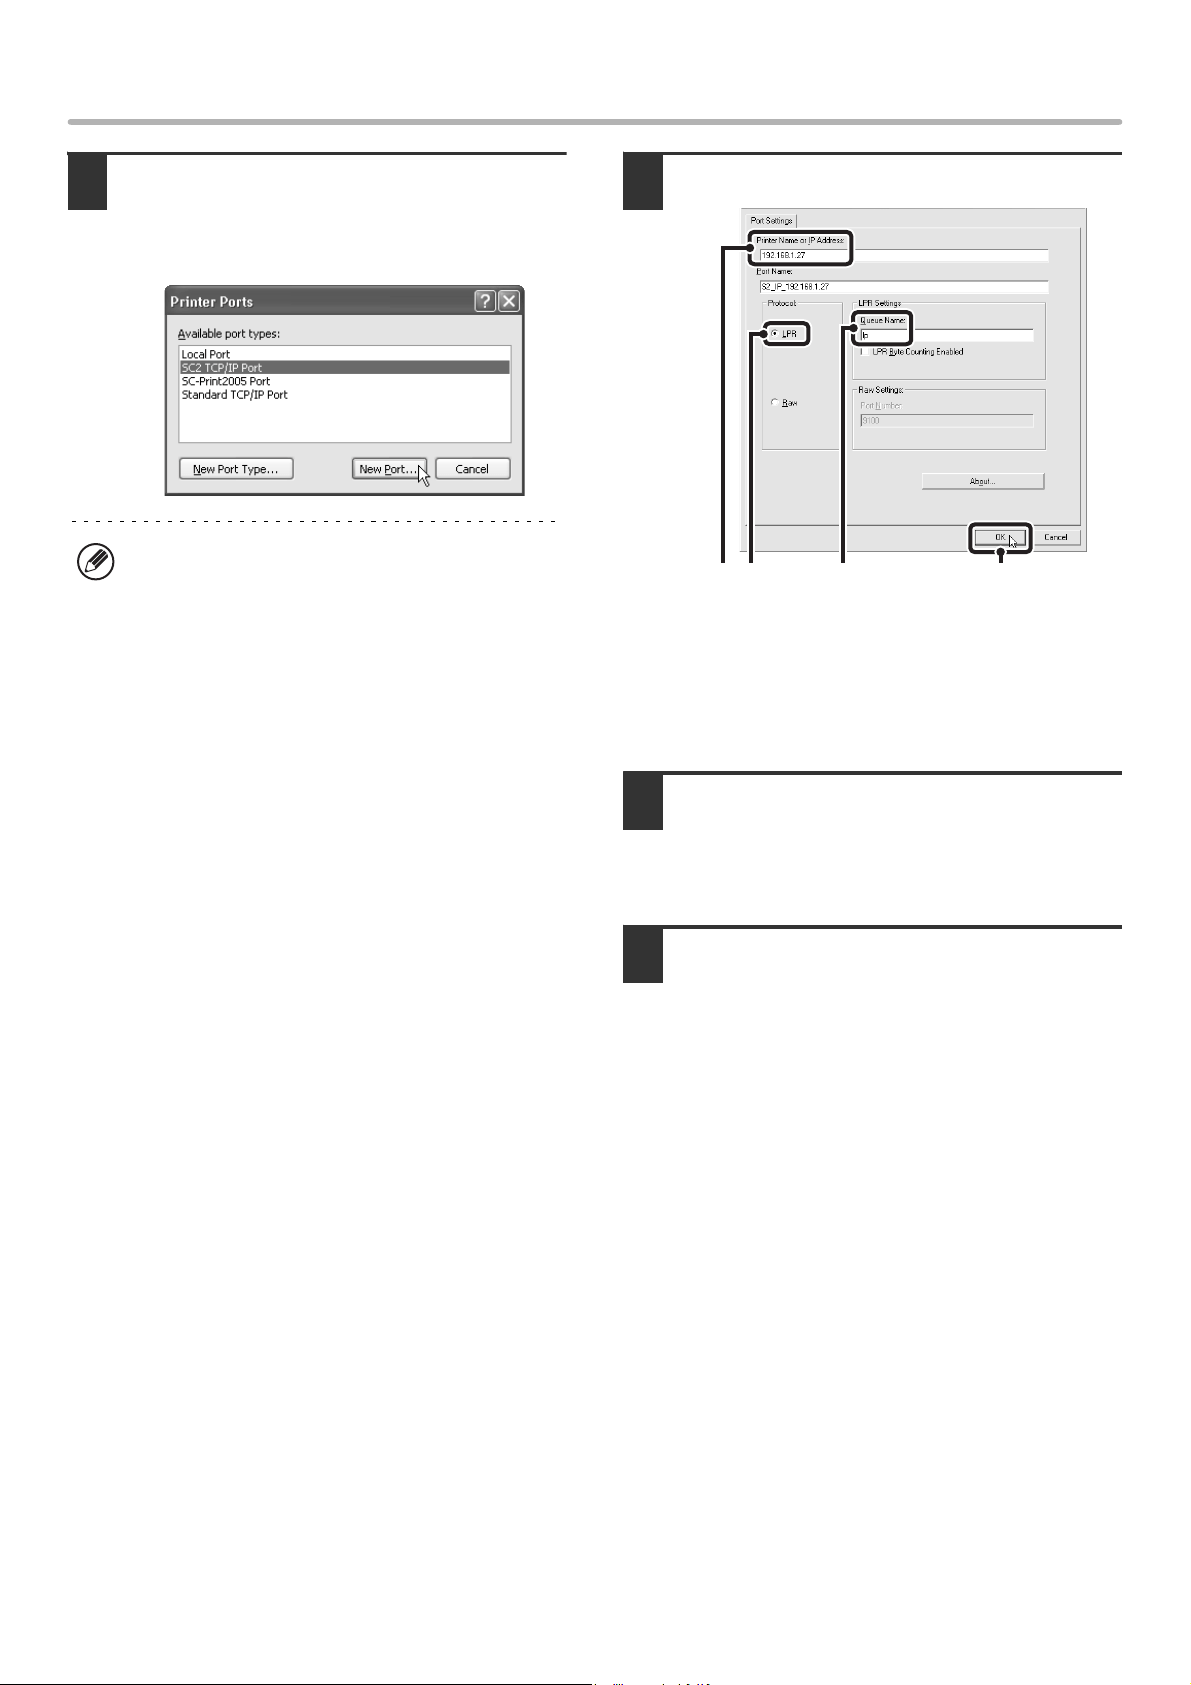
Select [SC2 TCP/IP Port] and then click
the [New Port] button.
In Windows 98/Me, select [Other], [SC2 TCP/IP Port],
and then click the [OK] button.
5
Create the new port.
(1) Enter the machine's IP address.
(2) Make sure that [LPR] is selected.
(3) Make sure that [lp] is entered.
(4) Click the [OK] button.
6
Click the [Close] button in the screen of
step 4.
In Windows 98/Me, this step is not required. Go to the
next step.
7
Make sure the created printer port is
selected in the printer properties
window and then click the [Apply]
button.
CHECKING THE IP ADDRESS OF THE MACHINE
You can check the IP address of the machine by printing out the "All Custom Setting List" in the system settings. Follow
these steps to print out the "All Custom Setting List".
Press the [SYSTEM SETTINGS] key, touch the [List Print (User)] key, and then touch the [All Custom Setting List] key.
• The "SC2 TCP/IP Port" is added when the printer
driver is installed using a "Standard installation", or
a "Custom installation" with "LPR Direct Print"
selected.
• If the printer driver is installed using a "Custom
installation" with "IPP" selected, the [SC-Print2005
Port] is added. If you need to change the printer port
when the machine is connected to an intranet or a
wide area network (WAN) using the IPP function,
select [SC-Print2005 Port], click the [New Port]
button (the [OK] button in Windows 98/Me), and
follow the on-screen instructions to create the port
again.
(4)
(1) (2) (3)
!mx4500_us_ins.book 43 ページ 2005年10月31日 月曜日 午前11時57分
Loading ...
Loading ...
Loading ...