Loading ...
Loading ...
Loading ...
79
4
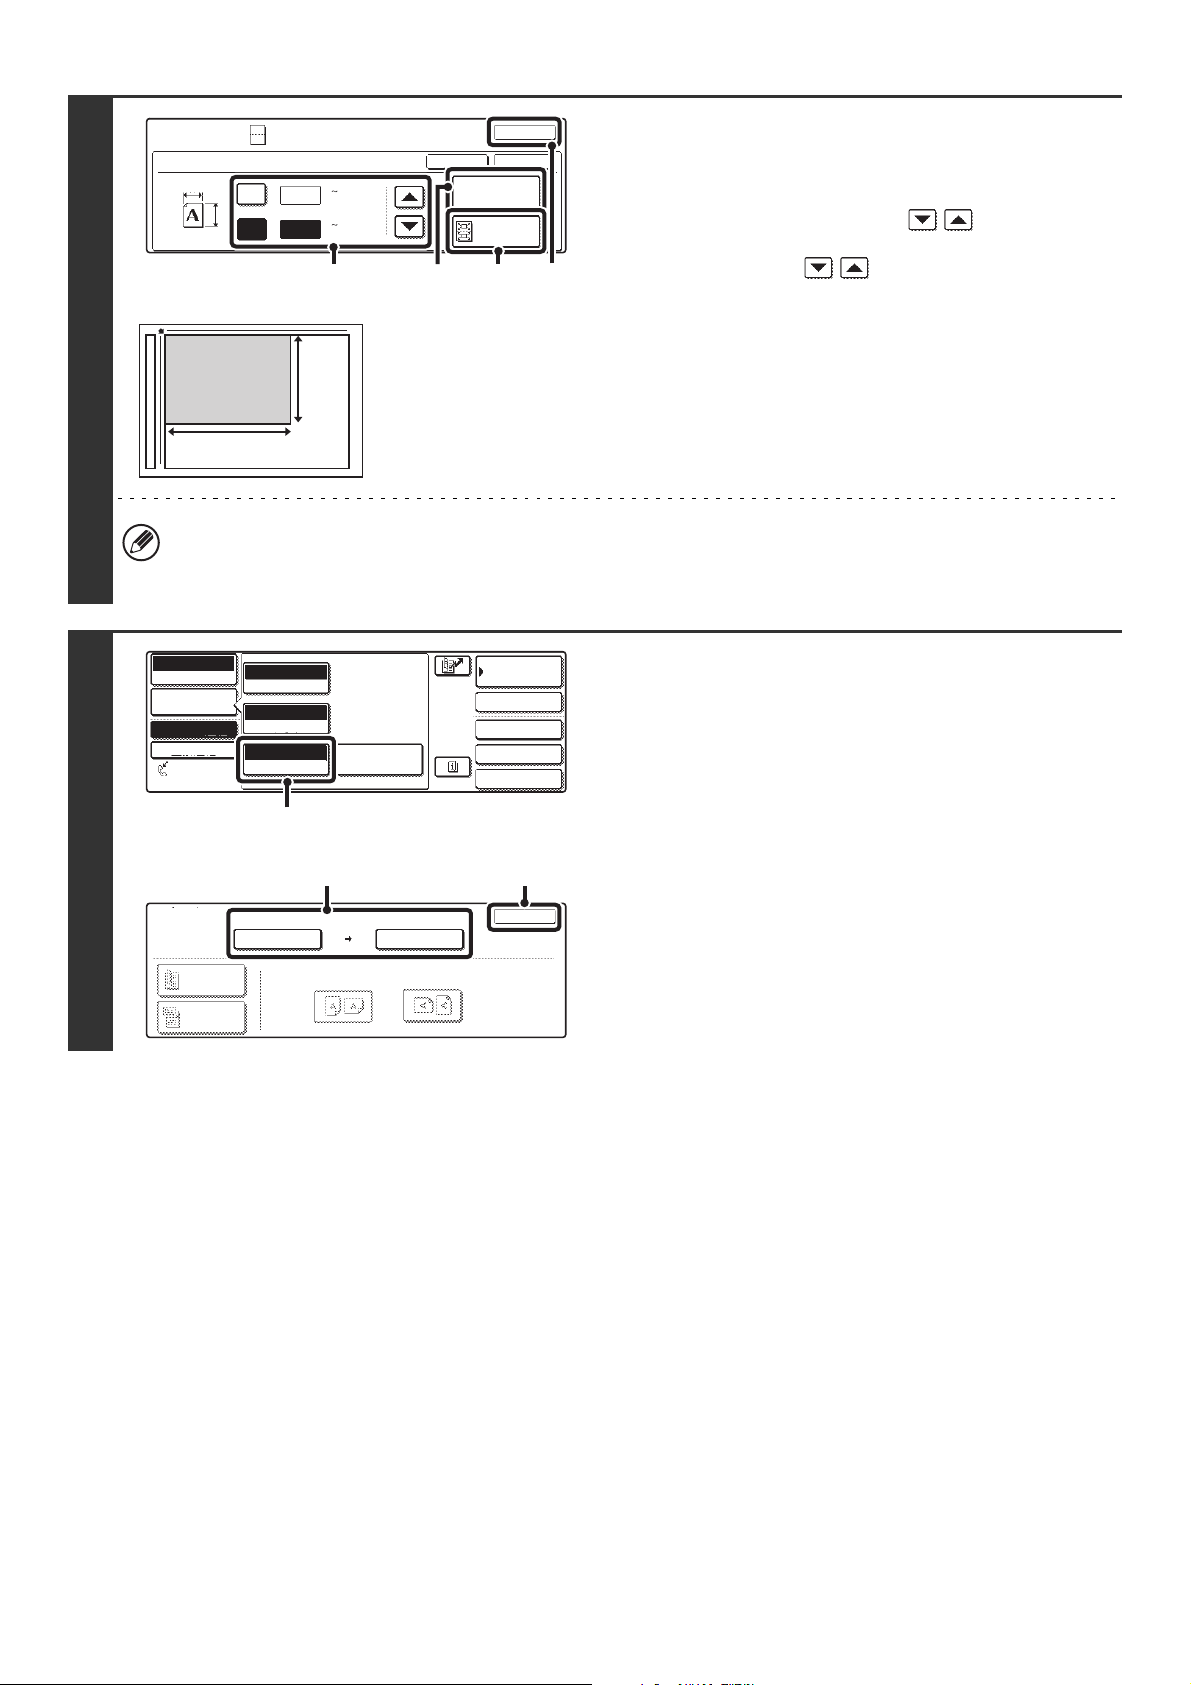
Enter the original size with the key.
(1) Enter the original size.
• With the [X] key highlighted, enter the X (horizontal)
length of the original with the keys.
• Touch the [Y] key and enter the Y (vertical) length of the
original with the keys.
(A) To return the original size to the default size, touch
the [Size Reset] key.
(B) To automatically enlarge or reduce the image size
to the send size, touch the [Fit to Send Size] key.
Do not touch this key if you wish to scan the original
at the original size that you entered.
(2) Touch the [OK] key.
• The send size is automatically selected based on the original size you entered. The send size can also be changed
manually.
• To complete the setting and return to the screen of step 3, touch the [OK] key next to the [Cancel] key.
5
Changing the original scan size and
send size.
If you do not need to change the scan size or send size, go to
step 6.
(1) Touch the [Image Settings] key and then
touch the [Original] key.
(2) Change the scan and send size.
• Touch the [Scan Size] key to return to step 4. Specify
the size.
• Touch the [Send Size] key to display the send size
selection screen. Touch the desired send size key and
touch the [OK] key.
(3) Touch the [OK] key.
Special Modes
OK
OK
Cancel
X
3
2
Size Reset
Fit to
Send Size
Card Shot
Y
X
Y
C 1
C 2
1
/
8
3
/
8
(1 8 1/2)
inch
(1 8 1/2)
inch
(1)
(2)
(B)(A)
X
Y
X 3 Y 2
Quick File
File
Special Modes
Sub Address
Address Book
Fax
Mode Switch
Image
Settings
Direct TX
Memory TX
Auto Reception
Fax Memory:100%
3
/
8
1
/
8
Auto
Exposure
Standard
Resolution
Original
Special Modes
(1)
Fax
Original
OK
Scan Size Send Size
100%
Image Orientation
2-Sided
Booklet
2-Sided
Tablet
X 3 Y 2
3
/
8
1
/
8
Auto 5 x8
1
/
2
1
/
2
(3)(2)
Loading ...
Loading ...
Loading ...