Loading ...
Loading ...
Loading ...
100
4
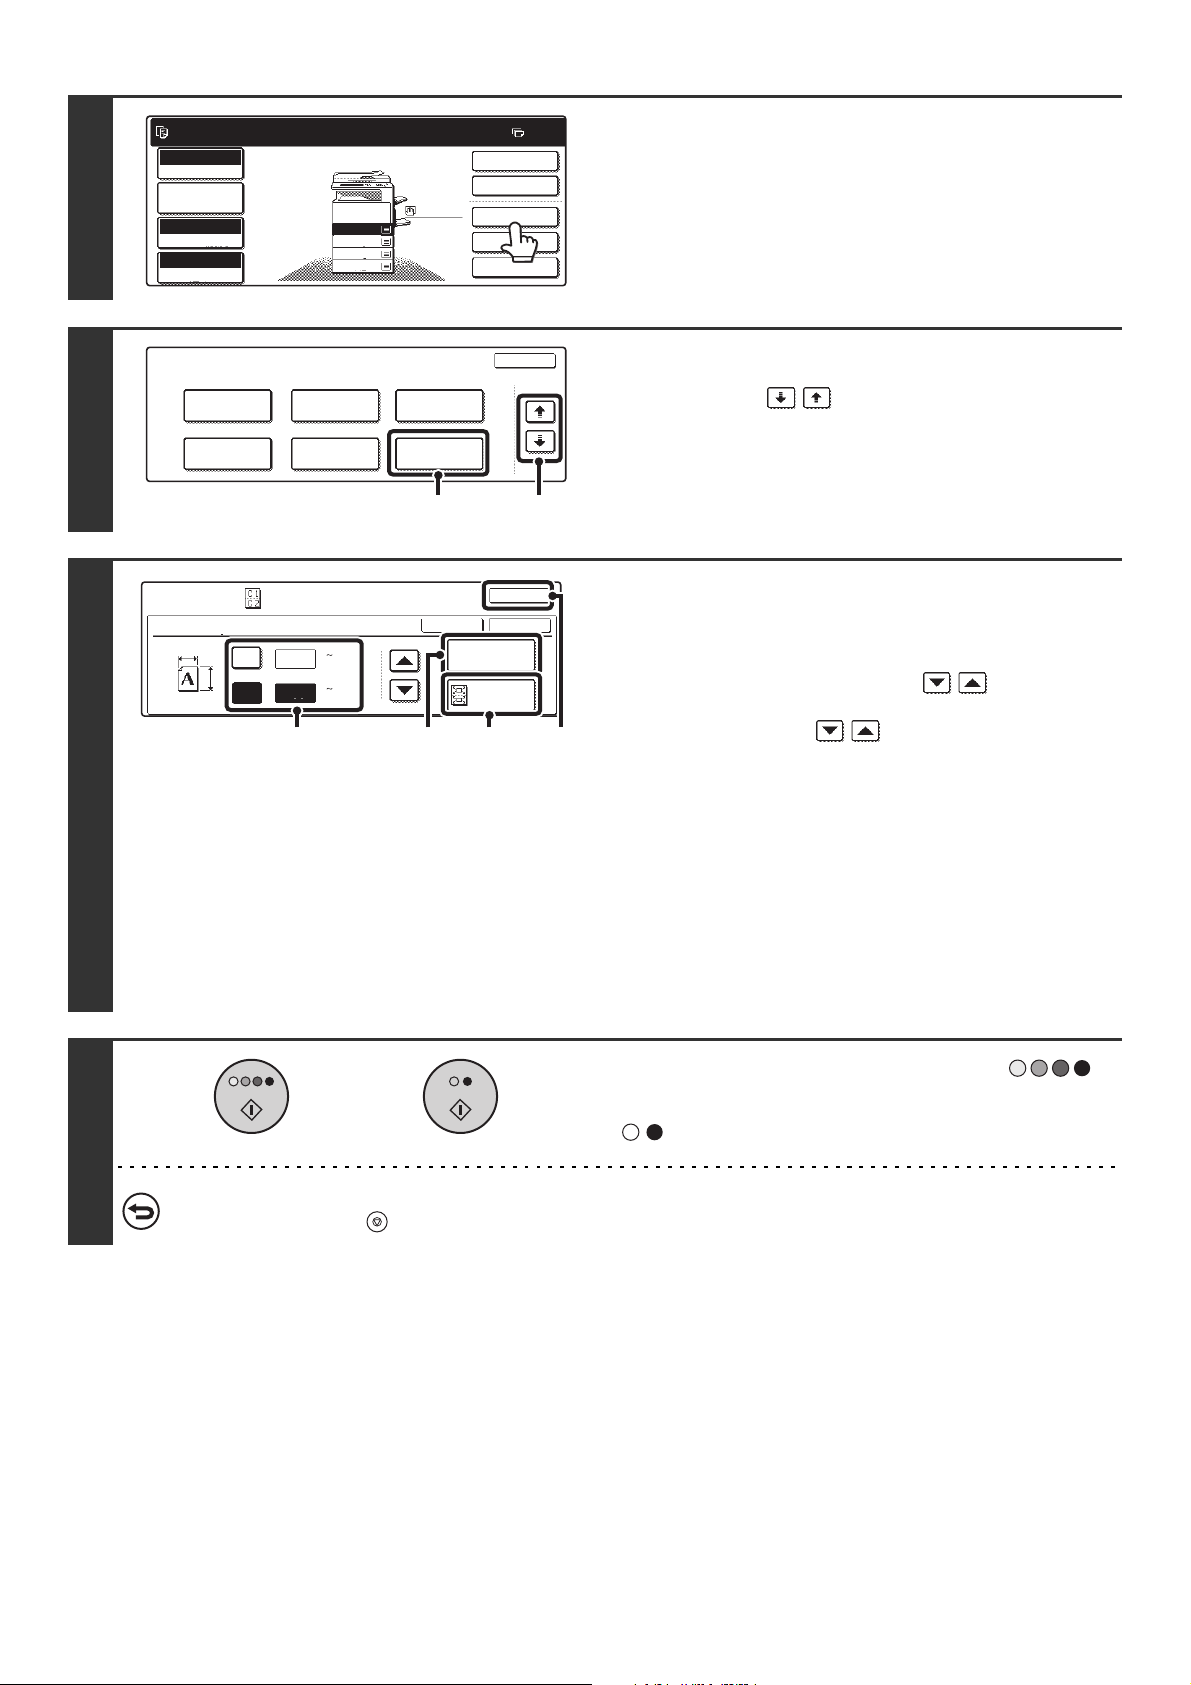
Touch the [Special Modes] key.
5
Select Card Shot.
(1) Touch the keys to switch through
the screens.
(2) Touch the [Card Shot] key.
6
Specify the original size.
(1) Enter the original size.
With the [X] key highlighted, enter the X (horizontal)
dimension of the original with the keys.
Touch the [Y] key and enter the Y (vertical) dimension of
the original with the keys.
(A) The [Size Reset] key can be pressed to return the
horizontal and vertical dimensions to the values set in
"Card Shot Settings" in the system settings
(administrator).
(B) To enlarge or reduce the images to fit the paper based
on the entered original size, touch the [Fit to Page]
key.
(2) Touch the [OK] key.
You will return to the base screen of copy mode. "Extra"
will appear in the original size display in the base screen.
7
Press the [COLOR START] key ( )
or the [BLACK & WHITE START] key
( ) to scan the front of the card.
To cancel scanning...
Press the [STOP] key ( ).
Ready to scan for copy.
2-Sided Copy
0
Output
Special Modes
File
Quick File
Full Color
Color Mode
2.
3.
4.
1.
8 x11R
8 x14
11x17
8 x11
Auto
Exposure
100%
Copy Ratio
Job Detail
Settings
1
/
2
1
/
2
1
/
2
8 x11
Plain
1
/
2
Special Modes
OK
2/4
Covers/Inserts
Book Copy
Transparency
Inserts
Multi Shot
Tab Copy Card Shot
(2) (1)
Special Modes
OK
OK
Cancel
X
3
2
Size Reset
Fit to
Page
Card Shot
Y
X
Y
(1 8 1/2)
inch
(1 8 1/2)
inch
3
/
8
1
/
8
(1)
(2)
(B)(A)
or
Loading ...
Loading ...
Loading ...